background image

63

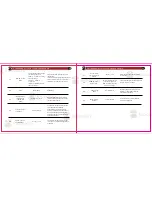
Mutes the speaker of the transceiver in

the absence of a specific low-level digital 
signal. If the station you are listening to
does not transmit this specific signal, you

will not hear anything. 

Mutes the speaker of the transceiver 

in the absence of a specific and 
continuous sub-audible signal. If the 
station you are listening to does not 
transmit this specific and continuous 

signal, you will not hear anything. 

10

11

OFF[0] see CTCSS 

Table in 

Appendix C

12

T-DCS-

Transmitter DCS

OFF[0] see DCS Table in 

Appendix C

Transceiver a specific low-level digital signal

to unlock the squelch of a distant receiver
(usually a repeater)

13

T–CTCS-

Transmitter 

CTCSS

OFF[0] see CTCSS Table in 

Appendix C

Transceiver a specific and continuous sub-
Audible signal to unlock the squelch of a 

distant receiver(usually a repeater).

14

VOICE- Voice

Prompt

OFF[0]| ENG [1]| 

CHI [2]

Allows audible voice confirmation of a key

press

15

ANI-ID-

Automatic 

Number ID

Displays the ANI code that has set by 
Software. This menu cannot be used to 
change it. The ANI-ID is sent when the
alarm is activated and menu 32=CODE

R-DCS-Receiver

DCS

R-CTCS - 

Receiver CTCSS

OFF[0] see DCS Table in 

Appendix C

Determines when DTMF Side Tones can be
Heard from the transceiver speaker.

Selects 1 of 15 DTMF codes. The DTMF

codes are programmed with software and 

are up to 5 digits each.

16

17

18 SC-REV-Scanner

Resume Method

Scanning Resume Method

19

When to Sand PTT-ID 
Codes are sent during either the beginning
or ending of a transmission.

20

PTT-ID Delay (milliseconds)

DTMFST- DTMF-

Side Tone of

Transmit code

S-CODE Signal

Code

OFF [0]: No DTMF side 
Tones are heard DT-ST 
[2]: Side Tones are heard

Only from automatically 

keyed DTMF codes

DT+ANI [3]: All DTMF Side 
Tones Are heard

1[0] |2[1] |3[2] |4[3] 
|5[4] |6[5] |7[6] |8[9] 
|9[8] |10[9] |
11[10] |12[11] |13[12] 
|14[13] |15[14]

PTT-ID – When 

to send the 

PTT-ID

PTT-LT-Signal
Code sending

delay

To [0]: Time Operation-scan

-

ning Will resume after a fixed 
time has Passed CO [1]: 
Carrier Operation-
Scanning will resume after 

the signal disappears

SE [2]: Search Operation-

Scanning will not resume

OFF [0]: No ID is sent 

BOT [1]: The selected S-CODE 

is Sent at the beginning
EOT [2]: The selected S-CODE 
is Sent at the beginning and 
ending

0-50ms

Visit Radioddity.com For Downloads And Help

56

Visit Radioddity.com For Downloads And Help

57

Содержание GA-5S

Страница 1: ...User Manual GA 5S Thank You for Shopping at Radioddity FIND TUTORIALS SUPPORT AND MORE https www radioddity com https www facebook com radioddity https www youtube com c Radioddityradio Two Way Radio ...

Страница 2: ...e Accessories https www radioddity com Notice Antenna Belt clip Battery Charging and battery maintenance Charging Battery Maintenance Chapter 2 Getting to know your radio The main display Battery Level Indicator Status LED 01 01 03 04 04 04 05 06 07 07 09 10 12 14 14 Visit Radioddity com For Downloads And Help ...

Страница 3: ...7 17 18 19 19 19 20 20 20 Channel selection Frequency VFO mode Channel MR mode Part ll Advanced topics Chapter 4 Working the menu system Basic use Using short cuts Chapter 5 Scanning Scanning modes Time operation Carrier operation Search operation Scanning a Frequency Range VFO Mode Scanning Your Selected Channels Channel Mode Tone Scanning Scanning for CTCSS and DCS Tones Codes 21 21 24 25 25 26 ...

Страница 4: ...6 37 38 39 40 40 42 44 44 45 46 46 Part lll How to and setup guides Chapter 11 Repeaters Chapter 12 Application Specific Setup Commercial Radio Setup Amateur Radio Setup FRS GMRS MURS PMR446 Appendix A Troubleshooting Appendix B Menu definitions Appendix C Technical specifications General Transmitter Receiver DCS table CTCSS table 48 51 51 52 53 53 54 62 62 63 63 64 66 Visit Radioddity com For Dow...

Страница 5: ... can result Turn off your radio prior when entering any area with explosive and flammable materials Do not charge your battery in the area with explosive and flammable materials To avoid electromagnetic interference and or compatibility conflicts please turn off your radio in any area where posted notices instruct you to do so Visit Radioddity com For Downloads And Help 01 Chapter 1 Initial setup ...

Страница 6: ...source When transmitting with a portable radio hold the radio in a vertical position with the microphone 3 to 4 centimeters away from your lips also make sure the antenna stays at least 2 5 centimeters away from your body when transmitting FIND TUTORIALS SUPPORT AND MORE This transceiver comes shipped with below items and accessories in the box GA 5S Radio 1800mAh Battery Dual Band Antenna Desktop...

Страница 7: ...or lower to avoid damage to the transceiver Do not hold the antenna with your hand or wrap the outside of it to avoid interference to the transceiver Never transmitting without an antenna There are two parallel screws mounted on rear radio body remove them and thread through the holes on the belt clip as you screw them back into the radio body Notice Antenna Belt clip Do not add any form of glue t...

Страница 8: ...Removal How to hook up and use the charger correctly 1 Plug the DC connector of the power adaptor into the charger base 2 Plug the AC connector of the power adaptor into a main ac wall outlet 3 Place the radio in the charging base 4 Make sure the radio is making contact with the charger When the red LED comes on steady your radio is charging 5 The radio is fully charged once the charger s green st...

Страница 9: ...to replace Battery s performance will be reduced in temperatures below Zero When working in cold environments it is suggested to prepare a spare battery Preferably inside your jacket or in a similar location in order to keep the battery warm Dust can interfere with the connection between battery and the radio lf necessary wipe the contacts with a clean cloth to ensure proper contact with radio and...

Страница 10: ...ypad 14 SP MIC 15 Battery pack see the section called Charging and battery maintenance for detailsLanyard loop 16 Battery contacts 17 Battery remove button In order to prevent damage from over discharge the battery must be left with partial power This radio uses a lithium based battery and a 40 charge is recommended This level minimizes age related capacity loss while keeping the battery in operat...

Страница 11: ...s about 1 5 1 or lower to avoid damage to the transceiver Do not hold the antenna with your hand or wrap the outside of it to avoid interference to the transceiver Never transmitting without an antenna Figure 2 2 Radioddity display Table 2 1 Charger LED codes Icon Description Icon Description Reverse function enabled Narrowband enabled Memory channel Least significant modifiers Battery level indic...

Страница 12: ...st FM the squelch will be activated to that frequency as if scanning and remain there until the signal goes away it will then switch back to broadcast FM Press and hold to activate the alarm function Press a short press again to turn it off Side key 2 MONI Monitor and Flashlight Press momentarily to turn on the LED flashlight Another momentary press will flash the LED Another momentary press turns...

Страница 13: ...ting mode The key is used to exit menus and cancel menu options For a more in depth explanation on how to work the menu see Chapter4 Working the menu system To enable the scanner press and hold the key for about two seconds See Chapter 5 Scanning for details To enable or disable the keypad lock press and hold the key for about two seconds You can also enable so that the radio automatically locks t...

Страница 14: ...ctly there should be an audible double beep after about one second and the display will show a message or flash the LCD depending on settings for about one second see 38 PON MSG Power On Message in Appendix B Menu definitions Then it will display a frequency or channel If the Voice prompt is enabled the voice will announce frequency mode or channel mode To attach accessories such as headsets speak...

Страница 15: ...u with the firmware version Turn the volume power knob counter clock wise all the way until you hear a click The radio will be off Frequency VFO mode Adjusting the volume To turn up the volume turn the volume power knob clock wise To turn the volume down turn the volume power knob counter clock wise Be careful not to turn it too far as you may inadvertently turn your radio off By using the monitor...

Страница 16: ... 145 6875 up to 145 6880 MHz an alternative is entering 145 675 and then pressing the key once to move it up to 145 6875 Enter on the numeric keypad if all went well the display should look something like this Example 3 1 Entering the frequency 145 6875 MHz on display A Figure 3 2 Half entered frequency input Figure 3 3 Successful frequency input VFO MR A B Just because you can program in a channe...

Страница 17: ... channels programmed with Transmit power set to Law you can use the key momentarily switch over to high power if you re having trouble getting through Visit Radioddity com For Downloads And Help 24 CHAPTER 4 WORKING THE MENU SYSTEM CHAPTER 5 SCANNING CHAPTER 6 DUAL WATCH CHAPTER 7 DTMF CHAPTER 8 SELECTIVE CALLING CHAPTER 9 CUSTOMIZATION CHAPTER 10 PROGRAMMING Part II Advanced topics Part two cover...

Страница 18: ... the key 4 For entering the desired parameter you have two options a Use the arrow keys as we did in the previous section or b Use the numerical keypad to enter the numerical short cut code 5 And just as in the previous section If your radio is set to Memory MR mode The following menu items will not take any effect STEP TXP W N CTCSS DCS S CODE PTT ID BCL SFT D OFFSET MEM CH BAND MENU MENU 1 Press...

Страница 19: ...in a To confirm your selection press and it will save your setting and bring you back to the main menu b To cancel your changes press and it will reset that menu item and bring you out of the menu entirely 6 To exit out of the menu at any time press the key 7 All further examples and procedures in this manual will use the numerical menu shortcuts The Radioddity GA 5S features a built in scanner fo...

Страница 20: ...would be done by listening to stations on the repeater s input frequency The UV 5RX3 can scan a user selected frequency range The UV 5RX3 can scan your programmed memory channels you can easily add or remove channels from the scanning bank at any time Scanning Your Selected Channels Channel Mode Procedure 5 2 Settingscanning range 1 Press and Hold for about 2 seconds to start scanning 2 Channels w...

Страница 21: ...nger required MENU Scanning for CTCSS Tone 1 Press the key to enter the menu 2 Enter on your numeric keypad to come to Menu 11 R CTCS 3 Press the key to select 4 Press the to begin CTCSS scanning MENU MENU A flashing CT will be in the left status display to indicate the radio is in CTCSS scanning mode In this mode whenever the radio is receiving an RF signal on the selected MR channel or VFO frequ...

Страница 22: ...or tele phony systems it has proved a very versatile tool in many other areas In two way radio systems DTMF is most commonly used for automation systems and remote control A common example would be in amateur radio repeaters where some repeaters are activated by sending out a DTMF sequence usually a simple single digit sequence Press the key to enter the menu 2 Enter on the numeric keypad to get t...

Страница 23: ...ze this problem several methods of blocking out unwanted transmissions on your frequency have developed In general there are two forms of selective calling in two way radio systems Group calling and individual calling Group calling as the name suggest is a one to many form of communication Every radio in your working group is configured the same way and any radio will make contact with every other...

Страница 24: ...mmunications mode while using these features will still be heard by anyone not employing filtering options of their own Also you cannot change the CTCSS or DCS settings while in memory MR mode The Radioddity GA 5S does not feature any form of individual calling CTCSS and 1750Hz tone burst are also popular methods among amateur radio operators to open up repeaters Procedure 8 1 CTCSS setup how to 1...

Страница 25: ...mitter DCS 7 Press to select 8 Enter desired DCS code on the numeric keypad Make sure it s the same code as that you entered for receiver DCS 9 Press to confirm and save MENU MENU MENU MENU MENU To send out a tone burst you simultaneously will press a key while holding down the PTT No further configuration required using this feature The following configurations will transmit accordingly PTT Trans...

Страница 26: ...D follow these steps 4 Use the and keys to pick the desired color 5 Press to confirm and save 6 Press to exit the menu MENU EXIT For details see the section called 29 WT LED Display backlight color Standby and onward in Appendix B Menu definitions To sync channels on the display simultaneously display channel name and frequency follow these steps Procedure 9 2 Setting backlight time out Procedure ...

Страница 27: ...k Write to write your changes to the radio Procedure 9 3 Setting the power on message Chapter 10 Programming Memory channels are an easy way to store commonly used frequencies so that they can easily be retrieved at a later date The Radioddity GA 5S features 128 memory channels that each can hold Receive and transmit frequencies transmit power group signaling information bandwidth ANI PTT ID setti...

Страница 28: ...key to test your new channel If you would like to name your channel you will need to do that from a computer More on that in the section called Computer programming The following assumes you ve setup a duplex channel in VFO mode on the upper display as described in Chapter 11 Repeaters and that you re still in VFO mode 1 Save as you would a regular simplex channel as described in the previous sect...

Страница 29: ...nux Visit Radioddity com For Downloads And Help 47 CHAPTER 11 REPEATERS CHAPTER 12 AUTOMATIC NUMBER IDENTIFICATION CHAPTER 13 APPLICATION SPECIFIC SETUP Part Ill How to and setup guides Part three covers is a collection of how to documents to help you set up your radio for specific working environments ...

Страница 30: ... t explicitly stated but rather an offset relative your receive frequency is specified This is conveniently enough also how the Radioddity GA 5S natively handles repeater set up in VFO by specifying offset rather than transmit frequency The following instructions assume that you know what transmit and receive frequencies your repeater employs and that you re authorized to use it Procedure 11 1 Rep...

Страница 31: ...called Manual programming for details b Set up CTCSS see the section called CTCSS for details 12 Press to exit the menu Chapter 12 Application Specific Setup Commercial Radio Setup MENU MENU EXIT 1 Press the key to enter frequency mode 2 Press the key to enter the menu 3 Enter on the numerical keypad 4 Press to select 5 Use the and keys to select between Wide and Narrow Narr 6 Press to confirm and...

Страница 32: ...nstructions on how to set that up on your radio To find out what other channels and features needed please contact your employer You may be tempted to use FRS GMRS MURS in the USA or PMR446 in Europe frequencies Do note however there are restrictions on these bands that make this transceiver illegal for use Appendix A Troubleshooting Symptom Possible Solution The radio doesn t start The battery is...

Страница 33: ... the RX sleep cycle but you may miss the first few syllables before the RX opens When enabled it is not necessary to push the PTT button on the transceiver Adjust the gain level to an appropriate sensitivity to allow smooth transmission Wideband 25 kHz bandwidth or Narrow band 12 5 kHz bandwidth Time out for the LCD backlight seconds 4 5 WIDE 0 NARR 1 6 OFF 0 X 2 3 4 5 6 7 S 9 10 7 TDR Dual Watch D...

Страница 34: ...the alarm is activated and menu 32 CODE R DCS Receiver DCS R CTCS Receiver CTCSS OFF 0 see DCS Table in Appendix C Determines when DTMF Side Tones can be Heard from the transceiver speaker Selects 1 of 15 DTMF codes The DTMF codes are programmed with software and are up to 5 digits each 16 17 18 SC REV Scanner Resume Method Scanning Resume Method 19 When to Sand PTT ID Codes are sent during either...

Страница 35: ...FREQ 2 Display programmed Frequency AUTOLK SFT D Frequency Shift Direction OFF 0 ON 1 OFF O I ON 1 OFF 0 TX RX simplex 1 TX will be shifted higher in frequency than RX 2 TX will be shifted lower in frequency than RX Specifies the difference between the TX and RX frequencies This menu is used to either create new or modify existing channels 0 through 127 so that they can be accessed from MR Channel M...

Страница 36: ...n of a 55 Hz or 134 4 Hz tone burst mutes the audio long enough to prevent hearing any squelch tail noise 35 STE Squelch Tail Elimination OFF 0 ON 1 This function is used eliminate squelch tail noise when communicating through a repeater 36 RP STE Squelch Tail Elimination OFF 0 1 10 Delay the Tail Tone of Repeater X100 milliseconds 37 RPT RL Delay the squelch tail of repeater OFF 0 1 10 Controls t...

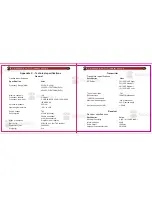
Страница 37: ...djacent channel selectivity 65 60dB Specification Frequency Range MHz Value 65 108 Rx only 136 000 173 975MHz Rx Tx 400 000 519 975MHz Rx Tx Memory channels 128 Frequency stability 2 5ppm Frequency step kHz 2 5K 5 0K 6 25K 10 0K 12 5K 20 0K 25 0K 50 0K Antenna impedance 50 Ohm Operating temperature 20 to 60 Supply voltage 7 4V Consumption 75mA standby 380mA reception 1 4A transmission Mode of oper...

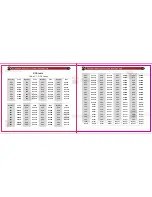
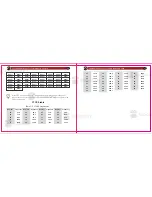
Страница 38: ...I D0431 D054I D073I D116I D132I D152I D165I Number Code Number Code Number Code Number Code 001 D023N 002 D025N 003 D026N 004 D031N 005 D032N 006 D036N 007 D043N 008 D047N 009 D051N 010 D053N 011 D054N 012 D065N 013 017 021 025 029 Number 033 037 041 045 049 053 057 061 Number 034 038 042 046 050 054 058 062 Number 035 039 043 047 051 055 059 063 Number 036 040 044 048 052 056 060 064 014 018 022 ...

Страница 39: ...29 33 37 41 45 49 22 26 30 34 38 42 46 50 23 27 31 35 39 43 47 24 28 32 36 40 44 48 131 8 151 4 165 5 177 8 189 9 203 5 225 7 250 3 136 5 156 7 167 9 179 9 192 8 206 5 229 1 254 1 141 3 159 8 171 3 183 5 196 6 210 7 233 6 146 2 162 2 173 8 186 2 199 3 218 1 241 8 D331I D371I D446I D503I D606I D662I D743I D332I D411I D452I D506I D612I D664I D754I D346I D413I D455I D523I D627I D712I D356I D431I D464...

Отзывы: