8
Connecting Inputs
6. Use a screwdriver to connect the spade
end of the supplied red power cable
(with in-line fuse holder) to the ampli-
fier’s + 12V terminal.
7. Connect the other end of the red power
cable to your vehicle’s positive (+) bat-
tery terminal as shown. Then tighten the
terminal.
Caution: Due to the amplifier’s high cur-
rent requirement, you must connect the
red power cable’s fused end directly to
the vehicle’s positive (+) battery terminal
or damage to your vehicle’s wiring could
result.
Do not reconnect your vehicle’s negative (–)
battery cable yet.
ˆ
Connecting Inputs
LOW-LEVEL INPUTS
You can connect your auto sound system’s
low-level line out jacks to the amplifier’s low-
level line in jacks.
If your auto sound system does not have
low-level line out jacks, see “High-Level
(Speaker Wire) Inputs” on Page 9 to connect
your amplifier.
Note: For the best results, use shielded au-
dio cables (not supplied) available at your lo-
cal RadioShack store.
1. Temporarily place the amplifier as close
as possible to the selected mounting
location.
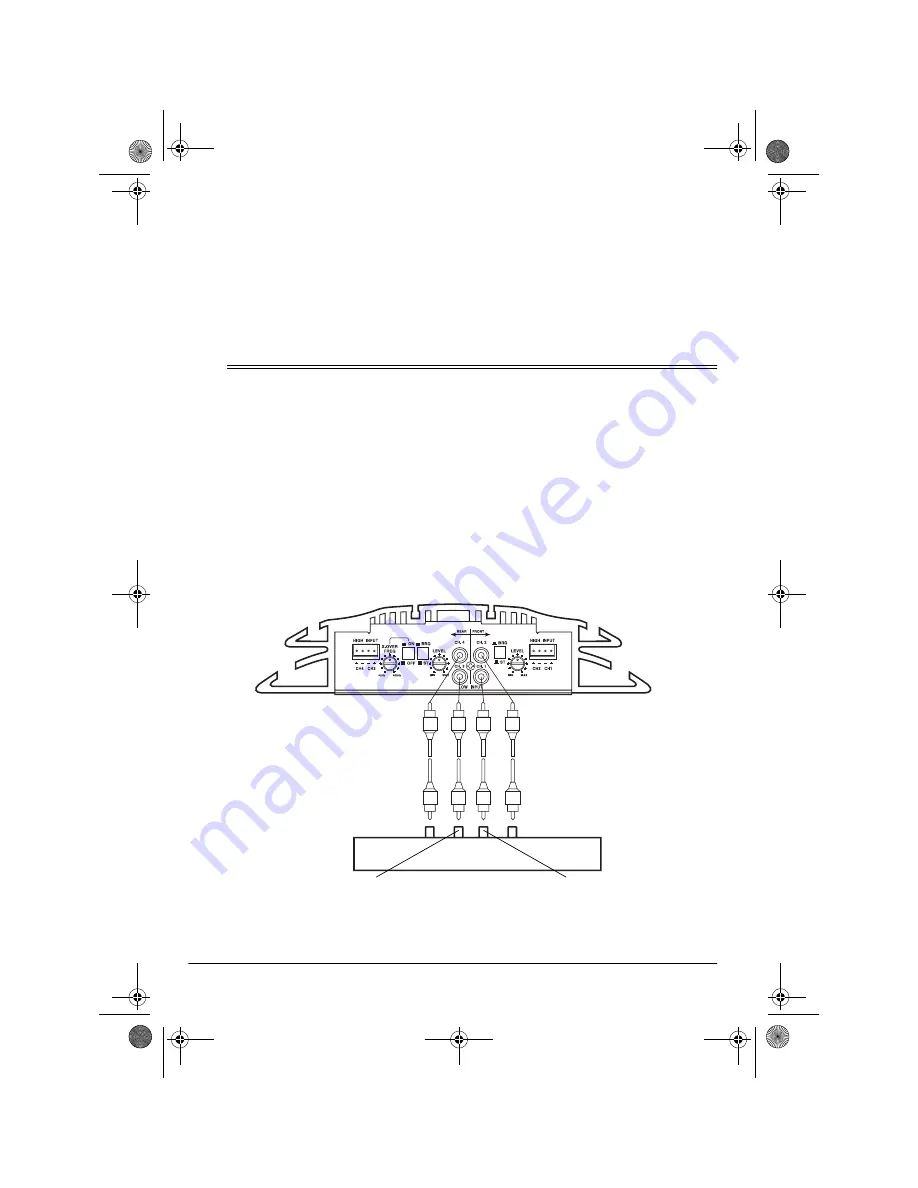
2. If your auto sound system has four sep-
arate line out jacks, connect the auto
sound system to the amplifier.
Left Rear
Right Rear
Auto Sound System
CH 4
CH
1
CH 2
CH 3
Right Front
Left Front
12-2017.fm Page 8 Tuesday, May 9, 2000 10:02 AM


