background image

9

RECHARGING/
CONDITIONING A 
RECHARGEABLE 
BATTERY PACK

Charging a Rechargeable 
Battery Pack

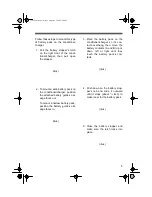
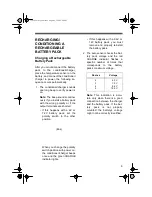
After you mount/connect the battery
pack to the conditioner/charger,
place the temperature sensor on the
battery, and connect the conditioner/
charger to power, the following se-
quence occurs automatically.

1. The conditioner/charger sounds

one long beep to verify power is
on.

Note: The beep sounds continu-
ously if you install a battery pack
with the wrong polarity or if the
output terminals are shorted.

• If this happens with a 6V or

7.2V battery pack, set the
polarity switch to the other
position.

When you change the polarity
switch position with power on,
the conditioner/charger beeps
once and the green CHARGE
indicator lights.

• If this happens with a 9.6V or

12V battery pack, you must
remove and properly reinstall
the battery pack.

2. The auto sensor checks the bat-

tery pack voltage and the red
CHARGE indicator flashes a
specific number of times that
corresponds to the battery
pack’s maximum voltage.

Note: This indication is accu-
rate only when there is a good
connection between the charger
and the battery pack. If the bat-
tery pack is not properly
mounted, the battery’s voltage
might not be correctly identified.

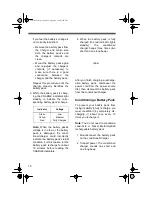
(illus)

Flashes

Voltage

2
3
4
5

 6.0 V

7.2 V
9.6 V

12.0 V

23-250.fm  Page 9  Friday, August 6, 1999  2:09 PM

Содержание Universal Battery Pack Conditioner/Charger

Страница 1: ...Cat No 23 250 OWNER S MANUAL Please read before using this equipment Universal Battery Pack Conditioner Charger 23 250 fm Page 1 Friday August 6 1999 2 09 PM...

Страница 2: ...Charging Contacts let you condition various types of re chargeable battery packs Built In Discharger lets you con dition your rechargeable battery pack for the longest life and best perfor mance Rever...

Страница 3: ...not expose this product to rain or moisture RISK OF ELECTRIC SHOCK DO NOT OPEN CAUTION TO REDUCE THE RISK OF ELECTRIC SHOCK DO NOT REMOVE COVER OR BACK NO USER SERVICE ABLE PARTS INSIDE REFER SERVIC I...

Страница 4: ...ts Do not try to connect a non rechargeable battery pack because it might damage the conditioner charger Do not try to charge non rechargeable battery packs because they could explode Use only one set...

Страница 5: ...ow battery pack position the battery guide so its edge faces in 3 Place the battery pack on the conditioner charger so its con tacts overhang then move the battery contacts A and B up or down left or...

Страница 6: ...sing the supplied alliga tor clip adapter 1 Clip the red alligator clip around the battery pack s positive terminal and the black alligator clip around the battery pack s negative terminal Note To use...

Страница 7: ...too high after a long charge the tem perature sensor detects it and the conditioner charger stops charging the battery pack CONNECTING POWER Caution Never connect AC or DC power to the conditioner ch...

Страница 8: ...sure the tip is securely attached to the plug 2 Plug the adapter s cigarette lighter plug into your vehicle s cigarette lighter socket Note You can remove the cover from the adapter s back so you can...

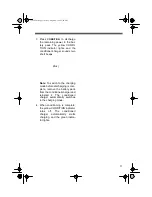
Страница 9: ...ty switch to the other position When you change the polarity switch position with power on the conditioner charger beeps once and the green CHARGE indicator lights If this happens with a 9 6V or 12V b...

Страница 10: ...the battery pack recharge for about 10 minutes before reading the CHARGE indicators 4 When the battery pack is fully charged the red indicator lights steadily the conditioner charger beeps three times...

Страница 11: ...ging mode before discharging is com plete remove the battery pack from the conditioner charger and reinstall it The conditioner charger automatically switches to the charging mode 4 When conditioning...

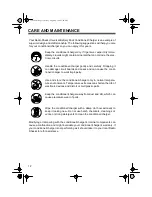
Страница 12: ...conditioner charger only in normal tempera ture environments Temperature extremes can shorten the life of electronic devices and distort or melt plastic parts Keep the conditioner charger away from d...

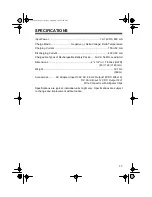
Страница 13: ...acks Ni Cd Ni MH Lead Acid Dimensions 21 4 43 4 7 Inches HWD 45 120 180 mm Weight 12 7 Oz 360 G Accessories AC Adapter Input 120V AC 60 Hz Output 18V DC 800 mA DC Cord Input 12V DC Output 12V Wire Con...

Страница 14: ...14 NOTES 23 250 fm Page 14 Friday August 6 1999 2 09 PM...

Страница 15: ...15 23 250 fm Page 15 Friday August 6 1999 2 09 PM...

Страница 16: ...re Warranty does not cover transportation costs Nor does it cover a product subjected to misuse or accidental damage EXCEPT AS PROVIDED HEREIN RADIO SHACK MAKES NO EXPRESS WARRANTIES AND ANY IMPLIED W...

Отзывы: