background image

8

CONTENTS

Installation .............................................................................................................  10

Mounting the Phone  .........................................................................................  10

On a Desk  ..................................................................................................  10
On a Wall Plate or Wall  ..............................................................................  11

Connecting and Charging the Battery Pack  .....................................................  12
Setting the Dialing Mode  ..................................................................................  14
Setting the Ringers  ...........................................................................................  14

Turning the Ringers On or Off  ..................................................................... 14
Setting the Handset's Ringer Volume  ........................................................  15

Using Auto Talk .................................................................................................  15
Setting Caller ID/Call Waiting On/Off Options  ..................................................  15
Storing Your Area Code ....................................................................................  16

Telephone Operation  ............................................................................................  17

Making and Receiving Calls  .............................................................................  17
Out-of-Range Signal .........................................................................................  17
Adjusting the Handset Volume  .........................................................................  17
Using Redial  .....................................................................................................  17
Using Flash .......................................................................................................  18
Using Tone Services on a Pulse Line  ...............................................................  18
Using the Intercom  ...........................................................................................  18

Paging from the Base to the Handset  ........................................................  19
Paging from the Handset to the Base  ........................................................  19

Using the Directory  ...........................................................................................  19

Storing a Name and Number  .....................................................................  19
Dialing a Stored Number ............................................................................  20
Editing an Entry ..........................................................................................  20
Deleting an Entry  .......................................................................................  21
Entering a Pause  .......................................................................................  21
Testing Stored Emergency Numbers  .........................................................  21

Using a Headset  ...............................................................................................  21

Caller ID Operation  ...............................................................................................  23

Call Waiting Options  .........................................................................................  23
Reviewing Caller ID Records ............................................................................  23

Callers List  .................................................................................................  23
Reviewing the Callers List ..........................................................................  24
Dialing Numbers Using the Callers List ......................................................  25
Storing a Caller ID Record in the Directory  ................................................  25

43-728.fm  Page 8  Thursday, August 26, 1999  8:53 AM

Содержание TAD-728

Страница 1: ...R S MANUAL Please read before using this equipment TAD 728 900 MHz Digital Spread Spectrum Cordless Telephone with Caller ID Call Waiting ID and Digital Answering System 43 728 fm Page 1 Thursday Augu...

Страница 2: ...ller ID Memory stores up to 30 Caller ID records 3 Line Liquid Crystal Display with Back Light lets you view an entire Caller ID record on one screen 30 Name Number Directory lets you store up to 30 t...

Страница 3: ...ng range Headset Jack lets you connect an optional headset for hands free conve nience TAD Features Date Time Stamp records the day and time of each message Digitally Synthesized Voice guides you thro...

Страница 4: ...Call Waiting features you must be in an area where those services are available and you must subscribe to those services through your local phone company Where Caller ID is offered one or more option...

Страница 5: ...vice on the line add up all the RENs If the total is more than five three in ru ral areas your phones might not ring If ringer operation is impaired remove one of the devices from the line FCC STATEME...

Страница 6: ...operated only from the type of power source indicated on the marking label If you are not sure of the type of power supply to your home consult your dealer or local power company 8 Do not allow anyth...

Страница 7: ...rminals unless the tele phone line has been disconnected at the network interface 4 Use caution when installing or modi fying telephone lines CAUTION TO REDUCE THE RISK OF FIRE OR INJURY TO PERSONS RE...

Страница 8: ...ndset Volume 17 Using Redial 17 Using Flash 18 Using Tone Services on a Pulse Line 18 Using the Intercom 18 Paging from the Base to the Handset 19 Paging from the Handset to the Base 19 Using the Dire...

Страница 9: ...1 Setting the TAD to Answer Calls 32 Screening Calls 33 Recording a Memo 33 Recording Telephone Conversations 33 Using the Handset 34 Using the Base 34 Playing Messages 34 Deleting Messages 35 Adjusti...

Страница 10: ...728 s DC 9V AC ADAPTER jack The sup plied adapter meets these specifica tions Using an adapter that does not meet these specifications could damage the TAD 728 or the adapter The supplied RadioShack a...

Страница 11: ...INE jack on the back of the base as in On a Desk Step 1 on Page 10 2 Insert the supplied AC adapter s barrel plug into the DC 9V AC ADAPTER jack as in On a Desk Step 3 3 Route the adapter s cord throu...

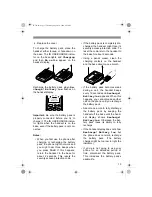
Страница 12: ...slots with the mounting screws and slide the base downward to secure it CONNECTING AND CHARGING THE BATTERY PACK The TAD 728 comes with a recharge able nickel cadmium battery pack in the handset but...

Страница 13: ...ed the handset might lose its security access protection code To reset the code return the handset to the base for about 2 seconds Using a pencil eraser clean the charging contacts on the handset and...

Страница 14: ...access code 9 for example before you dial an outside number do not dial the access code either If the dial tone stops you have touch tone service Leave PULSE TONE set to TONE If the dial tone continu...

Страница 15: ...set from the base or if the handset is away from the base by pressing any key Follow these steps to turn auto talk on or off 1 Lift the handset and press FLASH MENU First the menu of Ringer Vol appear...

Страница 16: ...Then when you dial from a Caller ID record the TAD 728 skips the area code if it matches the one you store Follow these steps to store your area code 1 Lift the handset and press FLASH MENU First the...

Страница 17: ...to within the base s range within 40 seconds then the out of range signal stops and you can resume your phone conversation If you keep the handset out of the base s range for 40 seconds or more the c...

Страница 18: ...hese special tone services by following these steps 1 Be sure PULSE TONE is set to PULSE 2 Dial the service s main number 3 When the service answers press TONE Any additional numbers you dial are sent...

Страница 19: ...answers the handset s page whether or not anyone is there Begin your conversation To end an intercom call press INTER COM on the base or handset All indica tors turn off USING THE DIRECTORY The TAD 72...

Страница 20: ...21 6 Press DIRECTORY The phone beeps and Saved directory appears 7 Repeat Steps 2 6 to store other names and numbers Note If 30 numbers have already been stored the display shows Directory full when y...

Страница 21: ...set at each point where a pause is needed The display shows For a longer pause press EDIT REDIAL additional times Testing Stored Emergency Numbers If you store an emergency service s number police dep...

Страница 22: ...eadset connected you can make or answer calls as usual using the keys on the handset You can use a handset holder available at your local RadioShack store to hang the handset on your belt for greater...

Страница 23: ...ss FLASH MENU again CALL WAITING OPTIONS The Caller ID service provides you with more choices on how to handle a sec ond call when you are already on the phone You can switch between the call ers have...

Страница 24: ...list The top line of each record shows the caller s name The second line shows the call er s phone number The third line shows the date time the number of calls from that number and NEW if you have ne...

Страница 25: ...u can enter the name if you like 4 Press DIRECTORY 5 Edit the phone number if necessary 6 Press DIRECTORY to store the record to the directory The phone beeps and Saved direc tory appears on the displ...

Страница 26: ...not within a Caller ID service area Forwarded call You have a call from your call forwarding service company Note The operation of this function might vary depending on your local telephone service p...

Страница 27: ...r appears just before the name 2 Press FLASH MENU Then the first option Switch Caller appears 3 Repeatedly press to scroll through the options list see Call Waiting Options on Page 28 4 Press FLASH ME...

Страница 28: ...r phone company s Voice Mail service Note Voice Mail is a service available from some telephone companies A call for a sub scriber can be kept at the telephone company and retrieved later on by callin...

Страница 29: ...press REMOTE on the handset while the phone is on hook The handset display shows Remote and two bars flash on the digital display on the base The TAD announces the number of messages you have if any...

Страница 30: ...US or SKIP until the TAD announces the correct day of the week 4 Press PLAY REPEAT The TAD announces the hour and AM or PM 5 Press PREVIOUS or SKIP until the TAD announces the correct hour including A...

Страница 31: ...e TAD records each incom ing message for 1 or 4 minutes When you set it to ANS ONLY the announce only message is selected RECORDING AN OUTGOING MESSAGE You can record your own message up to 1 minute l...

Страница 32: ...ANSWER on the base The TAD plays the current outgoing message then dis plays A or AO if set to announcement only Press ANSWER again to choose the prerecorded or your own message To turn off the TAD pr...

Страница 33: ...lf or others The memo is counted as one message and played back with other messages see Playing Messages on Page 34 1 Hold down MEMO REC on the base for about 2 seconds until a beep sounds 2 Speak int...

Страница 34: ...the base To repeat the playback press PLAY RPT 8 on the handset or press PLAY REPEAT on the base PLAYING MESSAGES After a new message is recorded A and the number of all recorded messages flash on th...

Страница 35: ...IP or SKIP 9 on the handset To skip to the previous message press PREVIOUS or PREVIOUS 7 on the hand set To play the current message again press PLAY REPEAT or PLAY RPT 8 on the handset To stop playba...

Страница 36: ...s the number of messages you have if any 2 Press PIN on the handset Then the TAD announces the current PIN through the handset 3 Enter your two digit PIN 4 Press PIN on the keypad again Then the TAD a...

Страница 37: ...e TAD beeps 2 Record your new outgoing mes sage 3 Press 1 or A beep sounds and the recorded outgoing message plays back To record a memo 1 Press 3 The TAD beeps 2 Record your message 3 Press 3 The TAD...

Страница 38: ...ng a call Move the handset closer to the base Lift the base s antenna to a fully vertical position Be sure the handset s battery pack is charged If the battery pack power is too low it does not have e...

Страница 39: ...e sure neither the handset s nor base s antenna is touching a metal sur face Recharge the battery pack Handset does not ring or receive a page Lift the base s antenna to a fully vertical position Move...

Страница 40: ...ur TAD 728 to your local RadioShack store for assistance The TAD does not answer calls Make sure the TAD is set to on Make sure the AC adapter and battery pack are properly connected Check all phone l...

Страница 41: ...y and carefully Dropping it can damage cir cuit boards and cases and can cause the TAD 728 to work improperly Use only fresh batteries of the required size and recommended type Batteries can leak chem...

Страница 42: ...lot and place the battery pack into the compartment 4 Replace the cover Cautions Use a replacement battery of the required type 3 6V 600 mAh rechargeable battery available through your local RadioShac...

Страница 43: ...ausing it Try to eliminate the interference by moving your phone away from the receiver connecting your phone to an AC outlet that is on a different electrical circuit from the receiver contacting you...

Страница 44: ...during the warranty period take the product and the RadioShack sales receipt as proof of purchase date to any RadioShack store RadioShack will at its option un less otherwise provided by law a correc...

Отзывы: