background image

10

Operation

board, or you can turn off a tune’s melo-
dy or accompaniment and play along on
the keyboard. 

Playing Back a Prerecorded 
Tune

1. Press 

SONG

. An indicator appears

next to SONG and the number of
the current tune appears.

Note:  The keyboard always selects
the tune “A Whole New World” (No.
00) the first time you press 

SONG

after turning the power on.

2. Choose a tune from the 100

SONGS list and enter its two-digit
number on the keypad.

Or, you can press 

– 

or

 +

 to move to

the next higher or lower numbered
tune.

Notes: 

• Precede a single-digit number

with a 0. For example, to select
07 (“O Christmas Tree”), press 

0

7

.

• If you enter an incorrect first digit,

press 

SONG

 to clear your entry,

then enter the correct digit.

3. Press 

PLAY/PAUSE

 or 

START/STOP

to start playing the tune.

You can change the tune by repeat-
ing Step 2 even while a tune is play-
ing. The new tune immediately
begins to play.

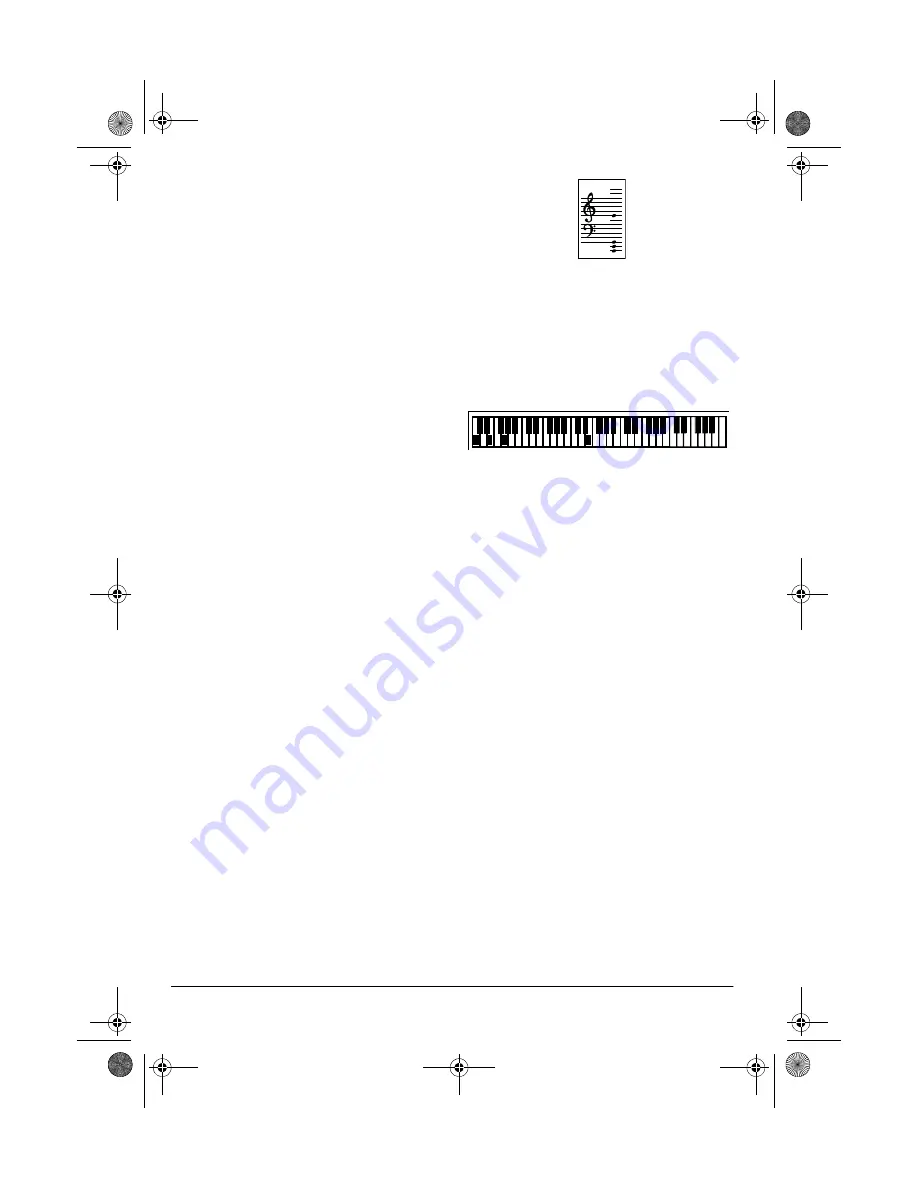
As a tune plays, the display shows:

• a “score” to show you the notes

that are playing (right side of the
display)

• a “keyboard” to show you the fin-

gering and which keys are
pressed (bottom of the display)

• a “metronome” to show you the

selected tempo — the metro-
nome’s bar swings along with the
tempo you selected, and the
black dots above the metronome
show the beat count in the mea-
sure

• the chord name (except for tunes

80 to 99, center right of the dis-
play)

• “hands” that show the fingering to

play the tune and chords

Note: Each tune plays a different
preset tone for the melody, but you
can change to another tone even
while the tune is playing. Follow the
steps under “Selecting/Playing a
Preset Tone” on Page 12 to select a
different tone.

4. Use 

MAIN VOLUME

 to adjust the

overall volume as desired. 

To adjust only the accompaniment
volume (except tunes 80 to 99),
press 

ACCOMP VOLUME

 then enter

42-4042.fm  Page 10  Friday, April 28, 2000  11:18 AM

Содержание MD-981

Страница 1: ...Owner s Manual Please read before using this equipment MD 981 MIDI Keyboard 42 4042 fm Page 1 Friday April 28 2000 11 18 AM ...

Страница 2: ... Playing Along with a Prerecorded Tune 11 Turning Applause Off On 12 Consecutively Playing Back the Tunes 12 Using the Preset Tones 12 Selecting Playing a Preset Tone 12 Keyboard Split Tones 13 Layered Tones 13 Percussion Sounds 13 Using the Preset Auto Rhythms 14 Selecting Playing an Auto Rhythm 14 Using SYNCHRO 15 Using FILL IN 15 Using Auto Accompaniment 15 Adjusting the Accompaniment Volume 15...

Страница 3: ...out MIDI 21 Making the MIDI Connections 21 MIDI Data 22 Changing MIDI Settings 22 Notes About the MIDI Implementation Chart 23 Troubleshooting 24 Standard Fingering Chord Charts 26 Note Table 29 MIDI Implementation Chart 31 Care and Maintenance 32 Specifications 33 42 4042 fm Page 3 Friday April 28 2000 11 18 AM ...

Страница 4: ...ong with the fingering current tone rhythm volume melody and tempo The display also shows a metronome icon to indicate the beat 100 Tones you can set your key board to sound like anything from a harpsichord to a honky tonk piano 100 Auto Rhythms give you a steady beat for many styles of music from rhumba to slow rock 100 Prerecorded Tunes let you hear a sample of what you and the keyboard can do Y...

Страница 5: ... interference in a residential area However your equipment might cause TV or radio interference even when it is operating properly To elimi nate interference you can try one or more of the following corrective mea sures reorient or relocate the receiving antenna increase the distance between the equipment and the radio or TV use outlets on different electrical cir cuits for the keyboard and the ra...

Страница 6: ... the keyboard with batteries for a week or more remove the batteries Batteries can leak chemicals that can destroy electronic parts Using AC Power You can power the keyboard using a 9V 800 mA AC adapter and a size M Adaptaplug adapter neither sup plied Both are available at your local RadioShack store Cautions You must use a Class 2 power source that supplies 9V DC and delivers at least 800 mA Its...

Страница 7: ...3 Set the DC adapter s voltage switch to 9 volts 4 Connect the DC adapter s barrel plug to the DC 9V jack on the back of the keyboard 5 Plug the DC adapter s other end into your vehicle s cigarette lighter socket CONNECTING HEADPHONES To listen to your keyboard without dis turbing others you can connect an op tional pair of stereo headphones with a 1 4 inch 6 4 mm plug Your local Ra dioShack store...

Страница 8: ...such as AUX IN or TAPE IN Your local RadioShack store sells a full line of amplifiers speakers and connec tion cables USING THE SHEET MUSIC STAND To easily view sheet music while playing your keyboard insert the supplied sheet music stand into the holes on the top back panel ˆ A Quick Look at Your Keyboard PHONES OUTPUT List SONGS 100 TONE RHYTHM SONG CHORD BOOK TRANSPOSE TUNE MIDI ACCOMP VOLUME 1...

Страница 9: ...MAIN VOLUME or to increase or decrease the volume The current setting ap pears Notes The keyboard s volume ranges from 0 no sound to 9 maxi mum Each time you turn on the keyboard the volume is set to 7 To quickly change the volume set ting hold down MAIN VOLUME or To quickly return to the default volume setting of 7 press both MAIN VOLUME buttons at the same time The volume level differs depend in...

Страница 10: ...Step 2 even while a tune is play ing The new tune immediately begins to play As a tune plays the display shows a score to show you the notes that are playing right side of the display a keyboard to show you the fin gering and which keys are pressed bottom of the display a metronome to show you the selected tempo the metro nome s bar swings along with the tempo you selected and the black dots above...

Страница 11: ...rded tune so you can Note You can find the scores for most of the prerecorded tunes in the Play Guide for the Prerecorded Tunes sup plied with your keyboard 1 Select and enter the tune you want to play 2 Press ON OFF RIGHT to turn off the melody R disappears from the hands indicating that the key board is not playing the right hand portion of the music Press ON OFF LEFT to turn off the accompanime...

Страница 12: ...rd s preset tones Some of the keyboard s preset tones however are capable of only 6 note polyphony Most tones on this keyboard have been recorded and processed using a technique called digital sampling To ensure a high level of tonal qual ity samples are taken in the low mid and high ranges and are then combined to sound amazingly close to the originals You might notice very slight differences in ...

Страница 13: ...ed Tones The preset tones numbered 80 through 89 on your keyboard let you automati cally play two different layered tones at the same time when you press one key For example STR PNO No 80 plays string and piano tones when you press a key Percussion Sounds PERCUSSION No 99 lets you play the 35 different percussion sounds shown here The symbol for each sound ap pears above the corresponding key on t...

Страница 14: ...choose an auto rhythm from the 100 RHYTHMS list and enter its two digit number on the keypad Or repeatedly press or to move to the next higher or lower numbered rhythm Notes Precede a single digit number with a 0 For example press 0 5 to select POP BALLAD No 05 If you incorrectly enter the first digit of the rhythm press RHYTHM to clear the entry and return to the last selected auto rhythm 3 Press...

Страница 15: ...keyboard to play two dif ferent types of auto accompaniment us ing the accompaniment keys Concert Chord lets you play chords on the accompaniment keys using chord formations of from one to four notes The number of keys you press determines the type of chord that plays see Concert Chord on Page 16 Standard Fingering lets you play chords on the accompaniment keys using standard chord formations of t...

Страница 16: ...ant seventh or minor seventh chord Follow these steps to start concert chord auto accompaniment 1 Set POWER MODE to CONCERT CHORD 2 Enter a two digit auto rhythm num ber 3 To start the auto rhythm before the auto accompaniment press START STOP Or to synchronize the start of the selected auto rhythm with your accompaniment press SYNCHRO FILL IN 4 Begin the accompaniment at the desired interval by p...

Страница 17: ... preceding chart to produce a 7 m7 M7 mM7 9 or m9 chord This chart shows only one possible fingering position for each chord It is possi ble to play a chord using several different positions For example the following three fingering positions produce the same C chord Major M Minor m Augmented aug Suspended 4th SUS4 Dominant 7th 7 Minor 7th m7 Major 7th M7 Minor Half Diminished m7 5 Major Half Dimi...

Страница 18: ...e rhythm simply press the auto accompaniment keys required to form the new chord 7 To stop auto accompaniment and the auto rhythm press START STOP USING THE CHORD BOOK You can use your keyboard s chord book display feature to see which keys to press and which fingers to use to form a chord You can also display the name of a chord you play Follow these steps to use the chord book feature 1 Set POWE...

Страница 19: ... have finished press CHORD BOOK to turn off chord book ˆ Special Features CHANGING KEYS The keyboard automatically selects the key of middle C each time you turn it on For added flexibility as you play the keyboard lets you change transpose the musical key in which it plays Note You cannot change the key while a prerecorded tune is selected or play ing 1 Repeatedly press TRANSPOSE TUNE MIDI until ...

Страница 20: ... shows Tune and the current pitch setting Note The number on the display is the number of cents to which the keyboard is currently tuned com pared to its default pitch A cent is the measurement that represents the acoustical interval between two tones 1200 cents equal 1 octave You can tune the keyboard to within 50 cents 101 levels of its default pitch 2 Within 5 seconds repeatedly press or to low...

Страница 21: ...not actually carry sound between them like a speaker wire carries sound from a receiver to a speaker Instead MIDI equipped devices communicate with each other using digital codes in structions One MIDI device sends digi tal instructions representing exactly what is being played on it The other MIDI device receives and translates those instructions then produces or records the sound exactly as it w...

Страница 22: ...tone The keyboard sends program change data in the range of 0 to 99 correspond ing to tone numbers It receives data within the same range if GM tone map ping is set to N or in the range of 0 to 127 if GM tone mapping is set to G In the latter case tones in the range of 100 to 127 are translated to the closest tone that the keyboard has Pitch Bend supplies pitch bend infor mation The keyboard s pit...

Страница 23: ...this fea ture The following notes explain what the keyboard can do Basic Channel MIDI uses up to 16 channels to exchange data As in a TV broadcast different channels send dif ferent data The keyboard can send data in any of 16 channels but receives data only on channels 1 through 4 or 10 Mode The chart shows that Mode 3 is OMNI OFF POLY This means the keyboard sends and receives polyphon ic data o...

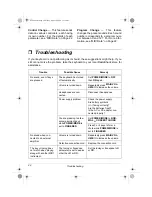
Страница 24: ...ume is turned down Repeatedly press MAIN VOL UME to increase the volume Headphones are con nected Disconnect headphones Power supply problem Check the power supply Are battery symbols facing correctly Are the batteries fresh Is the AC or DC adapter con nected properly You are pressing too few accompaniment keys while POWER MODE is set to FINGERED Set POWER MODE to NOR MAL or CONCERT CHORD Press 3 ...

Страница 25: ...ne octave lower Tone map parameter is set to N Set the tone map parameter to G see Changing MIDI Set tings on Page 22 Sounds sent to another MIDI device by the key board do not sound cor rect The other device s MIDI THRU function is turned on Turn off the MIDI THRU func tion on the other device Trouble Possible Cause Remedy 42 4042 fm Page 25 Friday April 28 2000 11 18 AM ...

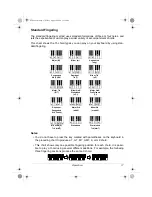
Страница 26: ...the chords you play most often This illustration shows which fingers on your left hand match the num bers on the charts The illustration also appears on your keyboard s dis play Note You cannot play chords marked with an asterisk in the fingered mode on this keyboard 42 4042 fm Page 26 Friday April 28 2000 11 18 AM ...

Страница 27: ...27 Standard Fingering Chord Charts 42 4042 fm Page 27 Friday April 28 2000 11 18 AM ...

Страница 28: ...28 Standard Fingering Chord Charts 42 4042 fm Page 28 Friday April 28 2000 11 18 AM ...

Страница 29: ...29 Note Table ˆ Note Table Legend 1 Tone number 2 Maximum polyphony 3 Range type see Page 30 4 Corresponding general MIDI number see MIDI Data on Page 22 42 4042 fm Page 29 Friday April 28 2000 11 18 AM ...

Страница 30: ...ving MIDI data Range transposed to nearest octave when receiving MIDI data or using the keyboard s transpose function 1 The received MIDI data is played one octave lower 2 The received MIDI data is played one octave higher 42 4042 fm Page 30 Friday April 28 2000 11 18 AM ...

Страница 31: ... the main vol ume value is 1 or 0 3 no relation After Touch Keys Channels X X X X Pitch Bender X O Control Change 1 6 38 7 10 11 64 100 101 120 121 X X X X X O X X X O X O O X O X X X Modulation Data entry Volume Pan Expression Hold1 RPN LSB MSB All sound off Reset all controller Program Change True O 0 99 O 0 127 4 4 Depends on GM Tone Map setting When set to N only the 100 normal list tones from...

Страница 32: ...eyboard so you can en joy it for years Keep the keyboard dry If it gets wet wipe it dry immediately Liquids might contain minerals that can corrode the electronic circuits Use and store the keyboard only in normal temperature environments Temperature extremes can shorten the life of electronic devices dam age batteries and distort or melt plastic parts Keep the keyboard away from dust and dirt whi...

Страница 33: ...s DC 6 AA batteries AC 120V 60Hz with AC adapter Vehicle Battery 9V with DC adapter Power Consumption 7 7 W Use only fresh batteries of the required size and recommended type Batteries can leak chemicals that damage your keyboard s electronic parts Wipe the keyboard with a damp cloth occasionally to keep it looking new Do not use harsh chemicals cleaning solvents or strong deter gents to clean the...

Страница 34: ...t Without Batteries 8 lb 14 oz 4 kg Included Accessories Sheet Music Stand Play Guide for the Prerecorded Tunes Specifications are typical individual units might vary Specifications are subject to change and improvement without notice 42 4042 fm Page 34 Friday April 28 2000 11 18 AM ...

Страница 35: ...35 Notes ˆ Notes 42 4042 fm Page 35 Friday April 28 2000 11 18 AM ...

Страница 36: ...oduct defect during the warranty period take the product and the RadioShack sales receipt as proof of purchase date to any RadioShack store RadioShack will at its option un less otherwise provided by law a correct the defect by product repair without charge for parts and labor b replace the product with one of the same or similar design or c refund the purchase price All replaced parts and product...

Отзывы: