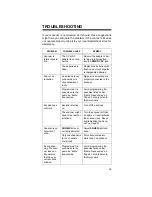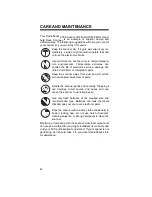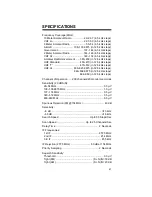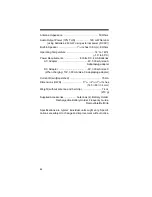
50
4. When the scanner successfully receives all data,
End
and
FiniSh
appear. If the scanner received an error while
receiving data,
End
and
d-Err
appear. If the scanner
received a checksum error while receiving data,
C-Err
and a number appear. The number shown next to
C-Err
indicates the packet number where the error occurred.
Note: If the scanner did not receive an end bit from the
PC,
End
does not appear.
Wired Programming Specifications
Interface .................................................................... RS-232C
Data Format ...................................................... Asynchronous
Data Length ...................................................................... 8-bit
Parity ............................................................................... None
Stop Bit ............................................................................. 2-bit
Baud Rate ................................................................. 4800 bps
Data Transmission Direction ............ One Way (Receive Only)
Flow Control ........................... None (2 Lines, RXD and GND)
USING ON-AIR PROGRAMMING
1. Turn off the scanner.
2. While pressing
ENT
and
8
, turn on the scanner.
On
Air
and
PGM
appear and the scanner automatically receives
154.600 MHz in FM mode. Then
On
Air
and the fre-
quency alternate.
3. Send the data from the PC.
StArt
and the data being
received by the scanner appears in the order it is received.
Note: If the scanner did not receive a start bit from the PC,
StArt
does not appear.
4. If you do not want to use 154.600 MHz to receive program-
ming, press
PGM
.
PGM
flashes. Then use the number keys
to enter the frequency you want to receive and press
ENT
.
To change the frequency back to the default (154.600
MHz), hold down
ENT
then press
CL
.
Note: You cannot use an AM frequency during on-air pro-
gramming. Do not enter a frequency between 108.000 and
136.9875 MHz in Step 4.
Содержание 20-514
Страница 63: ...63 NOTES...


