


Page 2
Kit Contents
(1) Partially Assembled Shelf w/Door
(2) Rear Brackets
(2) Cable management Arms
(16) Tie Straps
Rear Bracket Hardware:
(7) 8-32 x 3/8" Truss Head Screws
(7) 8-32 Keps Nuts
(1) Strip of Velcro (16" Long)
(2) Rear Cable Managment Brackets
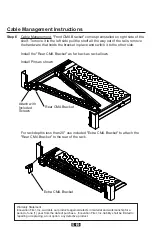
Installation Instructions
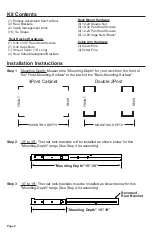
Step 1
Mounting Depth: Measure the "Mounting-Depth" for your rack from the front of
the "Front-Mounting-Surface" to the back of the "Back-Mounting-Surface".
Rack Mount Hardware
(9) 12-24 Square Nut
(9) 10-32 Pan Head Screws
(9) 12-24 Pan Head Screws
(9) 12-24 Cage Nuts "Black"
Cable Arm Hardware
(3) Clevis Pins
(3) Cotter Pins
Step 2
19" to 30": The rear rack brackets will be installed as shown below for this
"Mounting-Depth" range (See Step 4 for assembly).
Step 3
10" to 19": The rear rack brackets must be installed as shown below for this
"Mounting-Depth" range (See Step 4 for assembly)
4Post Cabinet
Double 2Post
FRONT
REAR
MOUNTING DEPTH
FRONT
REAR
MOUNTING DEPTH
"Mounting Depth" 19"-30"
Reversed
Rear Bracket
"Mounting Depth" 10"-19"


