IP-802 / IP-1602
IP Remote Setup
Quick Installation Guide of IP KVM for remote access
Please perform the follow steps
1. Power off all KVM hardware and connected devices.
2. Connect the power supply to IP KVM
3. Connect the monitor, keyboard & mouse to console port of IP KVM (not applicable to integrated LCD
drawer version )
4. Connect the KVM cable to IP KVM and target servers
5. Use an Ethernet cable to connect your local area network (LAN) to the IP console port on the KVM
Initial IP confi guration
The factory default, DHCP mode is disable (IP auto con? guration = None), and the preset default address as
below :
IP address :
192.168.1.22 (default)
Subnet-mask :
255.255.255.0
Default Gateway:
None
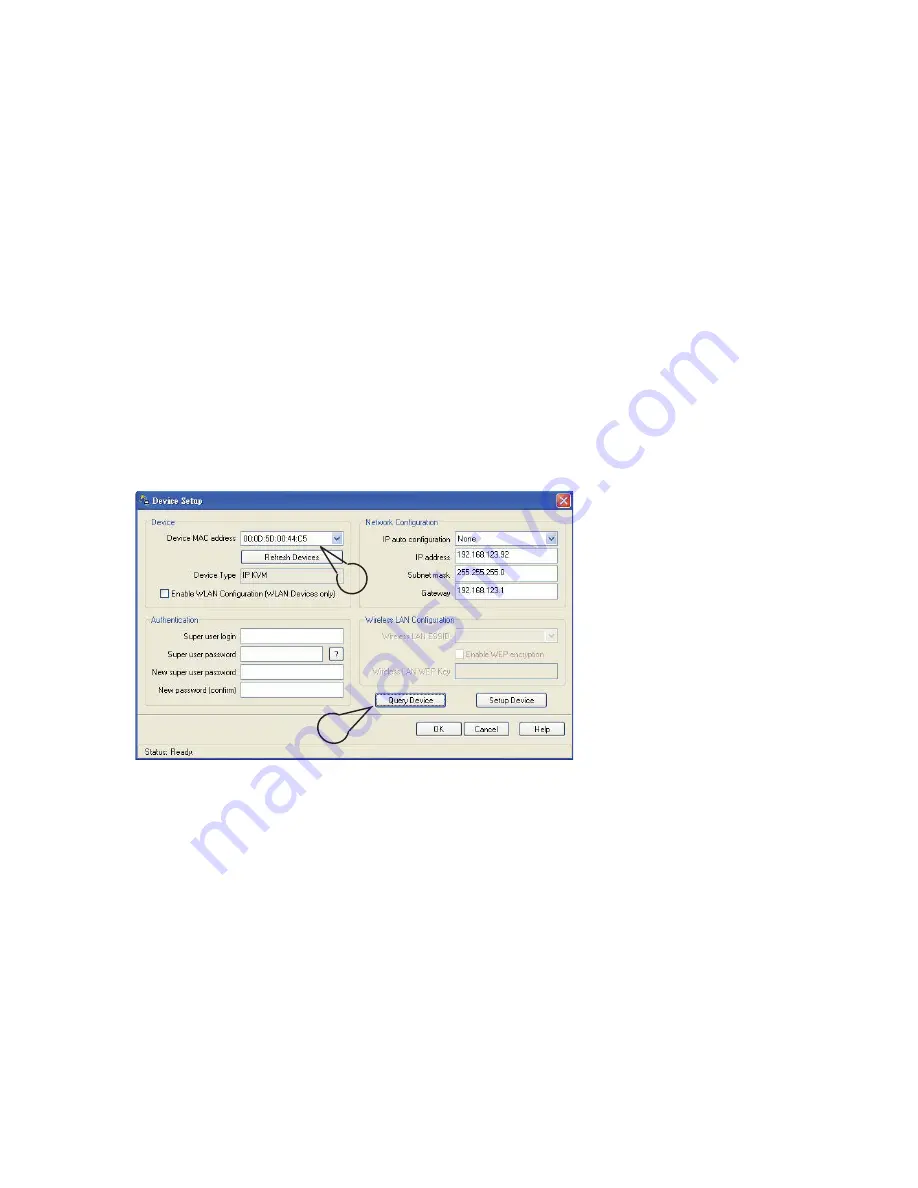
Install the “PSetup.exe” program from the provided CD-disc to a computer which networked with IP KVM
switch, then press Refresh Devices the look for the IP-KVM.
a. Select the MAC address from label on bottom of IP-KVM switch
b. Click Query Device
1. Confi gure the IP KVM with fi xed address
a. Setup “IP auto confi guration” as “None”; setup IP address and Subnet mask
b. Enter Super user login and password for Authentication (default : super/pass)
c. Setup Device. If super login was authenticated, it’ll show “Successfully confi gured device”.
Otherwise it’ll show “Permission Denied”.
2. Confi gure the IP KVM with DHCP
a. Setup “IP auto confi guration” as “DHCP”
b. Enter Super user login and password for Authentication (default : super/pass)
c. Setup Device. If super login was authenticated, it’ll show “Successfully confi gured device”.
Otherwise it’ll show “Permission Denied”.
3. Install JVM on Client system
The IP-KVM switch was remote accessed by a standard JAVA enabled web browser. The client system
must install Sun JVM 1.4.2 or above for remote access the IP KVM.
Remark:
■
At a minimum, you must have Internet Explorer 6.0 or Netscape 7.0 or Molliza 1.6 (and above) installed
on your client computer.
a
b


