background image

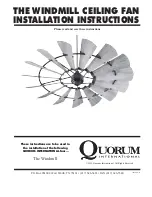
THE WINDMILL CEILING FAN

INSTALLATION INSTRUCTIONS

Please read and save these instructions

These instructions are to be used in 

the installation of the following 

QUORUM INTERNATIONAL fans...

The Windmill

P.O. Box 961008 • Fort Worth, TX 76161 • (817) 626-5483 • FAX (817) 626-5540

I0230-10/15

© 2015 Quorum International. All Rights Reserved.

Содержание The Windmill

Страница 1: ...and save these instructions These instructions are to be used in the installation of the following QUORUM INTERNATIONAL fans The Windmill P O Box 961008 Fort Worth TX 76161 817 626 5483 FAX 817 626 5...

Страница 2: ...stions regarding the warranty or the procedures for obtaining service please call us at 817 626 5483 Monday thru Friday 8 00 a m 5 00 p m CST technical skill competence or experience of the user 8 Lig...

Страница 3: ...oid possible electric shock turn off the electricity at the main fuse box or circuit panel before you begin the fan installation or before servicing the fan or installing accessories 2 Read all instru...

Страница 4: ...PROVIDED WITH THE OUTLET BOX CAUTION DO NOT MOUNT THIS FAN ON SLOPE CEILING Fig 1 Ceiling Joists Outlet Boxes Fig 2 Ceiling Joists Outlet Boxes WARNING Turn off the power CAUTION ALL PARTS ASSEMBLY SH...

Страница 5: ...omplete the blade circle Align the holes on the blade deco bars and secure with the blade deco bar screws Screw No 2 as show on Fig 7 Caution Do not tighten screws at this point All screws will be tig...

Страница 6: ...ow is the time to tighten all the blade and blade arm screws Be sure all screws are fully tightened Be sure not to forget screws No 1 and No 2 Fig 12 6 Lift the fan motor with the blades and place int...

Страница 7: ...wall plate and switch from the wall junction box Connect one BLACK wire from the wall to one BLACK wire labeled TO FAN from the wall transmitter Connect the other BLACK wire labeled TO POWER SUPPLY fr...

Страница 8: ...ach by turning clockwise Note Adjust the canopy screws as necessary until the canopy and canopy cover are snug Fig 15 2 Attaching the Control Cup Plate Attach the control cup plate to the flange of th...

Страница 9: ...p 3 The fan will start to run and begin the control setting process The fan will run in both directions for a total of approximately 5 minutes Step 4 When the fan stops after approximately 5 minutes t...

Страница 10: ...Periodically check tightness of all screws securing the blades to the blade arm attachment points A clicking or a rattling noise is a sure indication of loosening screws Since screws will invariably w...

Страница 11: ...trol to control the fan speed will always cause an annoying hum Many fan motors do not work quietly with solid state variable speed controls 4 Check that the rubber gasket on the mounting bracket has...

Отзывы: