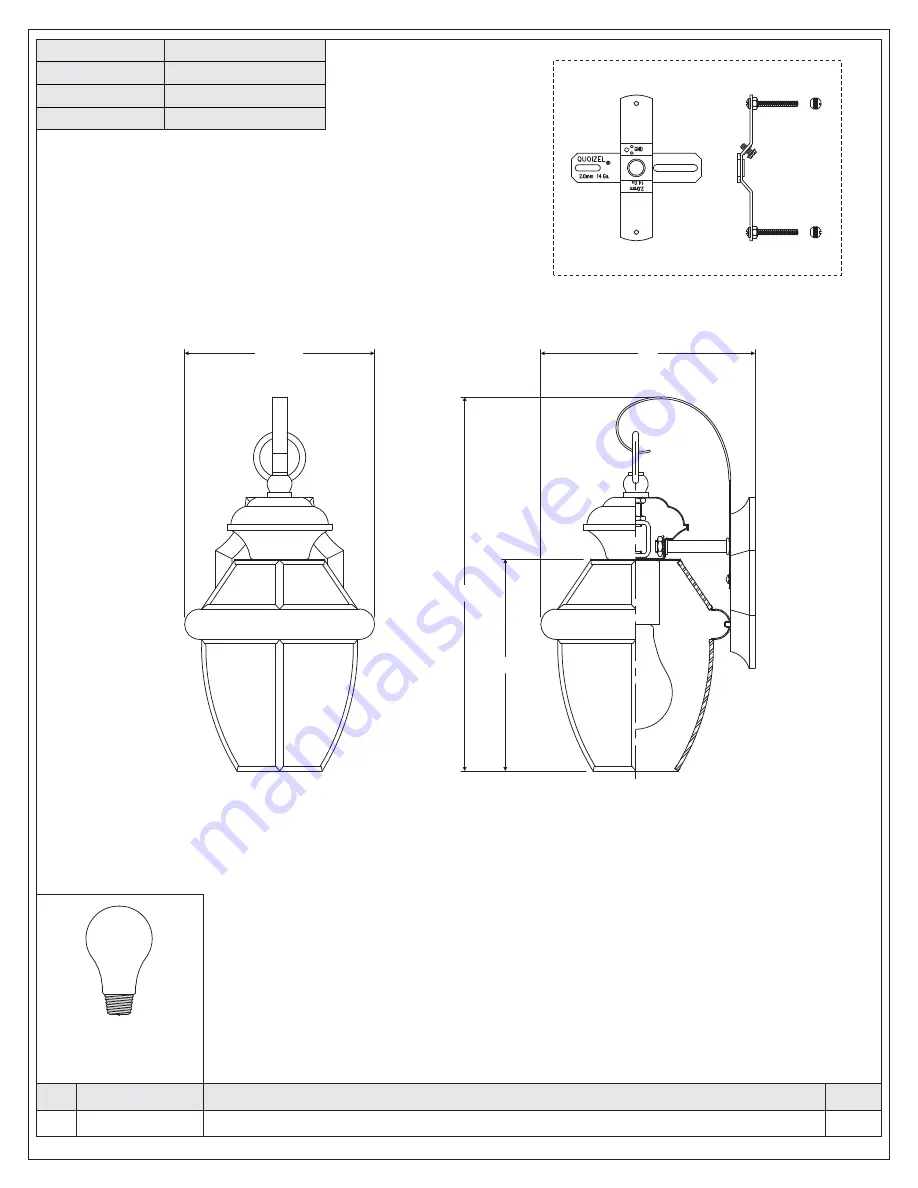
Quoizel NY8407K Скачать руководство пользователя страница 2

1

PART NUMBER

(1)150W medium

base bulb

(not Supplied)

NOTE: ALL DIMENSIONS ARE ROUNDED UP TO THE NEAREST 1/2

"

REPLACEMENT PART DESCRIPTION

REQ.

NO.

2of5

6” Dia.

7”

12.5”

7”

STYLE NUMBER

NY8407K

NY8407P

NY8407Z

MEDICI BRONZE

PEWTER

MYSTIC BLACK

FINISH

Содержание NY8407K

Страница 1: ...may result Thank you for purchasing a Quoizel product Need assistance with parts or assembly Call Quoizel customer service at 1 631 273 2700 or visit us on line at www quoizel com 2015 QuoizelInc Mounting Ball Mounting Screw Assembly Instruction Sheet IS NY8407 For Styles NY8407K NY8407P and NY8407Z 1of5 A B C D E 6 CORPORATE PARKWAY GOOSE CREEK SC 29445 www quoizel com F Please go to for product ...

Страница 2: ...0W medium base bulb not Supplied NOTE ALL DIMENSIONS ARE ROUNDED UP TO THE NEAREST 1 2 REPLACEMENT PART DESCRIPTION REQ NO 2of5 6 Dia 7 12 5 7 STYLE NUMBER NY8407K NY8407P NY8407Z MEDICI BRONZE PEWTER MYSTIC BLACK FINISH ...

Страница 3: ... Figure 2 STEP 1 Attach Mounting Screws Lock Washers and Hex Nuts to Crossbar A Line up a set of holes on the Crossbar A and Holes on the backplate of the Fixture Body K B Thread Mounting Screws B into the holes on the Crossbar A pass Lock Washers C and thread Hex Nut D onto the Mounting Screws B Hand tighten until snug Fixture Body Mounting Screw Crossbar Lock Washer Hex Nut Crossbar Outlet Box O...

Страница 4: ...Ground Wire from the Outlet Box to Ground Wire from fixture E Twist connectors until wires are tightly joined together F Wrap each connection with approved electrical tape and carefully stuff all the connected wires into the Outlet Box Figure 4 White wire from supply White wire from fixture Black wire from supply or Red Black wire from fixture Ground wire from supply Ground wire from fixture STEP ...

Страница 5: ...f dirt before applying caulk Using exterior grade caulk start on one side of fixture backplate and follow contour where the fixture backplate meets the exterior wall surface upward Proceed to caulk over top of backplate and down other side Do not caulk bottom of fixture backplate to ensure proper moisture drainage Your fixture is now assembled and ready to use Enjoy STEP 5 Install Bulb A standard ...

Отзывы: