background image

SET UP THE CLOUD CONTROL

Step 1: Mounting the Cloud Control 


Mount the controller to any wall near the wireless access point and plug it in with the included 12V Power Adapter.

Step 2: Mounting the Sensor Module 


Locate the Premium Sensor(s) in a clean and dry location where it will  

sample non-stagnant air. If you are utilizing the light sensor for sun sensing,  

ensure the light sensor has a clear path to the sun or light source. The  

Premium Sensor is designed to be suspended with the light sensor facing up  

and hanging at canopy level. The Premium Sensor can also be mounted to a  

wall with the wall-mounting hardware (order kit PN 4041954). Locate the  

sensor no more than 500 feet from the controller. See options 1 and 2 for 

hanging the sensor. Run power to the Premium Sensor with the included  

power extension cord and adapter.
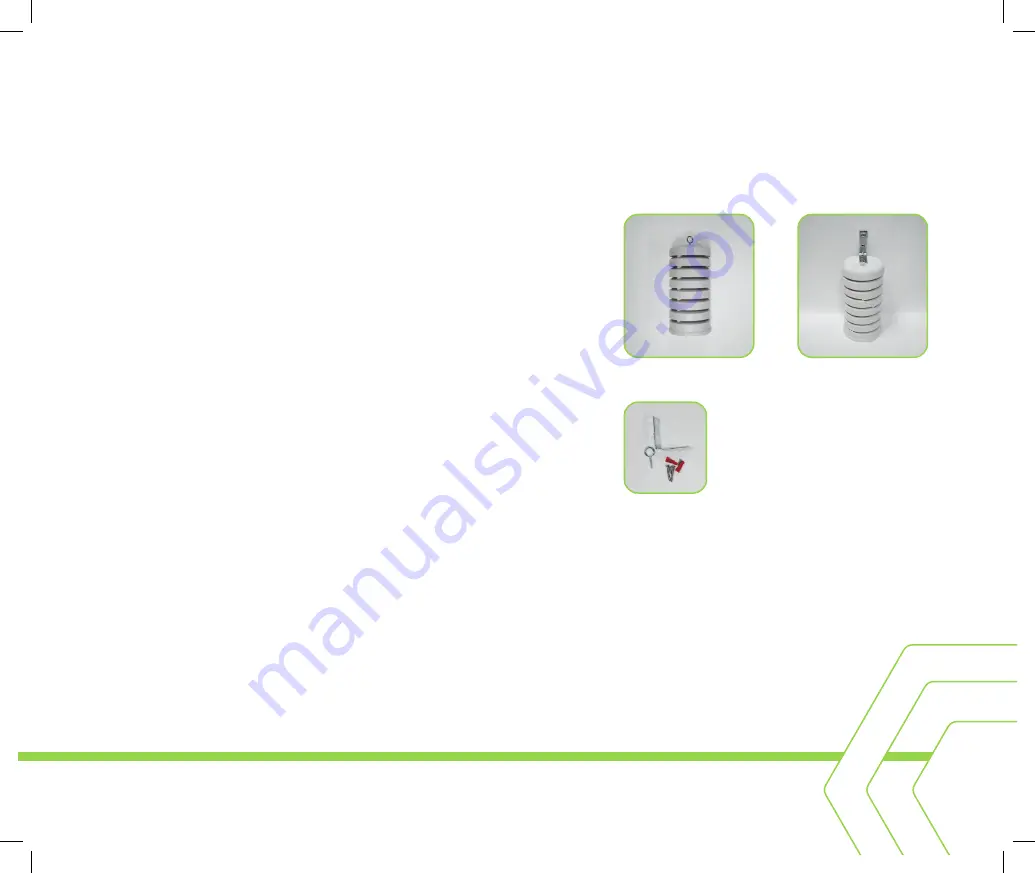
Option 1 - Eye Hook: Screw the eye hook into the top of the sensor.  

Attach to wall.
Option 2 - Bracket: Attach bracket to sensor using two small screws. Use two  

long screws to mount bracket to wall. If attaching to drywall, use anchors.

Step 3: Download the App and Create an Account 


Download the Cloud Control app and create an account within the app (see previous page for App  

download information). Register your Cloud Control account to manage one or more Controllers. 

1. Launch the Cloud Control App.

2. Type your Name, Email address, and Password in the corresponding fields.

3. Tap Continue when you’re finished.

Step 4: Follow the Onscreen Instructions 


Once you have created an account, on-screen prompts will guide you through the setup process.

Step 5: Add Power Links


Once your Environment Controller is set up, you can add your Power Links to it. 

Option 1 - Eye Hook 

Option 2 - Bracket

Premium Sensor Mounting Hardware Kit: 

(PN 4041954)

(2) Long Screws

(2) Anchors

(1) Bracket

(1) Eye Hook

(2) Small Screws

Содержание Cloud Control Base

Страница 1: ...CLOUD CONTROL...

Страница 2: ...guide describes how to start using your Quest Cloud Control immediately If you read nothing else read this guide For detailed information on your controller visit www questclimate com Incorrect insta...

Страница 3: ...nd relays in your lab or office Make sure you are using the most up to date software and firmware Professional installation recommended for large indoor grows and greenhouse installations Questions Vi...

Страница 4: ...between CLOUD MODULE Use the enclosed mounting hardware to mount it to any flat surface Use the included 12VDC power adapter to plug in the Cloud Module The first time it turns on it will have a flash...

Страница 5: ...a clear path to the sun or light source The sensor is designed to be suspended with the light sensor facing up and hanging at canopy level The sensor can also be mounted to a wall with wall mounting h...

Страница 6: ...3 4 5 6 7...

Страница 7: ...of a space This sensor plugs into the Cloud Module 3 The 24V Switch can connect to the terminal block on Quest products Once wired the switch allows your Quest Dehumidifier to be controlled via the Cl...

Страница 8: ...r Google Play Store LAUNCH APP Launch the App and follow the onscreen instructions to setup your new account and connect your controller to your Wi Fi APP DASHBOARD Your Cloud Control Dashboard shows...

Страница 9: ...ension cord and adapter Option 1 Eye Hook Screw the eye hook into the top of the sensor Attach to wall Option 2 Bracket Attach bracket to sensor using two small screws Use two long screws to mount bra...

Страница 10: ...y Off until you Tap Auto Mode or On Indicates the device is Forced On and will stay On until you Tap Auto Mode or Off RULES ALERTS Sensor Triggers Turn on and off equipment based on sensor threshold P...

Страница 11: ...in from the factory After the initial setup if you want to change the Controller s Wi Fi settings press and hold the Setup button for approximately 15 seconds until the light flashes blue rapidly Rel...

Страница 12: ...CONTACT US QUESTCLIMATE COM 1 877 420 1330 TS 1134 3 20 REV B...

Отзывы: