


Rack-Mount RDMS
TM
Telemetry Receiver
108
Quasonix, Inc.
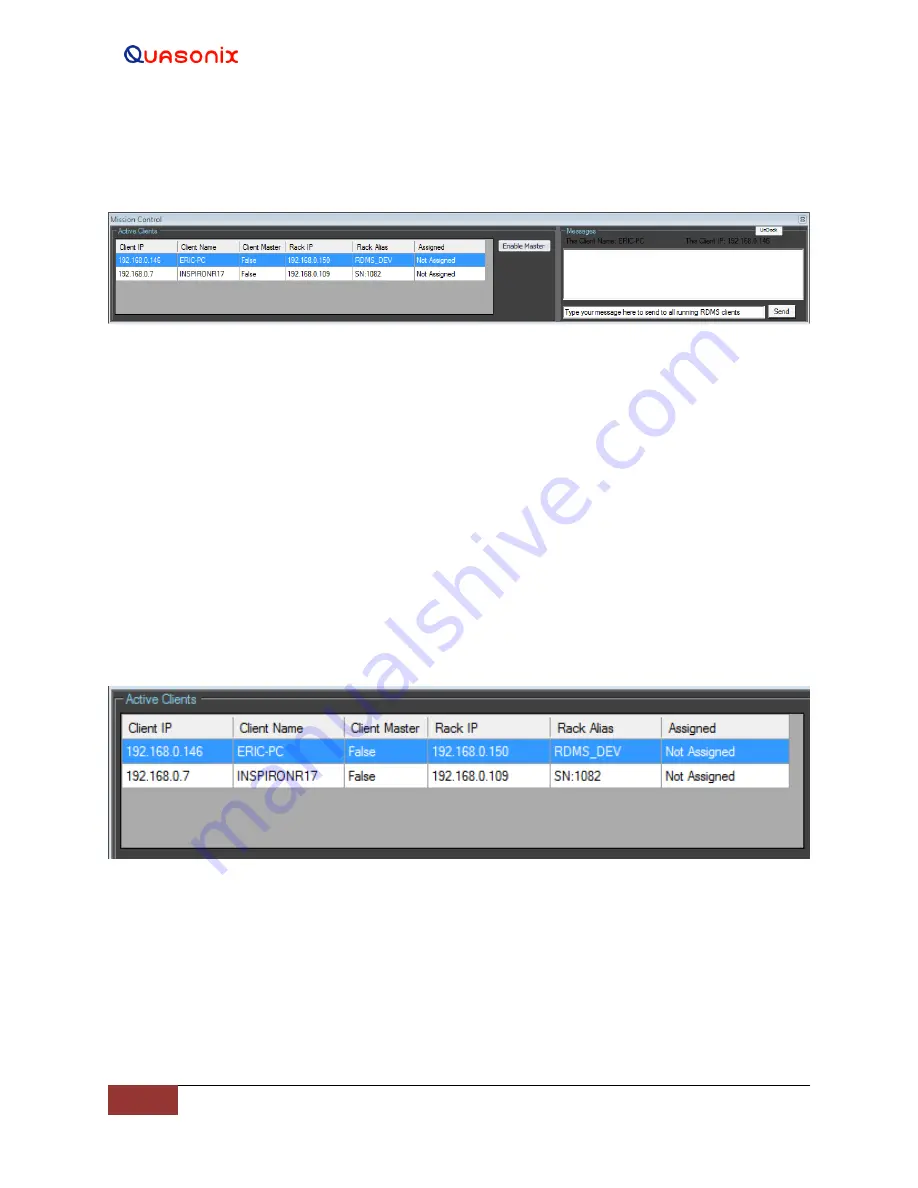
The Mission Control screen contains the Active Clients and Messages windows along with the Enable Master screen
button. The full window is shown in Figure 192.
Figure 192: Mission Control Screen
The Active Clients window, shown in Figure 193, contains the following information fields:
•
Client IP – Individual IP address for a PC connected to the RDMS™
•
Client Name – Name associated with the Client IP
•
Client Master – The Mission Control operator – unit currently in control of the RDMS™; has the ability to
control all racks
•
Rack IP – IP address for the RDMS™ rack
•
Rack Alias – Alternative descriptive name assigned to the rack
•
Assigned – Indicates whether or not the Client IP is connected to the Rack IP
Client racks are displayed in the order in which they are opened with the last opened client displaying on the top
line. Clients drop off of the list when they become inactive. Display order cannot be changed.
Figure 193: Mission Control, Active Clients Window
The Messages window, shown in Figure 194, provides the name of the Client PC and the Client IP address in the
grey frame. There is a Dock/Undock screen button in the upper right corner that allows the Mission Control
windows to be locked in the lower left corner of the PC screen or allowed to float freely on the screen.
The Messages window allows a chat session between active clients. Type a message in the text box at the bottom of
the window and click on the Send screen button.