


7
First Use
TUNING
[OK] to start search - [EXIT] to quit
TV LIST
ADD FAVOURITE: [OK] to confirm - [EXIT] to quit
SETTINGS
DIAGNOSTICS
CREATE
SORT
DEL.CHAN
DEL.LIST
v
Autotracking and Autosearch
These innovative automatic functions enable the receiver
to still be in tune with the selected channel while on the
move.
Typical DTT Networks are Multi Frequency Network (MFN);
each TV channel may be transmitted at different
frequencies depending on the specific geographical area.
Once a specific TV channel has been selected, the
Autotracking and Autosearch functions will tune, track and
in some cases automatically search for a channel where
there is a frequency change or signal loss without the need
of manually starting a new search.
To have the Autotracking and Autosearch functions
performing in the best possible way, it is recommended to
carefully follow the instructions below:
tune into the available channels
in that specific area
If the Autosearch function does not permit tuning into all
favourite channels, start the operations described at the
point 1 and 2 again but in another location.
1.Start an autoscan
2.Create a FAVOURITE TV LIST (from menu) -
3. Select the FAVOURITE TV LIST as default
-
by pressing [SCAN]
defi-
ne and organize the list of your favourite channels
WARNING: channels marked in red
are
temporarily not available due to the lack of
network coverage
.
WARNING: channels marked in red
are
temporarily not available due to the lack of
network coverage
.
FAVOURITE TV
1 Channel TV
2 Channel TV
3 Channel TV
4 Channel TV
5 Channel TV
6 Channel TV
7 Channel TV
TV LIST
[GREEN] to change list
FAVOURITE TV
TV LIST
1
TV
2
Channel
Channel TV
3 Channel TV
4 Channel TV
5 Channel TV
6 Channel TV
7 Channel TV
[GREEN] to change list
1
1
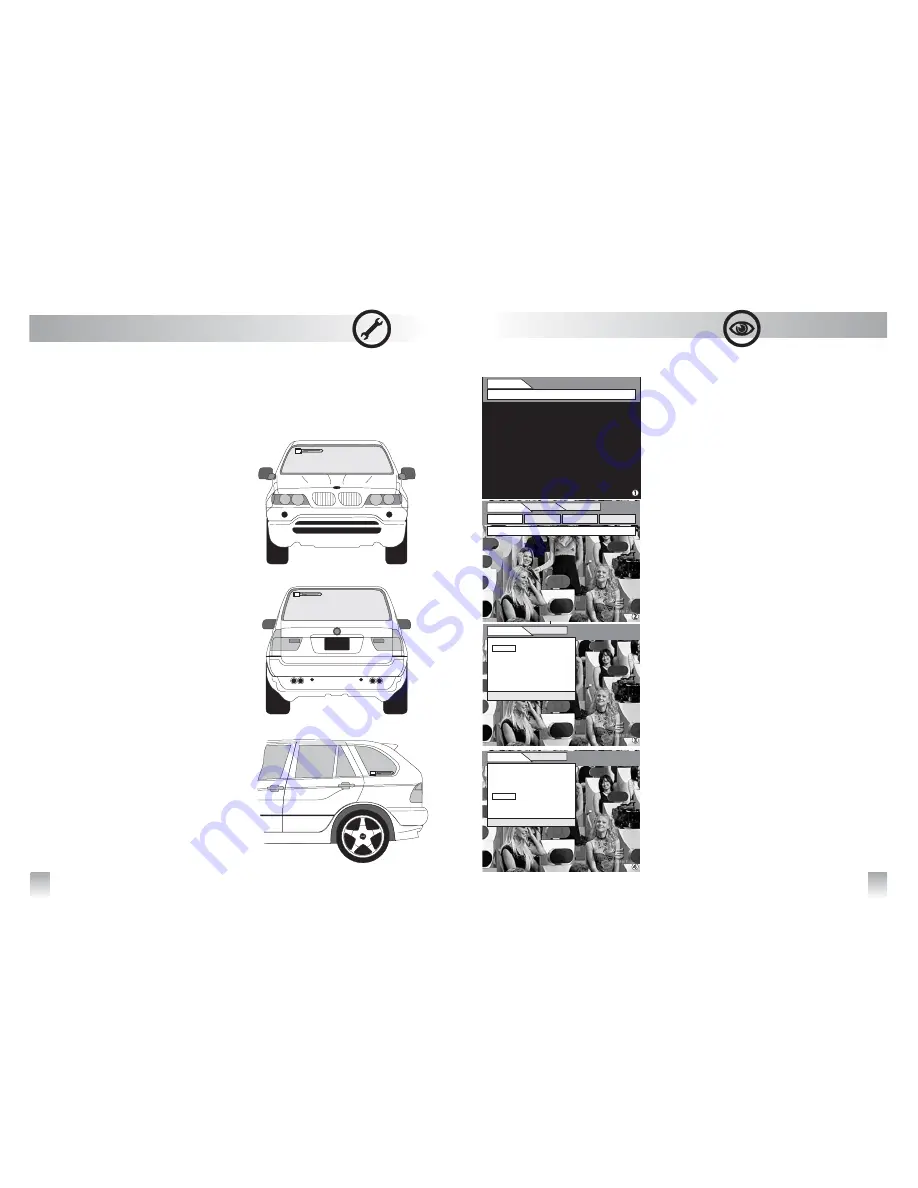
Installation and Connections
TV ANTENNAS
Recommendations
active antennas
receiver
s
(DVB-T).
v
•
•
• Placing the antenna in the
firstly
;
•
•
INSTALLATION GUIDELINES
Use only
amplified with adequate
gain directly powered by the
antenna
connector and suitable to the reception of the Digital
Terrestrial signal
Quantum
Antennas,
linked
together
with
Q10 receiver, have been manufactured in order to
o p t i m i z e
t h e
s y s t e m ' s
f u n c t i o n i n g .
WARNING: ONLY use Quantum antenna
provided. Use of different antenna or external
power may result in product damage and
might affect the warranty terms.
Be sure to position the antennas as far away and
opposing from each other as possible. For exam-
ple, place the first antenna on the right side of the
wind screen of the vehicle
and the second one
on the left side of the rear window
or on the left
rear vent wing .
Antennas must be installed as far away from the
metal parts (vehicle's roof or vertical borders of
the wind screen/rear vent wing) as possible.
bonnet or the boot (de-
pending on the vehicle) can influence the signal
reception. It's recommend to experiment
where to place the antennas whether on the
higher or the lower part of the window. The higher
part usually guarantees more protection from
noises caused by motorcycles and scooters.
Handle with care the coaxial cable setting in order
to avoid damages due to vibration or crushing.
Be sure that the connections have been correctly
set and check the screwing of the connectors. Sig-
nal reception's problems are often caused by
incorrect assembly.
18


