


Customer Helpline
0344 801 0979
16
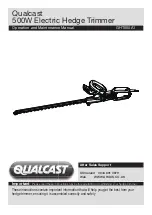
ORIGINAL INSTRUCTIONS
Maintenance
Troubleshooting
MAINTENANCE
CLEANING
Disconnect from mains electric supply. Using a soft brush-remove debris from all air intakes and
cutting blade. Wipe over surface of your Hedge trimmer with a dry cloth.
LUBRICATING THE CUTTING BLADE
For easier operation and longer life, lubricate the cutting blades before and after each
use. Before lubricating, make sure your Hedge trimmer is disconnected from the
mains electricity supply. Apply the oil so that it runs between the two blades.
Your trimmer should be stopped, disconnected and oiled occasionally during use.
AT THE END OF THE CUTTING SEASON
Clean your Hedge trimmer thoroughly. Check that all nuts and bolts are secure.
Visually inspect the Hedge trimmer for any worn or damaged parts.
TO STORE YOUR HEDGE TRIMMER
Store the hedge trimmer in a secure, dry place out of the reach of children. Do not
place other objects on top of the machine.
The following chart lists problem symptoms, possible causes and corrective action, if your electric
hedge trimmer does not operate properly. If these do not identify and correct the problem, contact
your service agent.
WARNING! Always switch the product off, disconnect it from power supply and let the product cool
down before performing inspection, maintenance and cleaning work!
Problem
Possible Cause
Corrective Action
Hedge trimmer does not
operate
1.1 No power
1.2 Mains socket faulty
1.3 Extension cord damaged
1.4 Fuse faulty
1.1 Check power
1.2 Check other socket, replace
1.3 Check cord, replace
1.4 Replace fuse
Hedge trimmer operates
intermittently
2.1 Extension cord damaged
2.2 Internal wiring damaged
2.3 On/Off switch defective
2.1 Check cord, replace
2.2 Contact Service Agent
2.3 Contact Service Agent
Motor runs but blades
remain stationary
3. Internal fault
3. Contact Service Agent
Cutting blade hot
4.1 Cutting blade dull
4.2 Cutting blade has dents
4.3 Too much friction, due to
lack of lubricant
4.1 Have blade sharpened
4.2 Have blade inspected/overhauled
4.3 Apply lubricant spray
General Troubleshooting


