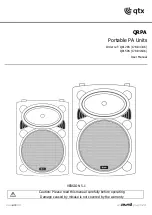


178.843UK, 178.846UK User Manual
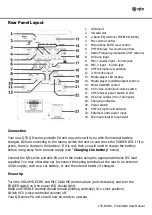
Rear Panel Layout
Connection
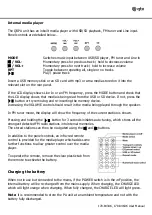
Your new QTX QR-series portable PA unit may arrive with you with the internal battery
charged. Before connecting to the mains, switch the unit on and check the POWER LED. If it is
green, there is charge in the battery. If it is red, then you will need to charge the battery
before using away from a mains supply (see “
Charging the battery
” below)
Connect the QR-series portable PA unit to the mains using the appropriate mains IEC lead
supplied. You may otherwise opt to connect the spring terminals at the rear to an external
12Vdc supply, such as a car battery, or use the internal battery if charged.
Power Up
Turn the VOLUME, ECHO and MIC VOLUME controls down (anti-clockwise) and turn the
POWER switch on (the power LED should light).
BASS and TREBLE controls should remain pointing vertically (12-o-clock position).
Switch VCV (voice-controlled volume) off.
Your QR-series PA unit should now be ready to operate.
1.
USB input
2.
SD card slot
3.
2-band EQ controls (TREBLE & BASS)
4.
Mic volume control
5.
Microphone ECHO level control
6.
VHF Wireless mic volume controls
7.
Radio Frequency indicators (VHF carriers)
8.
RCA line input
9.
MIC.1/Guitar input - 6.3mm jack
10.
MIC.2 input - 6.3mm jack
11.
VHF microphone A antenna
12.
3.5mm line input
13.
Media player LCD display
14.
Media player mode/transport controls
15.
Music VOLUME control
16.
VCV voice-controlled volume switch
17.
VHF receiver power switch & LED
18.
RCA line output (mix of all inputs)
19.
Charging indicators
20.
Power switch
21.
VHF microphone B antenna
22.
External 12Vdc power input
23.
IEC mains inlet & fuse holder