Qtx PAL8 Скачать руководство пользователя страница 3


PAL SERIES User Manual 
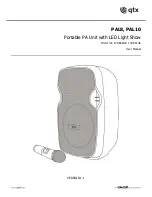
 Rear Panel  


Powering up


Your new PAL SERIES portable home PA unit may arrive with the internal battery charged.  

 
Before connecting to the mains, turn down all volume controls and switch the unit on (24) and 
the power LED should light (9). The battery charge status is shown on 4 LED indicators (8).  

If there is little or no charge, you will need to charge the battery before using away from 
mains power.  


Connect the PAL SERIES unit to the mains using the UK/EU 13.5Vdc adaptor supplied (26), 

which is supplied with UK and EU pin connectors. Slide the correct type in place until it latches. 
When not in use but connected to the mains, if the POWER switch (24) is in the OFF position, 

the internal battery will be re-charged from the mains supply, indicated by a CHARGING LED 
(10) which lights when charging.  

 
You may otherwise opt to connect the DC input at the rear (12) to an external 12Vdc supply 

(e.g car battery) or use the internal battery if charged. 

Media player display 

USB port 

SD/MMC card slot 

Media player mode 

Media player repeat play setting 

VHF microphone volume 

VHF microphone antenna 

Battery status LEDs 

Power LED 

10  Charging LED 

11  Front LED lights power on/off 
12  12Vdc power input terminals 

13  Media player USB/SD source select 
14  Previous track (hold for seek) 

15  Next track (hold for seek)


16  Play/Pause 

17  3.5mm AUX input 
18  Master volume 

19  Treble boost/cut 
20  Bass boost/cut 
21  Wired mic/guitar volume 

22  Echo effect level 
23  6.3mm jack mic/guitar select 

24  Power on/off 
25  Wired mic/guitar input 6.3mm jack 

26  13.5Vdc power input 

Содержание PAL8

Страница 1: ...PAL8 PAL10 Portable PA Unit with LED Light Show Order ref 178 860UK 178 861UK User Manual VERSION 1 1...

Страница 2: ...urself as this will invalidate the warranty We recommend you keep the original package and proof of purchase for any possible replacement or returned demand Warning To prevent the risk of fire or elec...

Страница 3: ...ion the internal battery will be re charged from the mains supply indicated by a CHARGING LED 10 which lights when charging You may otherwise opt to connect the DC input at the rear 12 to an external...

Страница 4: ...the speaker Note that the microphone switch has 2 positions the centre position is muted and the fully up position is on If the LED on the transmitter lights dimly change the batteries Take care not t...

Страница 5: ...correct compressed audio format before re connecting PLAY PAUSE 16 will alternately play or pause the selected track PREVIOUS TRACK 14 will step backwards through tracks Holding the PREVIOUS TRACK bu...

Страница 6: ...s no output check if there is more than one device within range called PAL SERIES In the eventuality that more than one device is called PAL SERIES try each device in turn until the PAL SERIES is foun...

Страница 7: ...in unit Rechargeable 11 1V 1800mAh Li ion Batteries VHF mic 2 x AA HF driver 25mm 1 Inputs Mic Guitar 6 3mm jack Aux 3 5mm jack Controls Wireless Mic Master Treble Bass Mic Gtr vol Echo Audio source I...

Страница 8: ...is not turned down Check media player is not turned down hold down Next No Bluetooth output Check volume output level on sending device Check sending device is connected to the receiver correctly Che...

Отзывы: