


8
Saving Presets
Presets can be modified and saved using the Save Preset menu. You can start with a Factory Preset (F
<n>
:
<name>
), make modifications, and then
save it as a User Preset (U
<n>
:
<name>
). You cannot overwrite Factory Presets. There are two ways to save presets: overwrite an existing User Preset,
or save a new User Preset.
To overwrite a User Preset,
HOME > PRESETS > PRESET SAVE > ENTER
To save a new User Preset,
HOME > PRESETS > PRESET SAVE AS > ENTER
Overwrite Preset
Press ENTER to save preset
U1: Config - A B C D
SAVE
To save, press
To exit without saving, press
EXIT
ENTER
To confirm the save, press
ENTER
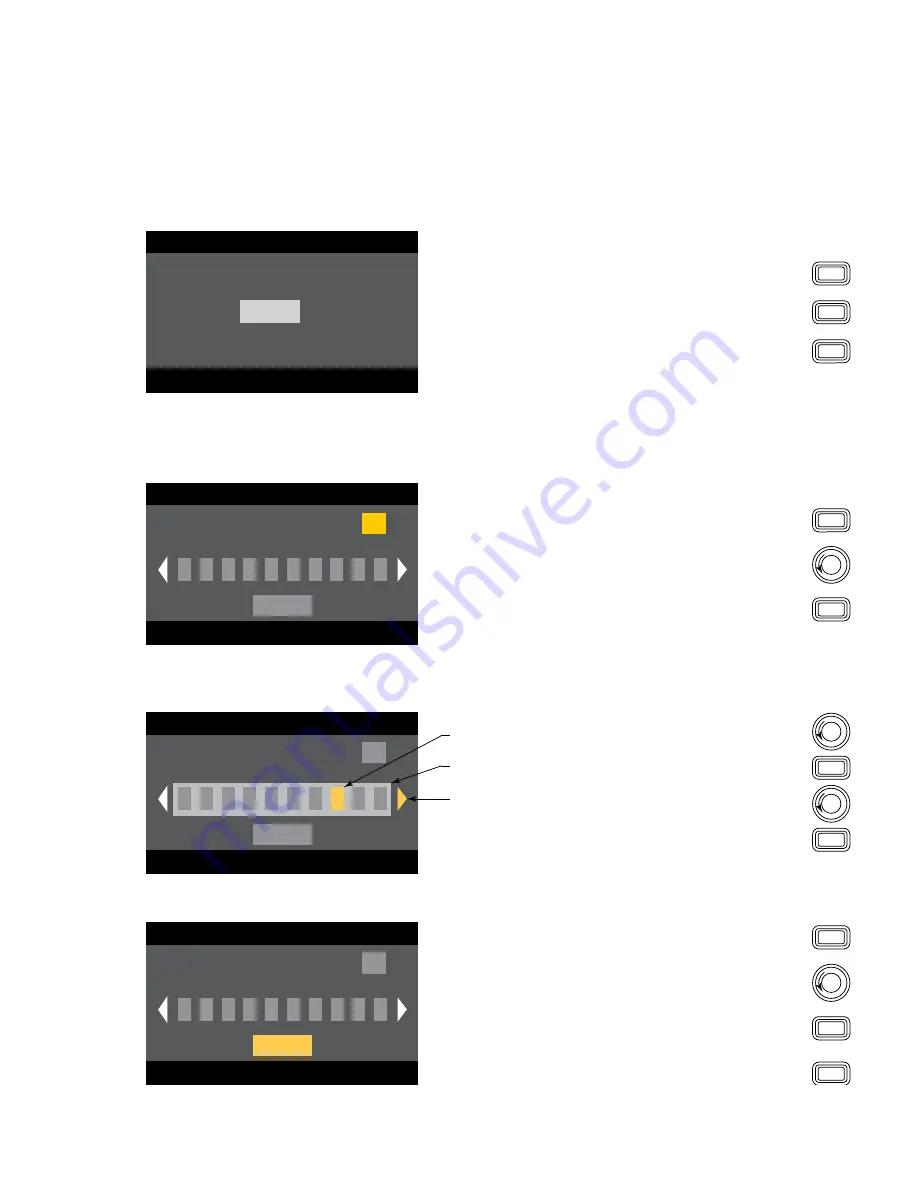
STEP 1 —
Select and Edit Preset Number
Edit preset number or press EXIT
U1: Config - A B C D
User Preset Number:
21
SAVE
New Preset Name
C
o
n
f
i
g
-
A
Scroll to desired number (1 thru 50)
To confirm User Preset number, press
ENTER
To edit User Preset number, press
ENTER
STEP 2 —
Name the Preset
Press ENTER to edit preset name
U1: Config - A B C D
User Preset Number:
21
SAVE
New Preset Name
C
o
n
f
i
g
X
A
Indicates more positions
Up to 21 characters, A - Z / a - z / 0 - 9 / _ / - / space
Indicates New Preset
Name selection
Indicates editing
Scroll to desired position
Scroll to New Preset Name
Press
ENTER
Press
ENTER
STEP 3 —
Save Preset
Press ENTER to save preset
U1: Config - A B C D
User Preset Number:
21
SAVE
New Preset Name
C
o
n
f
i
g
X
A
Press
ENTER
When you are finished naming, press
EXIT
Scroll to SAVE
SAVE
To confirm Save, press
ENTER


