28
Section 3:
Operation- Serial Port I/O Interface
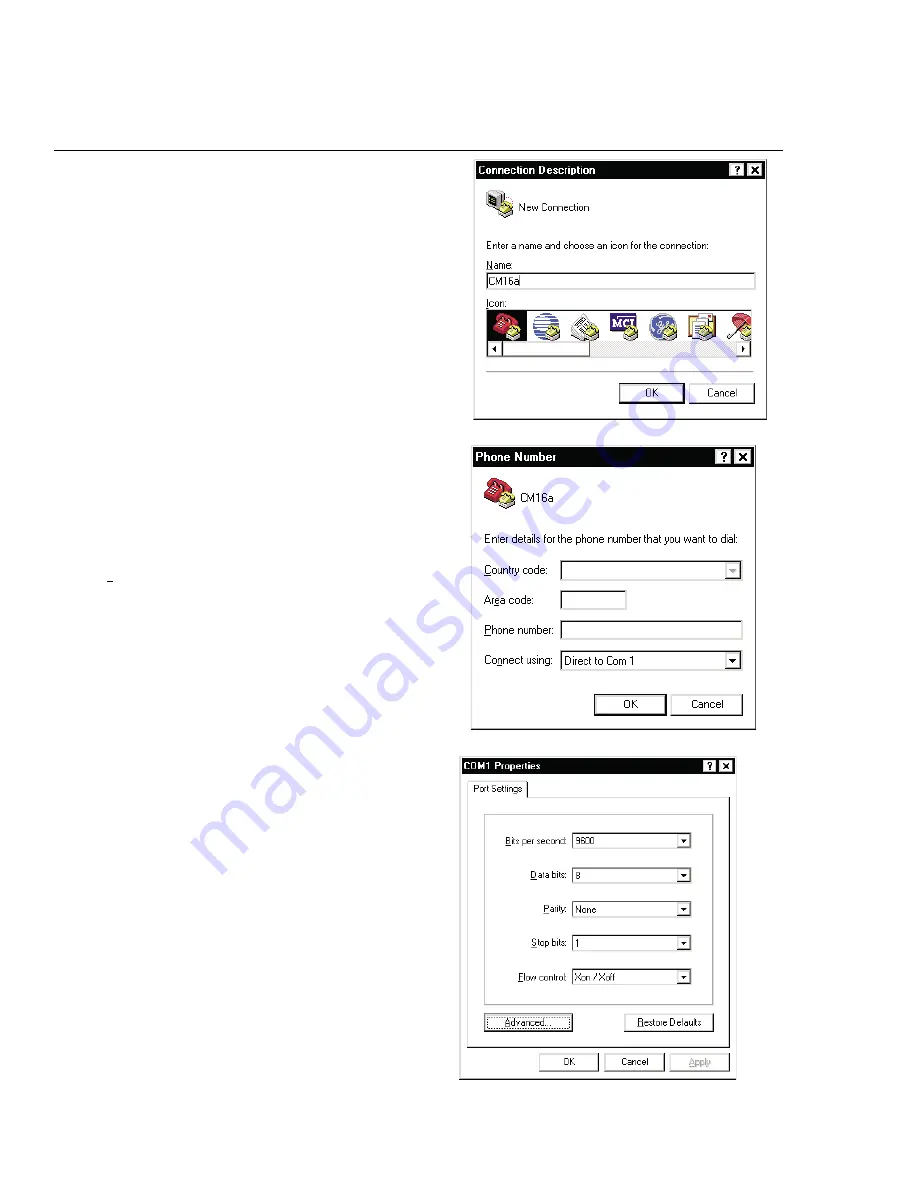
5)
The
Properties window for the selected COM port should now be active.
It should be similar in appearance as the example to the right.
For the Port Settings, use the following information
so communica-
tion between the CM16a and the computer is in the same “language”.
Bits per Second
9600
Data Bits
8
Parity
none
Stop Bits
1
Flow Control
Xon/Xoff
Once you have set the properties as outlined, click
OK to continue.
If all the connections and communications settings are correct, the main
Hyper Terminal window will appear next (see next page).
4)
Next,
Hyper Terminal needs to know how to “talk” to the CM16a. This
selection depends on which port on your PC the null-modem cable is
connected.
Ignore the first three entry fields (phone number information) and go directly
to the “
Connect using:” entry field and click on the down arrow for the drop-
down menu selection.
Select the appropriate port (COM1 is used in this example) and click
OK to
continue. The
Properties window should appear next.
3)
After starting
Hyper Terminal, a Connection Description window will
pop-up. It will require that you name your connection.Enter a name for your
new connection (example:
CM16a) and click OK to continue.
Содержание CM16a
Страница 1: ...CM16a Amplifier Network Monitor HARDWARE MANUAL TD 000086 00 TD 000086 00 Rev B...
Страница 9: ...Section 1 Introduction Block Diagram part 1 9...
Страница 10: ...Section 1 Introduction Block Diagram part 2 10...
Страница 22: ...Section 2 Installation Rear Panel Detail 22...
Страница 32: ...32 Section 4 Specifications Dimensions SIDE FRONT TOP...


