background image

 FUNCTION INSTRUCTION    18

19     FUNCTION INSTRUCTION

It can scan other frequency.
Steps as follows:
1. Press“F+C”key, it can scan frequency upwardly. Press EXIT to exit out.

It can scan other frequency.
Steps as follows:
1. Press“F+D”key, it can scan frequency downwardly. Press EXIT to exit out.

Function Instruction

Scan upwardly setting

Scan downwardly setting

Step upwardly in megabytes.
Steps as follows:
1. Press“F+A”key.
Step downwardly in megabytes.
Steps as follows:
1. Press “F+B”key

Megabytes step setting

Function Instruction

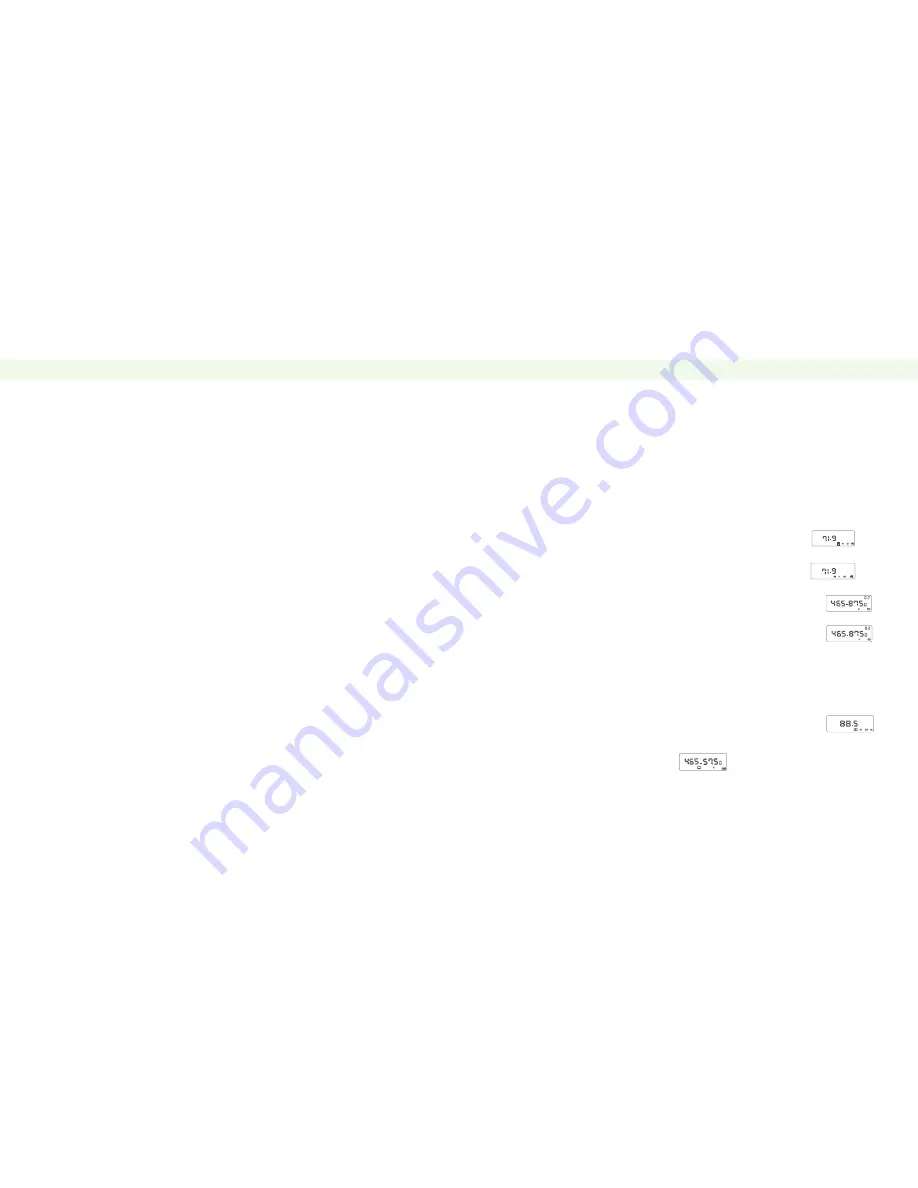
3. For example: save on channel 1 (same frequencies) receiving frequency 
465.875 MHz  CTCSS 71.9 Hz transmitting frequency 465.875 MHz  CTCSS 
71.9 Hz. save on channel 2 (different frequencies) receiving frequency 
465.575 MHz transmitting frequency 460.575MHz  CTCSS 88.5Hz.

Channel save setting

You can input & save frequency and other parameter.
Steps as follows:
1. Press “#”.
2. Press A or B to choose channel, or input the channel number, such as if 
save on channel 25, input number 2 and 5. The radio have 100 channels. 
(CH0-99)

Save channel 1 

1. Input number 465875 under frequency mode.
2. Press F+2, then press A or B to choose 71.9 Hz, LCD display: 

3. Press EXIT to exit the CDCSS setting.
4. Press F+3, then press A or B to choose 71.9 Hz, LCD display: 

5. Press EXIT.
6. Press “#”, then press A to choose channel 01 or input number 
01, press C to save the receiving channel.

7. Press “#”, then press A to choose channel 01 or input number 
01, press C to save the launching channel.

8. If no CTCSS, no necessary to set steps b,c, d,e.

Save channel 2 

1. Input number 465575 under frequency mode.

2. Press “F+2”, then press A or B to choose 88.5 Hz, LCD display: 

3. Press EXIT to exit the CDCSS setting.

4. Press “F+6” to set, LCD display:

Содержание k10at

Страница 1: ...o We believe this easy to use radio will provide stable and reliable communication for you QS Radio incorporates the latest advanced technology As a result we know that you will be pleased with the qu...

Страница 2: ...or moisture will erode the electronic board Do not transmit when the antenna is not installed If you find bad smell or smog please turn off the radio immediately And take the battery off the radio th...

Страница 3: ...ry pack 7 2V Belt clip Adapter User s manual Battery charger 1 SUPPLIED ACCESSORIES 1 1 1 1 1 1 1 SUPPLIED ACCESSORIES CHARGING NOTES 1 2 ATTACHING RELEASING BATTERY PACK INSTALLING ANTENNA INSTALLING...

Страница 4: ...ll shows low power please change a new battery pack Do not short circuit the battery terminals or throw the battery into fire Never attempt to remove the casing from the battery pack CHARGING NOTES 2...

Страница 5: ...nd ATTACHING RELEASING THE BATTERY PACK 4 5 INSTALLING ANTENNA 3 2 1 1 Turn off the radio before releasing the battery pack Push the battery releasing button in the direction of the arrow Slide the ba...

Страница 6: ...s not fully rain resistant while using the external speaker microphone Antenna Receive Transmit Indicator LED LCD Power Volume knob Speaker Microphone Exit key Up key Down key Receiveing Store Key Tra...

Страница 7: ...the different designated simbols in the LCD The following chart helps you to understand them It refers to CTCSS which will appear when transmitting and it means transmitting CTCSS It refers to DCS whi...

Страница 8: ...eration Full frequency operation Channel Frequency pattern operation 50 CTCSS 208DCS Transmitting CTCSS 50 CTCSS 208DCS Step frequency 6 25 5 10 12 5 25 0KHZ Voice prompt Press F 5 to choose turning O...

Страница 9: ...saving channel NO Channel Delete Jacklight Press EXIT and turn on the power at the same time then release memory elimination Press Jackligh key it is on press again to turn it off Full frequency patt...

Страница 10: ...LCD flashing press Key A or Key B to choose the frequency Press key EXIT to standby Details see attached CTCSS list P21 24 Using this function you may set different receiving and transmitting frequen...

Страница 11: ...S frequency inquiry Operation steps are as follows 1 In channel mode press F 8 key to display receiving CTCSS Letter R flashing means receiving CTCSS The LCD displays CTCSS or DCS the LCD displays No...

Страница 12: ...frequency 460 575MHz CTCSS 88 5Hz Channel save setting You can input save frequency and other parameter Steps as follows 1 Press 2 Press A or B to choose channel or input the channel number such as i...

Страница 13: ...ubles of saving again Low Power indication Battery icon twinkling it means low power pls change the battery If power lower than 5 5V you will hear voice prompt then the power will be off automatically...

Страница 14: ...D431N D432N D445N D446N 55 56 57 58 59 60 61 62 63 64 65 66 67 68 69 70 71 72 DCS 73 74 75 76 77 78 79 80 81 82 83 84 85 86 87 88 89 90 D452N D454N D455N D462N D464N D465N D466N D503N D506N D516N D523...

Страница 15: ...cations are subject to change without notice or obligation GENERAL Frequency Range Step Frequency Rated Voltage Frequency Stability Operating Temperature Working Manner Antenna Impedance Dimensions H...

Отзывы: