8
3
Getting Started
3.1
Connecting to Power
1. Insert and gently push up the back stand.
2. Remove the protecting film on the panel.
3. Place the DPF on a flat surface.
4. Press plug the AC power adapter into the photo frames DC power
jack and an electrical wall outlet.
5. Press the
button on the remote control.
3.2
Start up the DPF
After powering on the DPF for the first time, change the system
language and local time if necessary:
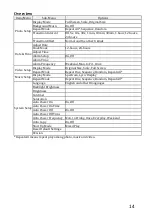
Change System Language
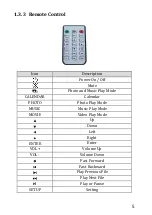
1. Press the SETUP button.
2. Press the
button to System Setup menu and press the ENTER
button.
3. Press the ENTER button and use the
button or the button to
select your language. Press the ENTER button to save the change.
4. Press the EXIT button.
Change Local Date & Time
1. Press the SETUP button.
2. Press the
button to Date & Time menu and press the ENTER
button.
3. Press the ENTER button and use the button or the button to
adjust year. Press the button to highlight the month or the day
field, adjust month and day accordingly.
4. Press the ENTER button to save the change.
5. Move to the Adjust Time menu and adjust local time.
Содержание PF1005
Страница 1: ...PF1005 Digital Photo Frame User Manual...
Страница 20: ...20 Printed in China...


