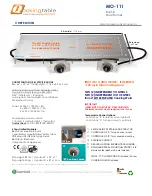
Hole
for fastening screws
Hole for
fastening
screws
Stem for
dial knob
Control
Light
Sockets
0
dial knob
Hollow Stem
Extension
DIRECTIONS:
1.
Remove packaging and carefully pull off the DIAL KNOB ONLY while holding on to the round plate. Do not use force or tools!
2.
Now separate the round steel plate from Control Light Sockets by carefully wiggling it away WITH the yellow and green light plastic caps
Hold one with two fingers and gently pull plate away; repeat with other. Yellow and green PLASTIC CAPS STAY IN PLACE in the plate.)
3.
Mark all necessary holes utilizing the provided template below. Drill required holes and gently thread light sockets through their
designated openings. DO NOT SNAP THE PRONGS! Now fasten the box to interior of cabinet wall or underside of counter top.
4.
Gently pull light sockets out a little bit and re-connect with plastic caps in the metal plate; affix plate with two small flathead screws, or
silicone into place.
5.
Connect the hollow extension to stem if needed (packed with nuts + washers). Slide dial knob onto stem (match flat side of stem
with flat side of female receptacle at back of knob). Do not use force. The “0” has to align centered below the CDS logo.
CAUTION: DO NOT TWIST OR SNAP DELICATE WHITE WIRING OF INDICATOR LIGHTS.
BUILT-IN
TYPE “B” CONTROL BOX
CONCEALED MOUNT
4”
(102 mm)
3”
(76 mm)
2-3/8”
(60 mm)
5-3/8”
(137 mm)
Holes for screws
to attach
plate
Hole
for
stem
Control/Indicator Light
Plastic Caps
1
1/16"
1
1/16"
9/32"
9/32"
1 17/32"
1 17/32"
1 13/16 in
4 7/8"
5 3/8"
ø
3/8”
10 mm
ø
6 mm
7/32”
ø
7/32”
6 mm
ø
9/64”
3.6 mm
ø
9/64”
3.6 mm
ø
9/64”
3.6 mm
ø
9/64”
3.6 mm
ø
5/8”
16 mm
8
CAUTION: DO NOT SNAP, PULL or TWIST THE CONDUIT DURING INSTALLATION ! ! !
Warranty will expire if capillary tube inside the conduit is damaged during installation.
Control box must be firmly fastened to a non-moving surface.
8
VERY IMPORTANT NOTE: Do not open the control box or warranty expires!
IMPORTANT: To use as 1:1 template
set “page scaling” to “none” when printing
Stainless
Steel Plate
3-1/8“ dia (80 mm)
cabinet
wall
interior
cabinet
space
exterior
YELLOW
GREEN
7 mm
39 mm
18 mm
18 mm
46 mm
39 mm
7 mm
124 mm
8
137 mm - PLEASE MEASURE ACROSS TO MAKE SURE TEMPLATE IS 1:1
Prongs prevent
light sockets from
slipping
back
into box


