background image

10

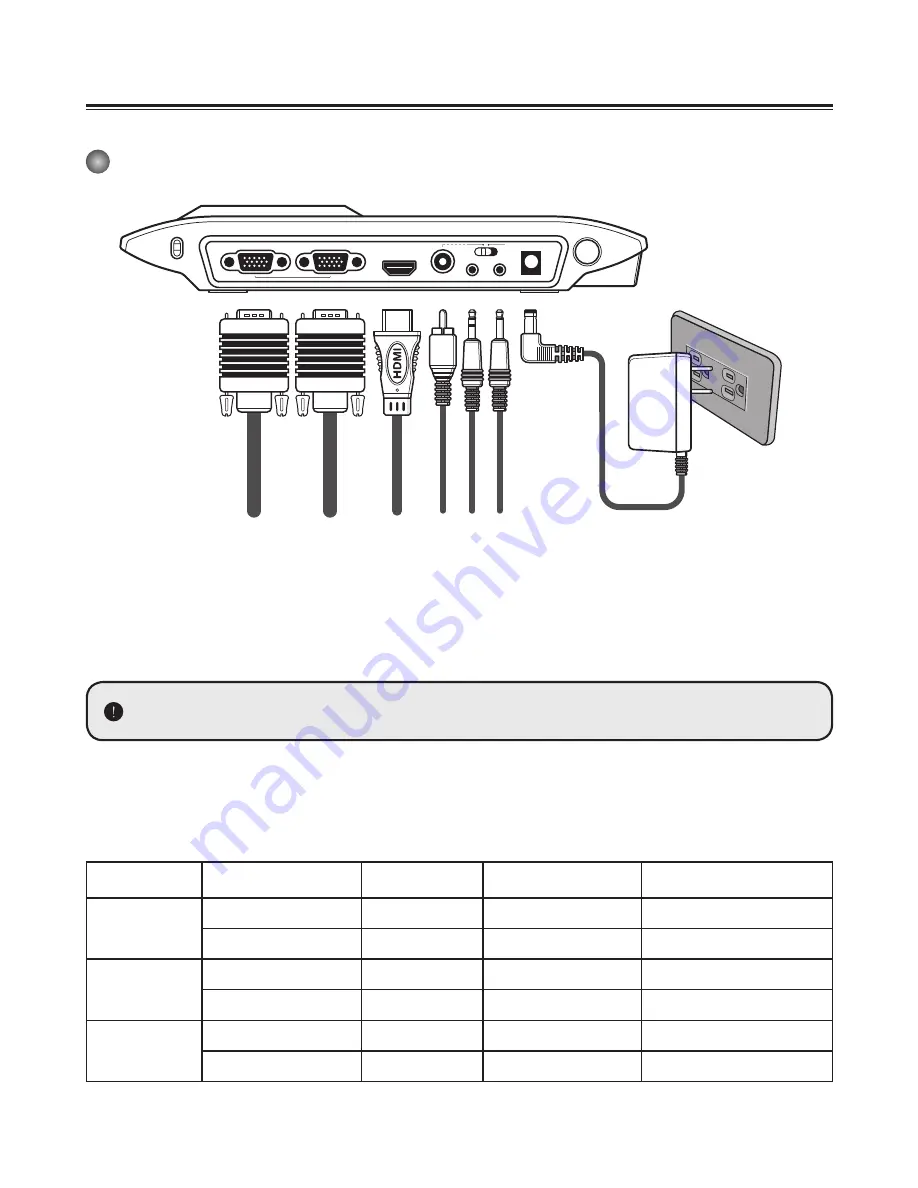
Making the Connections

 System diagram


Step 1 / Plugging in the Power Outlet

Use power adapter to connect DC IN connector on the product to a standard  100V~240V AC 

power outlet.

 The type of power adapter is depending on your countries / regions.

Step 2 / Output resolution and aspect ratio

Various output resolutions are available depending on the output and aspect ratio setting.

Please refer to the table listed below.

Output

ASPECT RATIO

TV system

Resolution

Vertical Frequency

HDMI

16:9

-

1280x720

50Hz/ 60Hz

4:3

-

1024x768

50Hz/ 60Hz

VIDEO

-

NTSC

720x480

60Hz

-

PAL

720x576

50Hz

VGA

16:9

-

1280x720

50Hz/ 60Hz

4:3

-

1024x768

50Hz/ 60Hz

AUDIO OU

T

M

IC. IN

NTSC

PA

L

HDMI OU

T

VIDEO OU

T

VGA IN

VG

A OU

T

PASS THROUG

H

DC IN(5V/2.5A)

Содержание QPC60

Страница 1: ...QOMO Portable Document Camera QPC60 English User s Manual...

Страница 2: ...radiate radio frequency energy and if not installed and used in accordance with the instructions may cause harmful interference to radio communications Operation of this equipment in a residential ar...

Страница 3: ...e 3 Carry the product by holding the lower part of the main unit in both hands Never hold the product by the arm or the camera head only 4 The camera can be damaged if it hits a desk surface or any ha...

Страница 4: ...rol signal receiver Control panel LCD Display Light Box SD Card slot USB port TV System Switch Antitheft slot VGA Input Port VGA Output Port HDMI Output Port Video Output Port Audio Output Port MIC In...

Страница 5: ...via RGB input port to RGB output port Display toggle Toggle between the 3 LCD display and external display device Freeze the current image Pause the clip while playing videos Show or hide OSD menu Rec...

Страница 6: ...e focus manually 2X or 4X digital zoom Highlight function on off Mask function on off Marco Normal switch Adjust highlighted masked area size Set color for highlighted masked area Button Function Incr...

Страница 7: ...lamp If the light is too dark please turn on the lamp on camera head to make best exposure 1 Press the lamp button to turn on off the illumination lamp 2 Adjust the brightness by rotating the shuttle...

Страница 8: ...Main working area Secodary working area If the document is not put in the recommend working area the image should be rotated by FLIP button on control panel or remote control 13 x 9 7 4 3 13 x 7 2 16...

Страница 9: ...view images and videos in the external display device Adjusting the brightness 1 Press MENU button and select the brightness mode 2 Use or buttons to increase or decrease the brighness level Adjusting...

Страница 10: ...remote control to finetune the focus Anti glare Anti glare sheet is a transparent plastic that is overlaid on top of shiny object or glossy surface to reduce the glare To use simply place the anti gla...

Страница 11: ...become inaccessible 3 To remove the card push the card to release it and then pull it out gently When using a brand new memory card you are recommended to format the card with the product Do not turn...

Страница 12: ...put resolution and aspect ratio Various output resolutions are available depending on the output and aspect ratio setting Please refer to the table listed below Output ASPECT RATIO TV system Resolutio...

Страница 13: ...Connecting with Components Product Port Cable Display Device Port HDMI HDMI OUT HDMI VGA RGB OUTPUT RGB INPUT AUDIO OUTPUT AUDIO IN VIDEO VIDEO OUTPUT VIDEO IN AUDIO OUTPUT AUDIO IN HD TV Connect via...

Страница 14: ...DEO cable yellow to connect to the C video in on your television via the VIDEO OUT connector 2 Make sure the output switch is set for VIDEO mode 3 To output sound use the AUDIO cable to connect to you...

Страница 15: ...ll be disabled when an external microphone is connected If HDMI OUT and AUDIO OUT are connected simultaneously the audio from HDMI OUT device will be disable but output from AUDIO OUT device Take caut...

Страница 16: ...press PC button on the control panel For laptop to output display mode use the keyboard command Fn to swtich between the display modes For different command please refer to your laptop manual The sign...

Страница 17: ...tint of color based subjects such as pictures or figures select Graphic 1 or Graphic 2 which represent different level of tint to satisfy your presentation Graphic 2 Text 1 The function is designed e...

Страница 18: ...enter PC Cam Mode Off Disable USB function Language Allows you select the language used for OSD Volume Use the Right Left buttons to adjust volume Clock Set date and time Format No Yes Format the stor...

Страница 19: ...ote control to fine tune focus 4 Press the Record button to start recording and press it again to stop recording Press the Shutter button to take a still picture The default resoulution of video clip...

Страница 20: ...is may cause malfunctions to occur If you would like to change the setting please refer to the Advanced settings section for more information Using product as a PC cam Installing the software The PC C...

Страница 21: ...tons to move the masked area Press the Size button on the remote control and use the direction buttons to adjust the highlighted masked size Press the Color button on the remote control and use the di...

Страница 22: ...built in panel first and then place the silde on top of the anti glare sheet 2 Press LightBox button to turn on the panel s backlight as a lightbox 3 Adjust the position of camera head 4 Switch the f...

Страница 23: ...ce insert the 28mm adapter into the 33 or 34mm adapter For a 31mm eyepiece insert the 31mm adapter into the 33 or 34mm adapter 4 Mount the microscope adapter onto the Lens 5 Switch the focus mode to M...

Страница 24: ...22 Storing 1 Power off the product 2 Unplug the AC adapter from the wall outlet Then disconnected the AC Adapter and all cables 3 Fold the camera head and arms in the direction shown in the figure...

Страница 25: ...rrectly connected to the external device Re connect all related cables with the external device correctly Incorrect input type of dispaly output device Set up correct input type of display output devi...

Страница 26: ...function The 3 LCD display is already on Press Display Toggle to switch display output then press LightBox to turn on the 3 LCD backlight Remote control can not work No power Replace the AAA batteries...

Страница 27: ...or above and Windows Media 9 0 Co decs to solve this problem Go to the website http www microsoft com to down load the required files Please refer to Copying files to your computer TV screen does not...

Страница 28: ...QOMO Portable Document Camera QPC60 QOMO HiteVision LLC Toll Free 866 990 QOMO Email info qomo com...

Отзывы: