


2.2
Access NAC-300
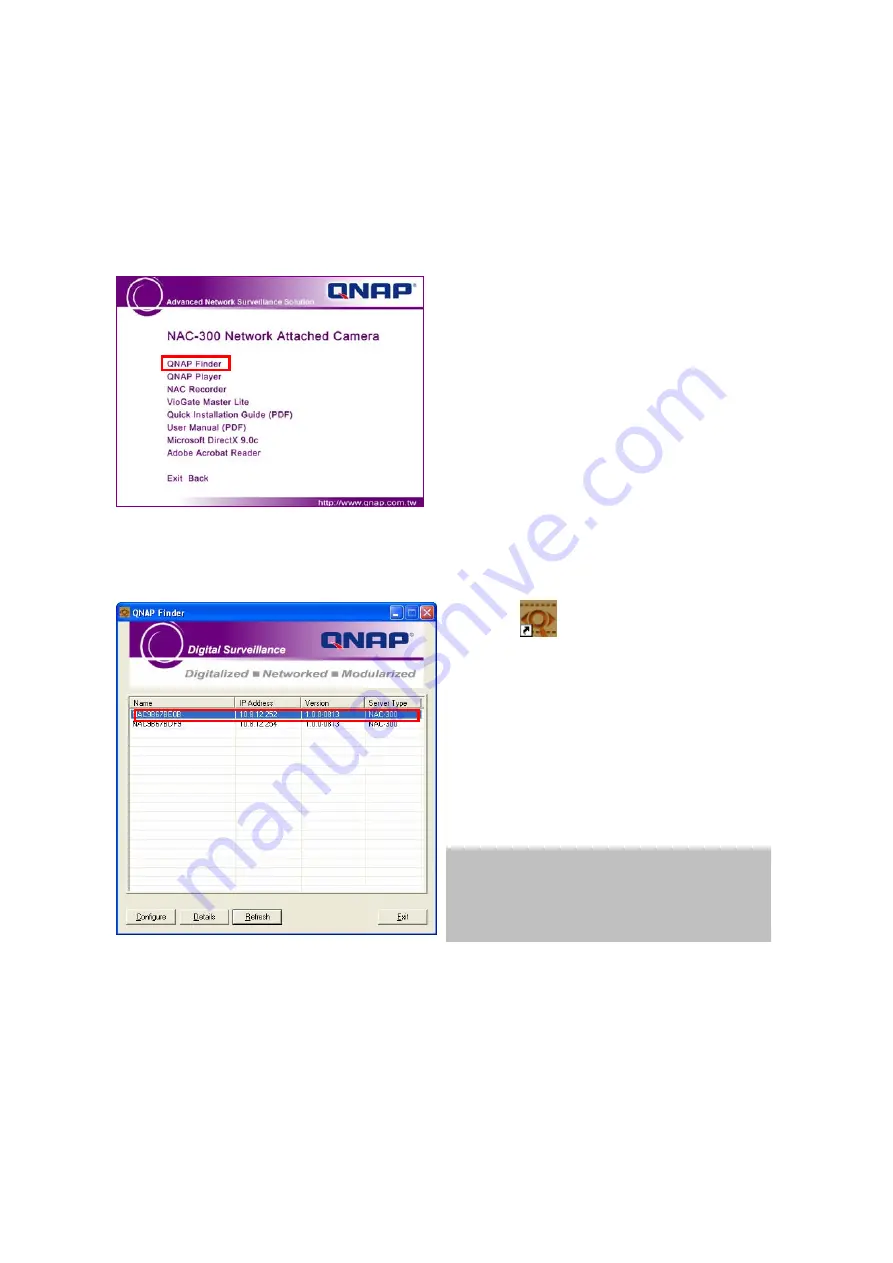
After installing NAC-300 and turning on the power, please follow the steps below to
connect your PC to NAC-300. Make sure NAC-300 is connected to the network.
Insert NAC-300 CD-ROM in a PC
connected to the network of NAC-300.
After auto running, click
QNAP Finder
to
install QNAP Finder.
Execute
on Windows desktop to
launch QNAP Finder.
Double click the name of your NAC-300
to login NAC-300.
NAC-300 will get an IP address from
DHCP automatically.
If you do not have DHCP service,
NAC-300 will use the default settings.
Default Settings:
IP Address: 192.168.0.1
Subnet Mask: 255.255.255.0
-
12
-
Содержание NAC-300N
Страница 1: ... 1 NAC 300N NAC 300P User Manual ...
Страница 16: ...4 You can view the monitoring image of NAC 300 and click on the top to start to configure the settings 16 ...
Страница 18: ... 18 ...
Страница 38: ...3 2 6 System Information You can view event logs and system logs in System Information page 38 ...
Страница 53: ...2 Highlight Internet Protocol TCP IP and click Properties 53 ...
Страница 56: ...2 Check the box I have read and agree to the Acceptable Use Policy above 56 ...


