


3
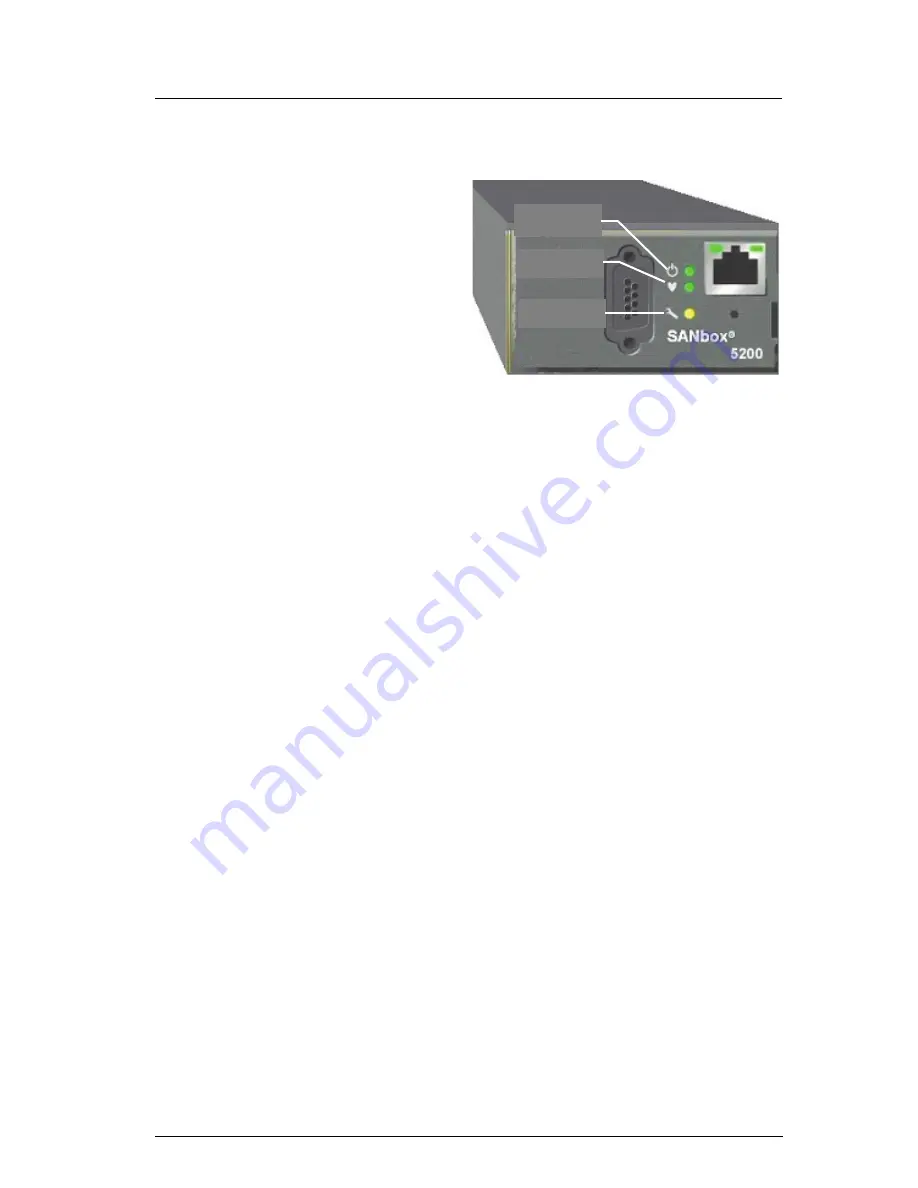
Step 5. Apply Power to the Switch
❑
Attach the AC power cords to the switch
and wall outlet or power strip. Verify that
the Input Power LED is illuminated.
❑
The switch runs its self tests and begins
normal operation – this may take a few
minutes. Verify that the Heartbeat LED is
blinking (once per second) and the
System Fault LED is NOT illuminated.
Step 6. Verify Workstation Requirements
❑
Verify that your workstation can support the SANsurfer Switch Manager™ application with
the following minimum requirements:
• Windows XP/2000/2003
• 256 MB memory
• 150 MB disk space
• 500 MHz processor
• Video card with 256 colors
• CD ROM drive, RJ-45 Ethernet port
• Internet Browser: Microsoft® Internet Explorer®, Netscape Navigator®, or Mozilla™
Step 7. Install the SANsurfer Switch Manager Application
The SANsurfer Switch Manager application includes the Configuration Wizard. This wizard
auto-detects and configures the switch based on selected options and recommended settings. To
install the SANsurfer Switch Manager application on a Windows workstation/server, perform the
following steps:
❑
Insert the supplied CD into the CD ROM drive of the Windows workstation/server.
❑
In the upper left corner of the product introduction screen, click
Management Software
.
❑
Locate your platform in the table and click
Install
.
❑
If the product introduction screen does not open, open the CD with Windows Explorer and
run the installation program with the following path:
data\files\Management_Software\Windows\Windows_5.00.xx.xx.exe
INPUT
POWER LED
HEARTBEAT
LED
SYSTEM
FAULT LED


