


User’s manual of remote client software
start overwrite the earliest recorded files.
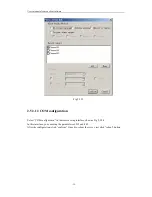
Record mode includes:
Manual recording, no cycle mode (default mode).
Manual recording and cycle mode (select “cycle record”).
Auto recording and no cycle mode (select “auto record”).
Auto recording and cycle mode (select “auto record” and “cycle record”).
Recording file size: it means how long one recorded file will be. If you select 64M, then
every 64M, client software will make a record file.
If you select auto recording mode, you must setup recording schedule. Press “Schedule” button to
enter into recording schedule setup dialog box. The detail parameter configuration you can refer to
client software record menu.
Notice: after the auto record parameters are changed, it will enable after reboot the client
software.
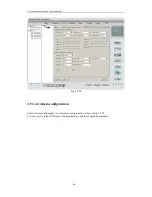
Auto record:
The client software is support the function of auto record.
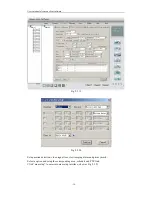
Enter into “local configure” interface, select “auto record”, then click “Rec. Cfg” to enter
into the interface of record schedule, show as Fig 2.5.17.
First select “record mode schedule” to setup record mode; every record has one mode name
and 4 record periods; here the mode names can’t be the same, the null mode can’t be setup. Select
record mode and setup the parameters and click “save”.
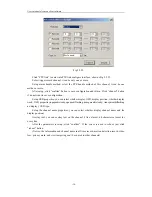
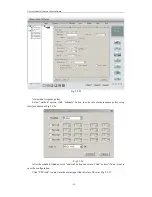
Then select “record schedule”, if one channel is selected just select the time in the time
column, and select a record mode in the mode column, click “OK”. Select one device, and all of
its channels are configured.
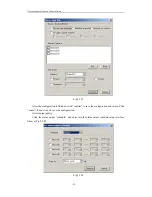
If the software time enter into the setup time, regardless the channel is in status of live
preview, the client will start auto record, if related channel is previewing and the icon will become
“
”, if not the icon will become “
”.
- 31 -