background image

Operation Manual-4CH Duplex DVR     


5.5 DVR Power Connection 

Connect the DVR power adapter to the adapter jack at the rear panel of the DVR unit. 

It will boot up the system. 

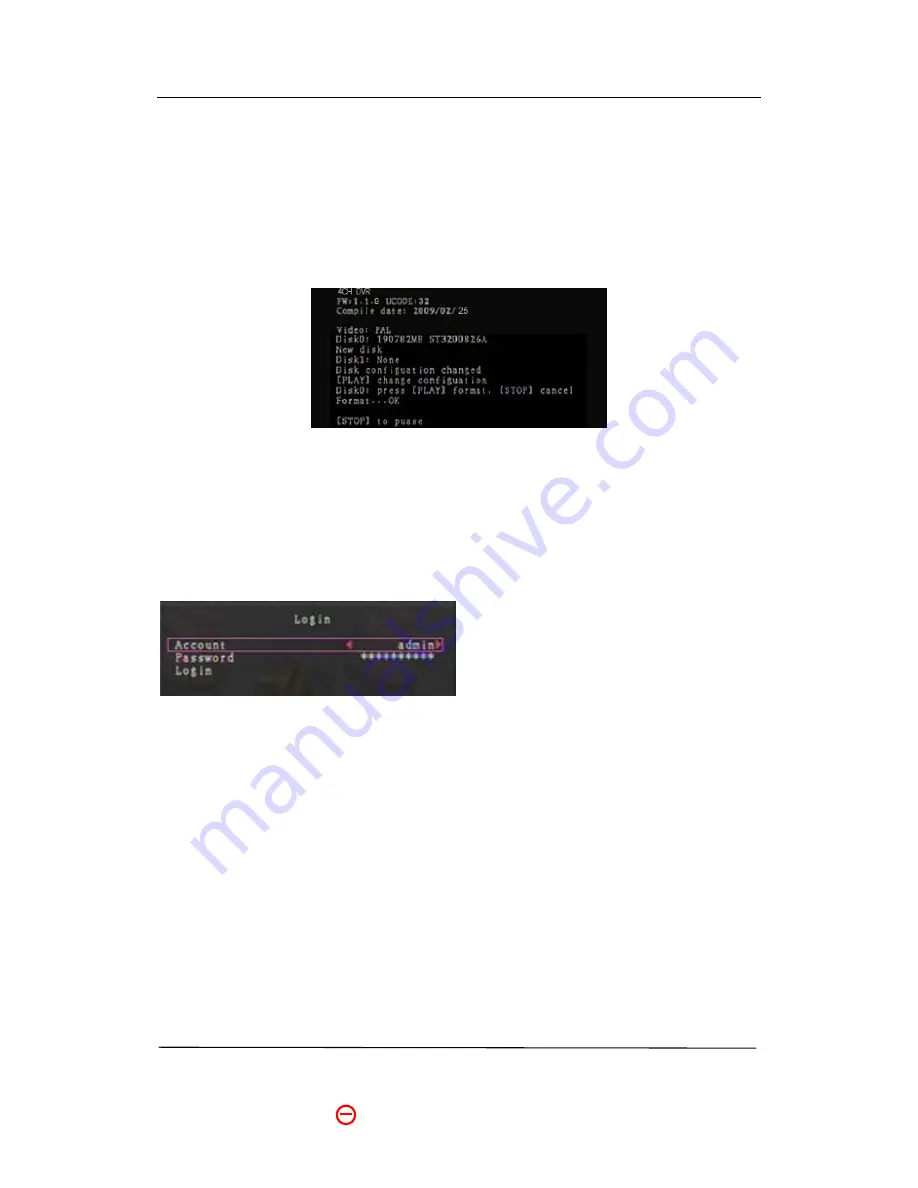
If users install a new hard drive, it will ask you to format the hard drive before the system 

starts to run (

Below Fig

). Choose format option by pressing the “PLAY” button. 


Below is the information of input/output voltage for the power adapter: 

Input: AC 100-240V, 50/60Hz, 1.5A 

Output: DC +12V == 3A 

6. SETUP


After installing a new hard drive on the 

system, user needs to format the hard drive 

first. The system opens to the login window, 

there are three password levels in the 

system, including 

admin

  (highest), 

operator

, and 

guest

  (lowest).  

If the user does not 

login to the system, he can only view live video display. And when the user logs into 

the system, if he doesn’t  operate the system within one minute the system will  

logout automatically.   

The system allows up to four user accounts. The administrator can set up the login name, 

password  and level for each user. The administrator can also add or delete users  as  he 

wants to. (Please refer to Section 

6.6.2

 for Account Setup.)   

The 

admin

 can operate everything. The 

operator

 can operate anything except examining 

user accounts, formatting hard drives  and  modifying  his password level. The 

guest

  can 

Содержание QSD371614C4-250

Страница 1: ...act US Q See Products 8015 E Crystal Dr Anaheim CA 92807 Website http www q see com Customer Service Phone 877 998 3440 X 538 Email cs dpsi usa com Tech Support Phone 877 998 3440 X 539 Email ts dpsi usa com Fax 714 998 3509 Rev 042009 ...

Страница 2: ...6 5 2 Monitor Connection 6 5 3 Camera Connection 7 5 4 Mouse Connection 7 5 5 DVR Power Connection 8 6 SETUP 8 6 1 Camera 10 6 2 Record 11 6 3 Alarm 13 6 4 Screen 15 6 5 System 15 6 5 1 Hard Drive Setup 16 6 5 2 Account Setup 17 6 5 3 Password Setup 18 6 5 4 Clear Account Info 18 6 5 5 Keypad Tone 19 6 5 6 Time Set 19 6 5 7 Event List 19 6 5 8 Firmware Upgrade 20 6 6 Language 20 6 7 Logout 20 ...

Страница 3: ...LAYING BACKED UP VIDEO FILES ON PC 23 10 1 Installing File Player 23 10 2 Program Interface 24 10 3 Button Functions 24 11 APPENDIX 29 11 1 QSD371614 4CH DVR series compatible USB Flash Drives 29 11 2 Specifications 30 11 3 System Connection Diagram 31 11 4 DVR Accessories included 31 11 5 Q SEE Product Warranty 32 Customer Information Card 32 ...

Страница 4: ...multaneous Play Record PAL NTSC Options High Quality Color Video at 50fps PAL or 60 fps NTSC Recording Playback shared by cameras Display Resolution PAL 704 576 NTSC 704 480 Recording Resolution PAL 640 288 NTSC 640 240 Recording Speed PAL max 50 fps Quad NTSC max 60 fps Quad shared by cameras Recording Mode Continuous Motion Detection Time Schedule Up to 8 days continuous recording at 30 fps sett...

Страница 5: ...tc For more details about the DVR menu refer to 6 SETUP The front panel key functions are the same as on the remote control refer to 3 3 Remote Control 3 2 Rear Panel VIDEO OUTPUT Use this port to connect DVR to the monitor VIDEO INPUT Use these BNC ports to connect cameras to DVR system You might need BNC adapter for each CH1 CH4 camera connection if the camera cables have RCA connectors USB PORT...

Страница 6: ... the monitor or move the cursor down CH3 Use this button for full screen display for channel 3 on the monitor or move the cursor left Also user can press this button to reduce value when adjusting parameters CH4 Use this button for full screen display for channel 4 on the monitor or move the cursor to the right Also user can press this button to increase value when adjusting parameters Quad Use th...

Страница 7: ... level press the FWD button again REW This is the rewind button To play the recorded video backward press the REW button NOTE The fast forward and reverse playback speeds will vary depending on the frame rate and record quality settings as well as the number of channels recorded PAUSE To pause the video playback press the PAUSE button Then the video display will be stopped To continue playback pus...

Страница 8: ... it has been shut down and then re initiate the recording process 5 HARDWARE SETUP 5 1 Hard Drive Installation This model uses an internal SATA hard drive and comes with a 250GB hard drive pre installed If you want to install a larger hard drive you would need to remove the cover of the DVR remove the power and data cables from the existing drive and unscrew it from the base then screw in the new ...

Страница 9: ...IDEO IN of your DVR and VIDEO OUT of the camera with video cable and plug in the camera s power adapter to the power feed of the video cable near the DVR 5 4 Mouse Connection If you use a PS 2 mouse connect it to the port below on the system A PS 2 Mouse must be connected to DVR before startup system You can also use a USB mouse with a PS 2 Adapter or attached to the USB port VIDEO OUT on CAMERA V...

Страница 10: ...ive first The system opens to the login window there are three password levels in the system including admin highest operator and guest lowest If the user does not login to the system he can only view live video display And when the user logs into the system if he doesn t operate the system within one minute the system will logout automatically The system allows up to four user accounts The admini...

Страница 11: ...t mouse button to select the Account and input correct account Then left click the Password option and input correct password Then left click Login to enter system There is one factory preset login account password admin 111111 at admin level The user can use it to login to the system for the first time After system boot up hold the right mouse button and there will be option menu on the monitor F...

Страница 12: ...min 111111 at admin level The user can use it to login to the system for the first time After logging in to the system press MENU button to make any changes to the DVR settings and you will see screen on the Menu options on the monitor as Fig b Then press the UP or DOWN key on the DVR front panel or remote control to move the cursor Press SELECT button on the front panel or remote control to chang...

Страница 13: ...hannels will be recorded no matter how many camera channels are displayed on the screen A RECORD FRAMERATE Set the recording frame rate for each channel The higher the recording frame rate the more natural movement you will see while playback You can set each channels frame rate independently For PAL video output format system default value is 12 frames per second with each channel ...

Страница 14: ...se button to click icon to decrease the recording frame rate for each channel If you set the recording frame rate to off the channel will not record B RECORD QUALITY Choose record quality setting among 1 2 3 The best record quality is 3 and the lowest record quality is 1 The higher the record quality is the higher the video image quality is when you playback Higher quality requires more hard drive...

Страница 15: ...ually stop recording during that time Green bar The system will record whenever motion is detected See the following chapter MOTION DETECTION 6 3 Alarm A BUZZER DURATION It sets the buzzer duration time in seconds after an alarm is activated Value options are 05 10 15 20 25 30 CONT OFF in seconds Default is OFF When buzzer duration is cont the buzzer will sound continuously B EVENT REC DURATION Th...

Страница 16: ...ssign the area The keypad and mouse control instructions are below Using keypad or remote control button Press SEL once to pick the area press SEL twice to cancel the area CH1 Up CH2 Down CH3 Left CH4 Right Using Mouse button While holding a left mouse button move the mouse to select deselect or reselect the motion detection area for recording The area only can be selected from up to down and from...

Страница 17: ...rs on the screen before switching to the next channel Values are Off 1 to 10 seconds Default is Off VIDEO ADJUSTMENT You can move the entire video screen up down left and right using this option Keypad usage on the front panel or remote control is below Use CH1 for up CH2 for down CH3 for left CH4 for right Mouse function is below Use the right mouse click button this will display the following ic...

Страница 18: ... system at operator or guest level the menu bar will be displayed as Fig d The user can only modify his own password Please refer to section 6 6 3 for password setup 6 5 1 Hard Drive Setup OVERWRITE ENABLED If you choose Yes recording continues and overwrites previous recording when hard drive is full If you choose No the recording stops when the hard drive is full It won t record until reformat o...

Страница 19: ...nter the right password again 6 5 2 Account Setup Only Administrator can log into the Account Setup Menu the Account Setup allows the administrator to add new users delete existing ones and modify the user s name password and level The system allows up to 4 user accounts Account Password In setup Menu display move the cursor to change the highlighted option to Account and then press SEL button to ...

Страница 20: ...is 111111 All numbers letters and signs in the pane can be used in passwords Press SEL to input value and move the prompt to the option of Enter press SEL to input current password Button function on the front panel or remote control Use CH1 for up CH2 for down CH3 for left CH4 for right Use the same operation procedure to input new password and confirm password When password is changed successful...

Страница 21: ...ey on the DVR front panel or remote control and then press SELECT button to change the numeric value Once you finish setting the time press MENU button Then press DOWN key and SELECT button to apply the new time set Or move the mouse to move the cursor up and down use the left mouse click button to change the numeric value Once you finish time setting use the right mouse button to return Then move...

Страница 22: ...g a USB flash drive you can upgrade the system once you connect the USB flash drive that contains a firmware file CAUTION 1 Do not turn off the system while the system is upgrading Otherwise it will cause the breakdown of the system that will require a special recovery process 2 If there is no hard drive installed in the DVR the system can t be upgrade 3 In order to upgrade the system you must sto...

Страница 23: ...H FUNCTION This is an enhanced playback option which enables the user to manually select a specific starting time for playback Keypad Control In order to playback using time search function press the PLAY button on front panel or remote control Then press SELECT key to change the value of the playback date and start time and press PLAY button again The playback will start from the date time indica...

Страница 24: ...e the USB flash drive formatted and ready before attaching it to the DVR system In order to save the video data to these back up devices you should first start with playback Then press MENU button Use UP key or DOWN key to move the prompt then press SELECT button to set the start time and the end time of the recorded video data that you want to save to the flash drive If you want to setup the end ...

Страница 25: ...ton to continue on the system To view the video files saved on back up devices on the computer you need to use the software provided with this package 9 RECORDING LENGTH Using Video System NTSC Estimated record time basing on 250GB HDD The best record quality is 3 and the lowest record quality is 1 Record Speed REC Quality DATA RATE GB Hour Record Time Hour 60F Sec 3 4 1 61 2 3 2 78 1 2 3 108 30F ...

Страница 26: ...ation Manual 4CH Duplex DVR 24 Select setup option Set up the install directory Execute Start Program Vx4SLPlayer 10 2 Program Interface Double click icon on desktop to run the program 10 3 Button Functions ...

Страница 27: ...us Frame 5 Pause 6 Next Frame 7 Play 8 Fast forward 9 Still Capture 10 Split 1 11 Split 4 12 Volume Scroll Bar 13 Mute On Off 14 Playing Scroll Bar 15 Minimize the window 16 Close the window 1 Open File 2 Fast Reverse 3 Rewind 4 Previous Frame 5 Pause 6 Next Frame 7 Play 8 Fast forward 9 Still Capture 10 Split 1 11 Split 4 12 Volume Scroll Bar 13 Mute On Off 14 Playing Scroll Bar 15 Minimize the w...

Страница 28: ...ection On screen display date time format you can adjust the date time format displayed on screen Show playback time T The playback time will display on screen during play back 4 Press the keyboard F1 or click the right mouse button to select option About Viewer F1 you can see the current version of the program 5 Translate VVF File Format VVF into AVI File Format AVI As shown in the below illustra...

Страница 29: ...computer may not be able to play the file 2 Since this model does not have audio in ports the audio option is not available 6 Capture If you want to save a file in VVF file format VVF on your computer you must make sure the playback view is in pause state Drag playing scroll bar to select start time click the right mouse button to select the option Capture then left click Mark In Drag playing scro...

Страница 30: ...Operation Manual 4CH Duplex DVR 28 The Output Size is the size of output file Left click to setup save path Then left click ...

Страница 31: ...ay However in some cases it doesn t operate normally For example in case of a PC it might not cause any problem under this kind of situation because it is immune to these types of problems However in case of our products they often work better with some drives compared to others These are the flash drives we recommend based on our testing WORKING DEVICE LIST MAKER MODEL SIZE SONY MICROVAULT SOK US...

Страница 32: ...rding at 30fps with 250GB HDD Hard Drive Capacity Up to 1 0 TB SATA interface HDD 1 USB port File backup Flash Drive and software upgrade PS 2 Mouse PS 2 mouse and USB mouse with adapter 38KHZ IR Remote Control Yes Power Input 100 240VAC DC 12V 3A Dimension LxHxW 10 x 8 5 x 4 75 in 250 x 218 x 42 mm ITEM Cameras QSC7614 6mm QSC7614W 3 6mm Image Sensor Color OV CMOS Horizontal Resolution 400TVL Min...

Страница 33: ... Note We STRONGLY recommend that you plug the DVR and cameras into a Transient Voltage Surge Protector UL 1449 rating Look for a clamping voltage of 330 or lower Joule rating of at least 400 and a response time of 10 nanoseconds or less 11 4 DVR Accessories included ...

Страница 34: ... and conditions in on which the equipment operates e g improper power environment temperature humidity and lightening strike etc that cause equipment damage 3 Damage caused by acts of nature earthquake and fire etc 4 Equipment damage caused by the maintenance of personnel not authorized by our company 5 Product sold over 12 months ago In order to provide various services to you please complete reg...

Страница 35: ... questions Contact Us Mailing Address Customer Service DPS Inc Phone 877 998 3440 x 538 8015 E Crystal Dr Email cs dpsi usa com Anaheim CA 92807 Website Tech Support http www q see com Phone 877 998 3440 x 539 Fax Email ts dpsi usa com 714 998 3509 ...

Отзывы: