1.
From the Main menu, select CAMERA to
setup the name display (up to 8 characters)
and position of each channel (camera).
2.
Select COLOR SETUP to adjust the image
brightness, saturation, contrast and hue
settings for each channel (camera).
3.
Select LIVE MODE and/or RECORDING
MODE to choose preview mode for the
channel (camera).
Choose MENU by right clicking on the mouse
or by pushing the MENU button on the
DVR front panel or remote control.
The Main Menu offers the following
Setup Features:
CAMERA:
Setup name display, position, image view, and record quality of each channel
(cameras).
RECORD:
Enable recording & audio, set resolution & quality, recording mode and file size.
NETWORK:
Setup Network access (Remote Internet Monitoring).
SEARCH:
Find files for playback and backup.
DEVICES:
Manage & Format hard drive and USB devices, setup alarms, PTZ cameras,
mobile phone access and motion detection.
SYSTEM:
Setup time, date, password, and video mode.
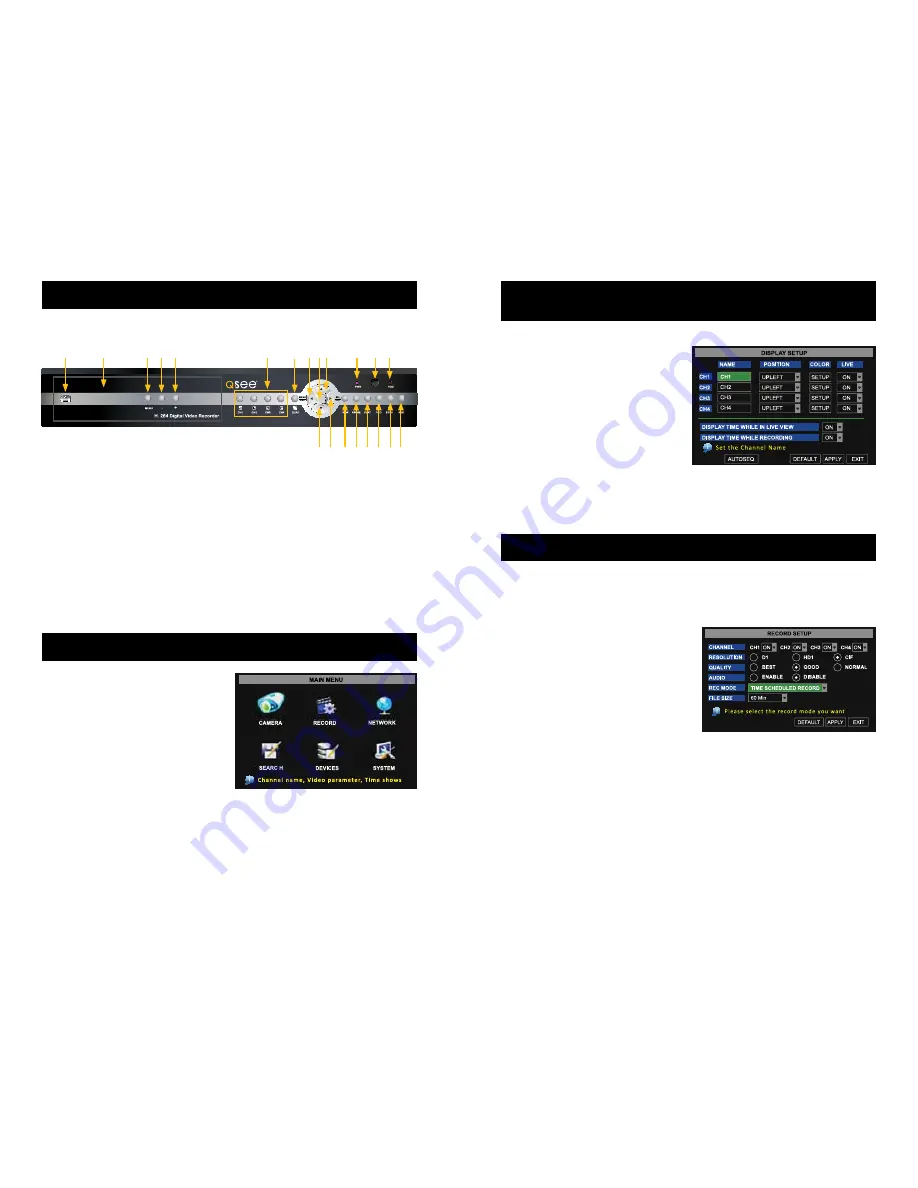
dVR ContRols
settinG UP CameRas FoR VieWinG
and ReCoRdinG
aCCessinG the dVR menUs
to staRt ReCoRdinG
1.
Enter/Exit Display screen
2.
7” LCD screen for Monitoring
3.
show Menu
4.
scroll Down in Menu
5.
scroll Up in Menu
6.
Numeric Keys and Channel select
7.
View All Channels
8.
Menu/Escape/Left
9.
Enter or Exit PTZ
10.
Up Button
11.
Power LED
12.
IR Receiver
13.
Hard Drive LED
14.
Down Button
15.
select/Edit/Right
16.
Reverse/PTZ Focus
17.
Pause/Auto sequence
18.
Play
19.
Forward
20.
stop Recording
21.
Record
FRont Panel
1
2
3 4
5
6
7 8 9 10
11
14 15 16 17 18 19 20 21
12 13
This System offers 3 recording modes:
A.
Manual
B.
Time Schedule
C.
Motion Detection
From the main menu, select RECORD to enter into the Record Setup menu (shown below).
Using higher resolution and quality settings results in better video quality, but takes up more
space on the hard drive. Choosing lower settings result in lower video quality, but takes up
less space on the hard drive.
AUDIO:
Select ENABLE to record sound in addition to video. (will have audio output in
playback mode) Select DISABLE, to turn sound off. (no audio output in playback mode)
REC MODE:
Sets DVR to record on Manual, Motion Detection & Time Schedule Recording.
PACK TIME:
Choose the time length of all recorded files: 15, 30, 45, 60 min. (Max = 60 min)
CHANNEL:
Select ON to enable video recording
from the respective camera. Select OFF to
disable video recording.
RESOLUTION:
D1=704x480, HD1=704x240,
CIF=352x240
QUALITY:
Best, Good, Normal


