Q-SEE QUICK INSTALLATION GUIDE
M
M
O
O
D
D
E
E
L
L
N
N
U
U
M
M
B
B
E
E
R
R
Q
Q
R
R
4
4
0
0
4
4
-
-
4
4
1
1
4
4
7 |
P a g e
Motion Detection Recording:
From the Record Setup screen, set the Rec Mode to “TIME SCHEDULE RECORD” and click “SCHEDULE” in green. This will
display the Schedule menu (See picture above). The options are: All, CH-1, CH-2, CH-3, and CH-4 respectively. The
channel you select will be highlighted in “Blue”, and the unselected channels will be “Grey. Click on the red ALARM
option box then click on the boxes for the days and times that you want to record using this option on the timeline. You
can use the [From – To] pull-down menus and COPY button to copy settings from one day to another day, or all days.
Your DVR will record on Motion Detection. Click APPLY to activate your customized schedule, and then go to the Devices
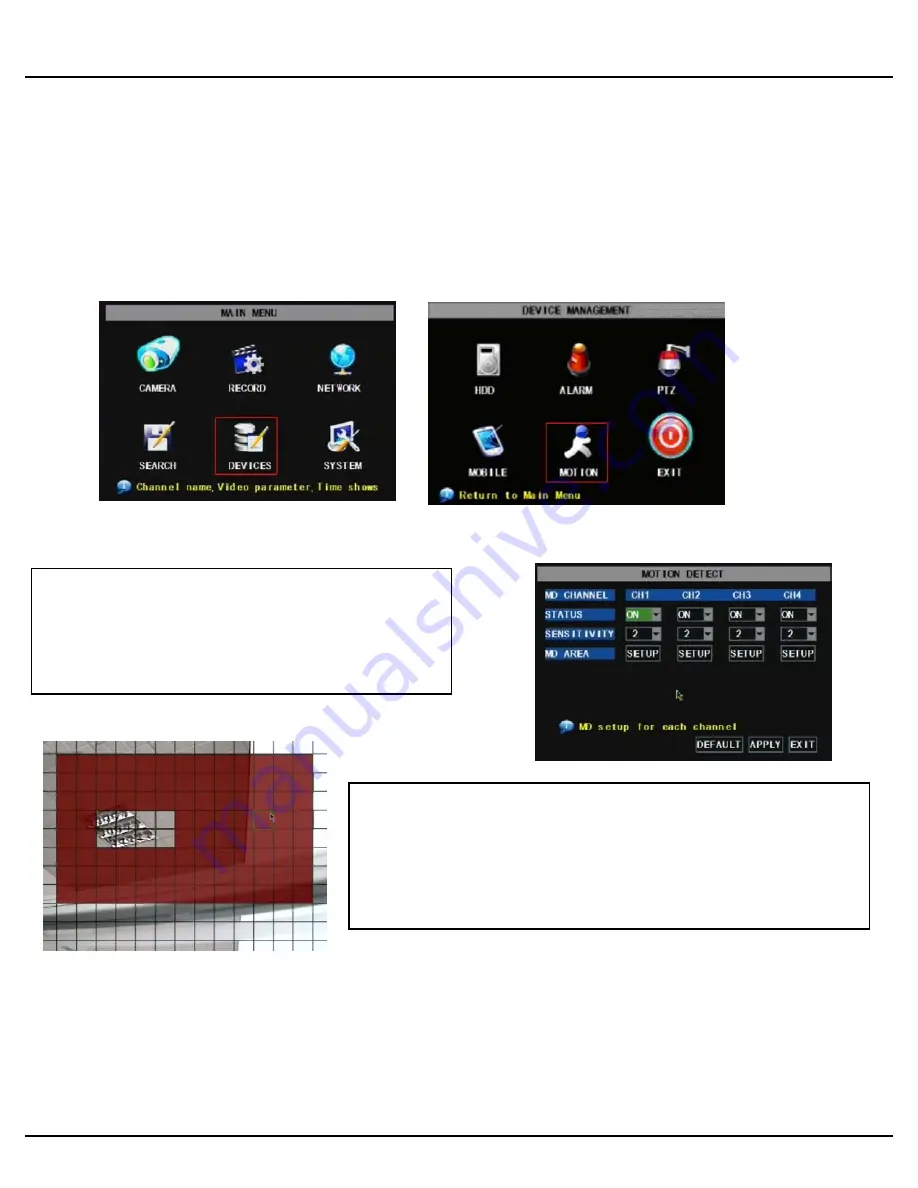
option (red box in first below picture) and select the Motion Option (red box in second picture below), which will display
the Motion Detect Box.
The Motion detection Menu has three sections, including
Channel Status, Sensitivity and Motion area.
STATUS
: This option allows you enable motion detection on
any channel.
SENSITIVITY:
This option allows you to set sensitivity level
of motion detection from 1 to 4, with 4 being the highest.
Next, click on the MD AREA SETUP button, which will display the picture on
the left. This option allows you to select the area you want to be sensitive
to motion. The area in red is sensitive to motion. You can set this area by
using the mouse or REV, FWD, and SEL keys on the front panel. Once you
have set the area, right click with the mouse or push the ESC key to save
the setting. After you have set all of the cameras, click on the Apply button
to save the settings.


