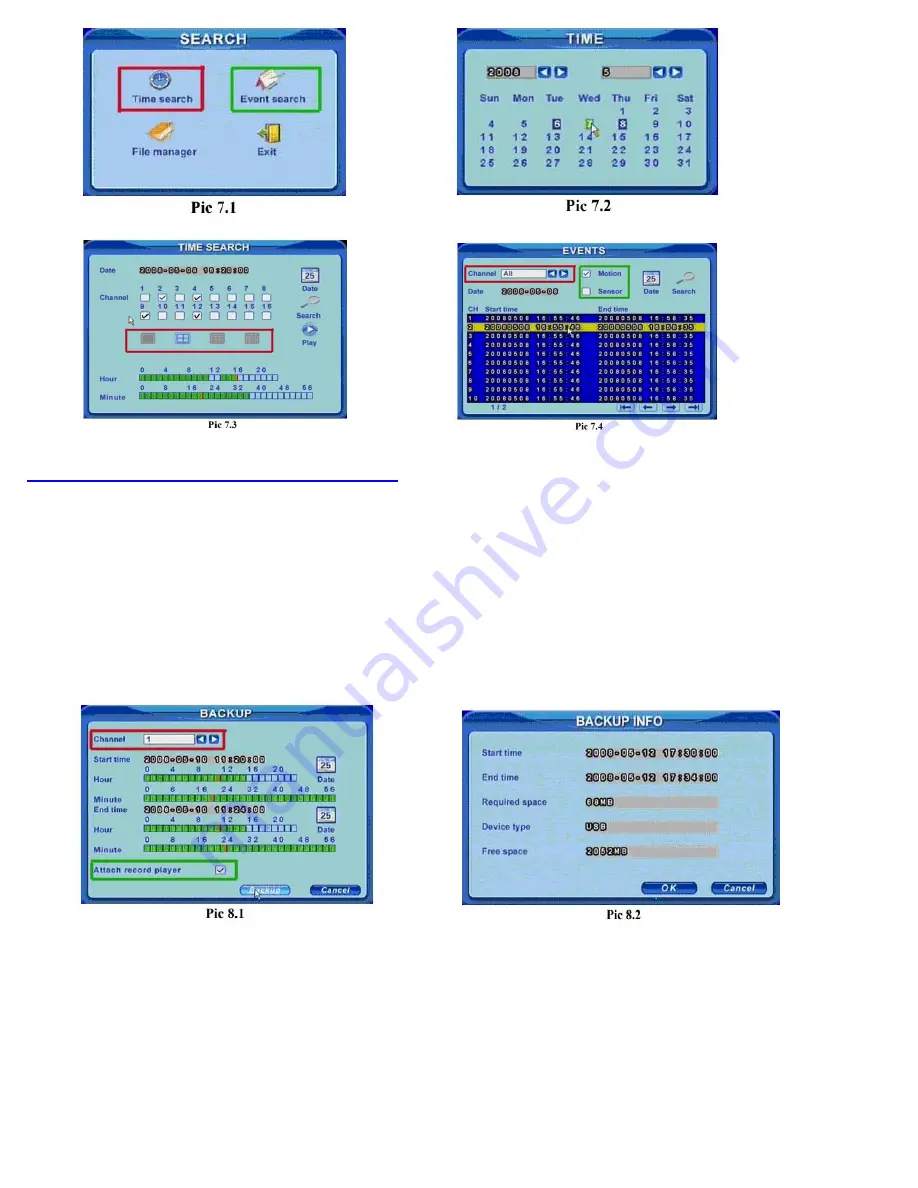
Part 8 – Setting up the DVR to Backup Files
Insert a flash drive into the USB port on the DVR, if you have installed a DVD burner into the DVR you can record to it as well. Press the
BACKUP button on the DVR (number 4 on the Front Panel in Part 4), if the system is password protected it will ask you to enter
a user name and password. This will bring up the BACKUP box shown as Pic 8.1. Choose the camera (RED box in Pic 8.1), use the
Direction Keys and ENTER button on the DVR to select the start and end time.
Click the Date button to change the date. If you put a checkmark in the “Attach record player” option, it will save a file player along
with the backed up files. With this player users can make time and event searches when checking the backup. Click Backup button.
The BACKUP INFO window will appear as shown in Pic 8.2. Press the OK button. The DVR will begin to write the video files you have
selected to the backup device. A progress bar will be displayed and when the backup is completed a message box will appear with
“Backup Complete”.
NOTE: If you stop recording while backing up the files, the backup will go faster.


