Q-SEE QUICK INSTALLATION GUIDE
M
M
O
O
D
D
E
E
L
L
N
N
U
U
M
M
B
B
E
E
R
R
Q
Q
C
C
4
4
0
0
1
1
0
0
8
8
-
-
8
8
1
1
8
8
/
/
4
4
1
1
8
8
5 | P a g e
2. Scheduled Recording:
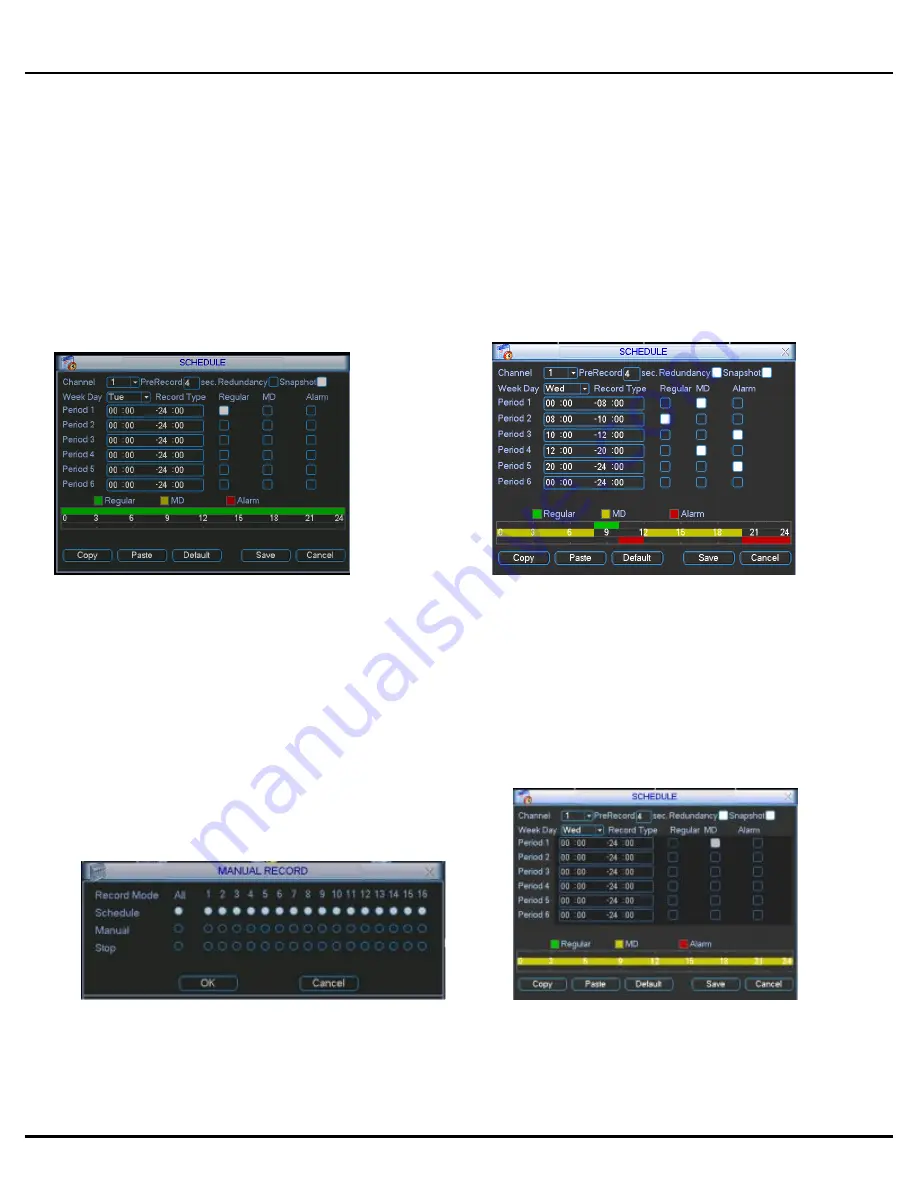
To record on a schedule you would go to the Main Menu, Manual Record and select the cameras on the
Schedule line instead of the Manual line in the Manual Record screen shown in Pic 5.1, then go to the
Main Menu, click on Settings, and select Schedule. This will bring up the screen shown in Pic 5.3. You can
set up a schedule for all channels or different times for different cameras. You can also set up the same
schedule for all days, or set up different schedules for different days. You can also setup a mixed schedule
where you have some cameras recording all of time during certain times and on motion or alarm detection
during others. Pic 5.4 shows a mixed schedule were some the cameras are set to record all the time
between 8 and 10am, record on motion detection between 12am and 8am and 12pm to 8pm and then on
external alarm from 10am to 12pm and 8pm to 12am. The time line on the bottom of the screen shows
how the day is broken up by the recording methods.
Pic 5.3
Pic 5.4
3. Motion Detection Recording:
There are 3 steps to setting up the DVR to record on motion. The first is to go to the Main Menu, Advanced,
Manual Record option which will display the screen shown in Pic 5.5. You can select the All option on the
Schedule line to record on all cameras or you can select the cameras that you want to schedule motion
recording on. Next you would go to the Main Menu, Setting, Schedule option to setup the schedule for when you
want the cameras to record on motion. This is shown in Pic 5.6 where Channel one is scheduled to record 24
hours on Wednesday. Set the schedule for all cameras on all days that you want them to record on motion.
Pic 5.5
Pic 5.6


