background image

18

19

CHAPTER 4  MAIN MENU SETUP

Spot Tab

This allows select feeds to be viewed on a separate monitor that is connected to the DVR but 
may be in another room, for example. There will be no menu access on this auxiliary display.

PICTURE 4-12

PICTURE 4-13

PICTURE 4-14

Only one channel can be displayed at a 
time on this monitor. You can choose which 
channels (each channel is a “group”), the 
order and their dwell time. The left and right 
arrows allow you to move to the next group. A 
channel can appear in more than one group. 

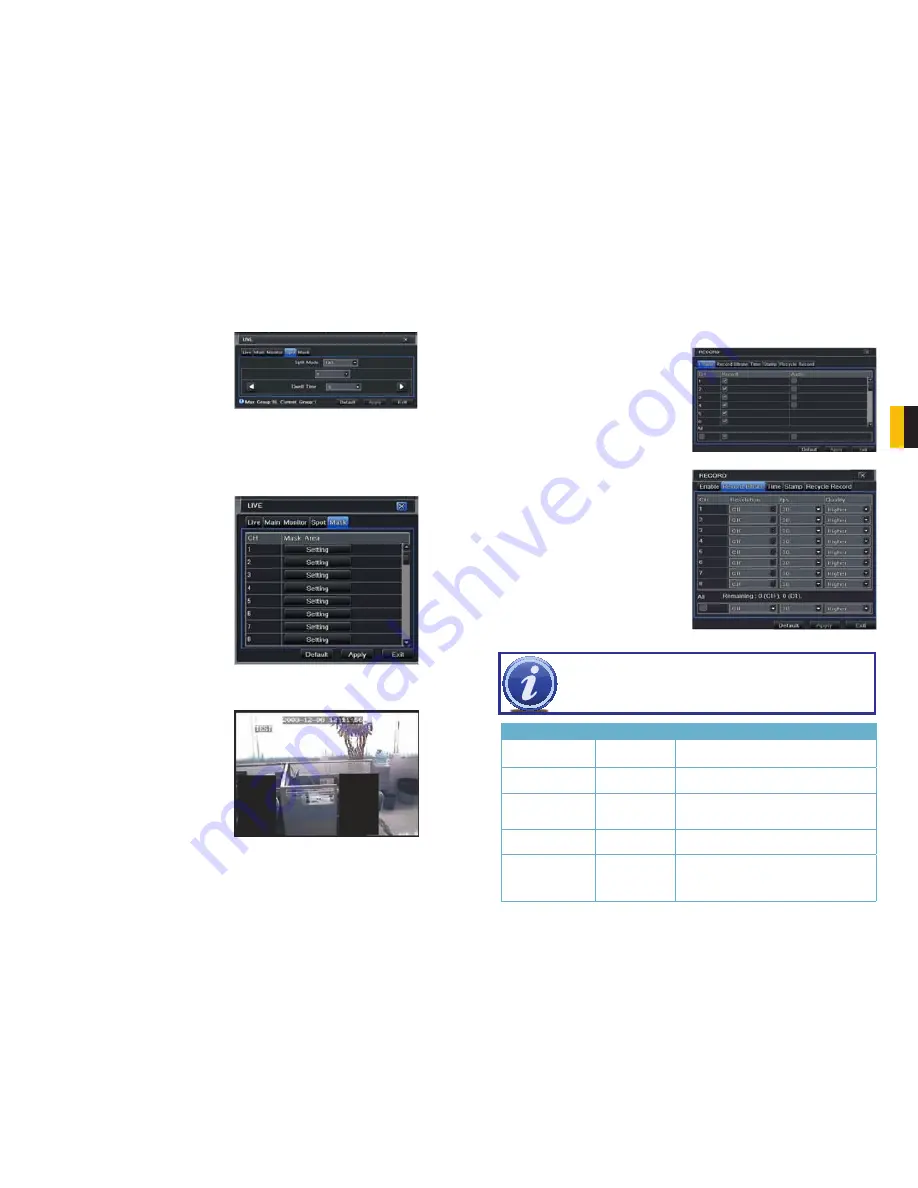
Mask Tab

Set up masks on individual cameras to block out select areas on each screen. This is to grant 
privacy in situations when other users may be able to view the camera feeds and you wish to 
restrict viewing of certain areas or activities.

Click on the 

Setting

 button next to a given 

camera to apply a mask to its view.

Up to three areas may be masked in an 
image. Simply click and drag to cover the 
area. To delete, double-click on a mask.

Right-click to exit the screen, your masks will 
be saved.

The masks will appear on that channel’s 
image in the live area as well as on 
recordings.

4.3 RECORD CONFIGURATION

The QT528 is configured to record in high-resolution D1 format at real-time rate of 30 FPS for 
smooth, detailed video on all channels. Depending on your needs, you may choose to change 
the resolution or frame rate of each channel independently or all together. Configure the 
recording settings for your cameras. There are five sets of options; 

Enable

Record Bitrate

Time

Stamp

 and 

Recycle Record

.

Enable Tab

Select some or all of the cameras to record 
to the DVR. You can set up to four cameras 
to record audio in addition to video. You can 
globally select all the cameras regardless of 
their individual settings by selecting the 

All


box below each column.

Record Bitrate Tab

Set up the resolution, quality, encoding, 
quality and maximum bitrate of the video 
stream according to your needs. You can set 
each camera individually, or globally by using 
the 

All

 function at the bottom of the window.

PICTURE 4-15

PICTURE 4-16

Parameter

Options

What it Means

Resolution

D1, CIF

D1 = Full TV resolution, CIF = 1/2 D1. D1 takes more 
room on the hard drive than CIF

FPS

1-30

Frames per second. More frames makes for smoother 
video but takes up more room on the hard drive.

Encode

VBR, CBR

Variable Bit Rate versus Constant Bit Rate. VBR 
provides better compression, but issues may arise 
when streaming for remote viewing.

Quality

Lowest – Highest

Only available when VBR is selected. The higher the 
quality, the more drive space required.

Max Bitrate

256-2084kbps

 Your network may not have enough bandwidth to 
handle maximum rates from all of your cameras. 
Adjusting these settings to suit your network will 
improve performance and on-screen image quality.

NOTE!

  While  each  camera  can  have  its  resolution  and  frame  rate  set 

independently of the other cameras, the DVR may limit the frame rate available 
to a camera based on the settings of other cameras.

Содержание Prosumer QT528

Страница 1: ...1 User Manual QT5 Series Network DVR With Real Time D1 Recording MODEL QT528 QT526...

Страница 2: ...to warranty and technical support benefits you ll receive notifications of product updates along with free downloadable firmware updates for your DVR Register today at www Q See com Please see the ba...

Страница 3: ...nformation 40 Online User Information 41 6 2 Manual Alarm 41 6 3 Disk Management 41 6 4 Upgrade 42 6 5 Logoff 42 6 6 Shut Down 42 7 REMOTE SURVEILLANCE 43 7 1 Network Access 43 7 2 Remote Internet Acc...

Страница 4: ...water If this product accidentally gets wet unplug it and contact an authorized dealer immediately n Keep product surfaces clean and dry To clean the outside case of the DVR gently wipe using a lightl...

Страница 5: ...pports deleting and locking the recorded files one by one Supports remote playback in Network Client through LAN or internet INTRODUCTION CHAPTER 2 ALARM 1 channel alarm output and up to 16 channel de...

Страница 6: ...t clicking on the screen with the mouse will display the CONTROL BAR on the bottom of the screen Screen Display Mode Dwell Volume Snapshot Playback PTZ Record Color Zoom Move Control Bar Menu The func...

Страница 7: ...ar fashion to those of a conventional DVR or other video playback device but with a few additional commands available to you Previous Next Record Moves to the prior or following recorded event respect...

Страница 8: ...NNEL SELECT menu Users can check any or all channels between 1 and 16 depending on your model to display the live feeds Click the box to confirm the settings before closing the CHANNEL SELECT menu by...

Страница 9: ...ep your system s clock current by allowing it to occasionally receive updates from the selected server 4 2 LIVE CONFIGURATION Live configuration includes four submenus Live Main Monitor Spot and Mask...

Страница 10: ...all together Configure the recording settings for your cameras There are five sets of options Enable Record Bitrate Time Stamp and Recycle Record Enable Tab Select some or all of the cameras to recor...

Страница 11: ...re space available PICTURE 4 19 PICTURE 4 20 PICTURE 4 21 PICTURE 4 22 PICTURE 4 23 4 4 SCHEDULE CONFIGURATION Configure your camera to record at specific times based on time of day motion detection o...

Страница 12: ...whether a signal will be sent via the ALARM OUT port MOTION Motion Tab As with the Alarm function above it incorporates hold time and can trigger procedures Select which cameras you wish to start rec...

Страница 13: ...s that you wish to occur in the event that a video input is lost Both Alarms and PTZ events can be scheduled as in the Sensor menu above OTHER ALARM In this menu you can set the DVR to alert you to a...

Страница 14: ...sword The TEST button will verify that your information is correct NOTE The default value is 80 If port 80 is already occupied by another device on the network then another port will need to be select...

Страница 15: ...s Enter your new address This will appear on alert e mails sent from the DVR Password Enter the password you created for this account Remember it will be case sensitive Receive Addresses You may set u...

Страница 16: ...ton Modify a user s password The admin password may be changed The default is 123456 4 8 PAN TILT ZOOM PTZ CONFIGURATION If you are connecting optional Pan Tilt Zoom cameras the controls are set from...

Страница 17: ...all the way to the top of the order Move a preset point up one position in the list Move a preset point down one position in the list Move a preset point to the bottom of the order Cruise Selecting a...

Страница 18: ...obile or external storage devices and recorded onto the DVR PICTURE 4 50 4 10 FILE SEARCH PLAYBACK AND MANAGEMENT Access the recordings on the DVR play them back and backup the recordings to an extern...

Страница 19: ...and the word Writing disappears 2 3 4 1 6 7 8 5 SEARCH Search Time Search Image Event Search File Management Search Delete Delete Lock Lock Save Save Save All Save All Time Search Image Event Search F...

Страница 20: ...times total size of the files and whether you have space available on the receiving storage media You can select which type of device you are recording to as well as what type of file you will be crea...

Страница 21: ...the list of online users Disconnect The Administrator can disconnect a selected user from the DVR That PC will not be able to access the device for five minutes thereafter 6 2 MANUAL ALARM This displ...

Страница 22: ...ft power down of the DVR This DVR can be accessed remotely via a connected network and over the Internet 7 1 NETWORK ACCESS Accessing the DVR from a computer or computers attached to the same router a...

Страница 23: ...om remote computers STEP 2 Type ipconfig at the prompt Red arrow in Picture 7 6 to access router settings STEP 3 Write down the IP4v address Blue arrow as well as the gateway and subnet mask numbers G...

Страница 24: ...different than any other device attached to the same router If the fourth set of numbers in your IP4v address is a single or double digit number then you can enter any three digit number up to 254 If...

Страница 25: ...E 7 12 7 3 PORT FORWARDING Port Forwarding allows computers and devices outside of your network to communicate with the DVR You will need to forward ports 80 and 6036 from the attached router to the I...

Страница 26: ...PICTURE 7 15 STEP 6 Click on the Network icon Red box in Picture 7 18 STEP 7 This window will show the 1 IP Address 2 Subnet Mask and 3 Gateway assigned to the DVR by the router Write down this inform...

Страница 27: ...load a FREE router detection program STEP 1 Go to http www pcwintech com shanes toolbox STEP 2 Click on Detect Multiple Routers to begin the download STEP 3 Unzip the application to install it STEP 4...

Страница 28: ...rwarding in the program list Click on the program to launch it STEP 3 Once Simple Port Forwarding has launched select your router from the list The default Router IP and Login information will automat...

Страница 29: ...If for some reason a port or ports that you forwarded are not listed in the Router and if you see a message in the Scripts list on the left side of the window stating that the port already exists Red...

Страница 30: ...he Bridge setting instead of DMZ STEP 1 Login into Router 1 by putting the IP of Router 1 into the Internet Explorer browser as in the example shown in Picture 7 35 where the IP address of Router 1 is...

Страница 31: ...om of the screen STEP 3 The next page will ask you to create a domain name Domain names must begin with a letter a z or a number 0 9 and cannot contain a hyphen Once you ve decided upon a name click o...

Страница 32: ...ssage informing of a codec that is missing or not installed This conflict can be resolved by turning off User Account Control UAC Windows Vista 1 Open the Control Panel accessible by clicking on the W...

Страница 33: ...the Sites button PICTURE 7 49 PICTURE 7 50 PICTURE 7 51 STEP 7 Uncheck the Require server verification https for all sites in this zone button STEP 8 Type the DVR s IP address obtained during Network...

Страница 34: ...R from your computer please proceed to Section 7 7 Using the Remote Access Software 7 6 ACCESSING THE DVR THROUGH SAFARI CONFIGURING SAFARI The Safari Client WebKit Plugin can only operate in 32 bit f...

Страница 35: ...s IP address or DDNS address The browser window will ask you to download the plugin You receive this message only when you access the DVR with this computer for the first time or after the DVR s firmw...

Страница 36: ...r name and password for this computer to give the program permission to install PICTURE 7 61 PICTURE 7 62 6 The installation window will let you know when the software has been successfully installed...

Страница 37: ...mpted to download a webcam program to access the cameras with the following message in the information bar at the top of the page This website wants to install the following add on WebClient cab from...

Страница 38: ...stination for recordings made from within the Remote Live Viewer as well as how many audio channels if available are recorded in addition to which camera channels PICTURE 7 69 Screen Display Mode Clic...

Страница 39: ...the image Click and drag to move within the image Double clicking will exit this mode Right clicking will return to the main interface Master Stream Sub stream All to Master Stream All to Sub stream E...

Страница 40: ...section STEP 3 A highlighted date in the Calendar Item 2 in Picture 7 72 indicates that data was recorded on that date STEP 4 Select which channels data to display Item 3 in Picture 7 72 STEP 5 Selec...

Страница 41: ...ble click on an item to open the Playback window PICTURE 7 75 File Management This allows you to locate an event and lock unlock or delete it from the record Lock Select a recording from the File List...

Страница 42: ...cking on the Config tab in the Main Menu of the Remote Live Viewer will change the display to where the user can set up or alter the operating parameters of the DVR Available functions include the abi...

Страница 43: ...EP 3 Input the DVR s IP address or DDNS domain STEP 4 You will be asked to download the software PCam Click on the software name to open the download dialog pop up STEP 5 Click Yes to start downloadin...

Страница 44: ...ace Live View Open mobile Live View Image View To check pictures snapped in the Live View mode System Setting Login setting and alarm setting Help Function indication and help PICTURE 8 6 PICTURE 8 7...

Страница 45: ...RE 8 14 STEP 1 Open the App Store function on your device STEP 2 Select the Search function and search for SuperCam STEP 3 Click on SuperCam to open the introduction Click on the FREE button and it wi...

Страница 46: ...interface STEP 2 Input the DVR s IP address or DDNS domain name User Name and Password Check the Remember Server box to save this setting The User Name and Password are the same as used on the DVR Th...

Страница 47: ...te speed of the PTZ H Reverse Inverts PTZ control up is down V Reverse Inverts PTZ control left is right PICTURE 8 24 PICTURE 8 25 PICTURE 8 26 PICTURE 8 27 Image View Interface Record Playback Interf...

Страница 48: ...Sensor or Motion event occurs Shake Alarm If turned on this will cause the device to vibrate when a Video Loss Sensor or Motion event occurs Information View Interface This presents information on the...

Страница 49: ...eeded to access and control your system Clicking on the help icon will list the functions as well as how to use them They are also defined below Button Function Button Function Playback Playback recor...

Страница 50: ...ction or connections if you are remotely monitoring multiple systems Button Function Add a server Modify a server connection Delete a server Return to Main Menu Information View This presents informat...

Страница 51: ...lease check the following Verify that you have a good connection to your cellular network Verify that you can access the DVR from a remote computer Modify your BlackBerry s browser configuration STEP...

Страница 52: ...ccess and control your system Button Function Button Function Image Image View Log Record log Server List Device list Settings Software settings Live Live view Information Device information view Help...

Страница 53: ...ognize that you may wish to upgrade or replace your drive in the future so this DVR is designed to make installation and replacement easy for the average user It should be noted that while this is the...

Страница 54: ...a for calculating the required disk space is Total Recording Capacity Used space per hour MB h x Recording time hour x number of channels Example A customer is using the NTSC format 30 frames per seco...

Страница 55: ...e DVR starts and displays please wait all the time a First possible reason hard drive power cable and or data cable are not securely connected Solution Please check the cable connections and make sure...

Страница 56: ...CTURE A 3 A 2 SPECIFICATIONS Parameter QT528 QT526 COMPRESSION Compression Format Standard H 264 Baseline VIDEO Video In Composite 1 0V p p 75 BNC x 8 Composite 1 0V p p 75 BNC x 16 Video Out COMPOSIT...

Страница 57: ...extreme environmental temperatures humidity lightning and sudden surges of electricity 3 Damage caused by acts of nature e g earthquake fire etc 4 Equipment damage caused by the maintenance of personn...

Страница 58: ...114 Digital Peripheral Solutions Inc 8015 E Crystal Drive Anaheim CA 92807...

Отзывы: