


2.0 Points of attention when installing:
•
The Showersave®QB1 should be mounted vertically both from
frontside as from the side
•
The Showersave®QB1 is a device and should therefore be
mounted easily accesable, so that it can be easily installed and
uninstalled
•
Before the freshwater connection a non-return valve and a
shut-off valve should be installed (type EA) (see afb.1 page 5)
•
The Showersave®QB1 may not be mounted in an area where
the temperature normally is higher than 25 °C
•
The Showersave®QB1, the water pipeline and the connections
may not be inslulated
•
The waterconnections should be made with straight thread, so
not with conical thread
•
Hemp may not be used on the connections
•
The tightening moment of the connection may not exceed 120
Nm (Tip : use a counter key)
•
The label with the serial number and technical information
may not be removed and should stay readable
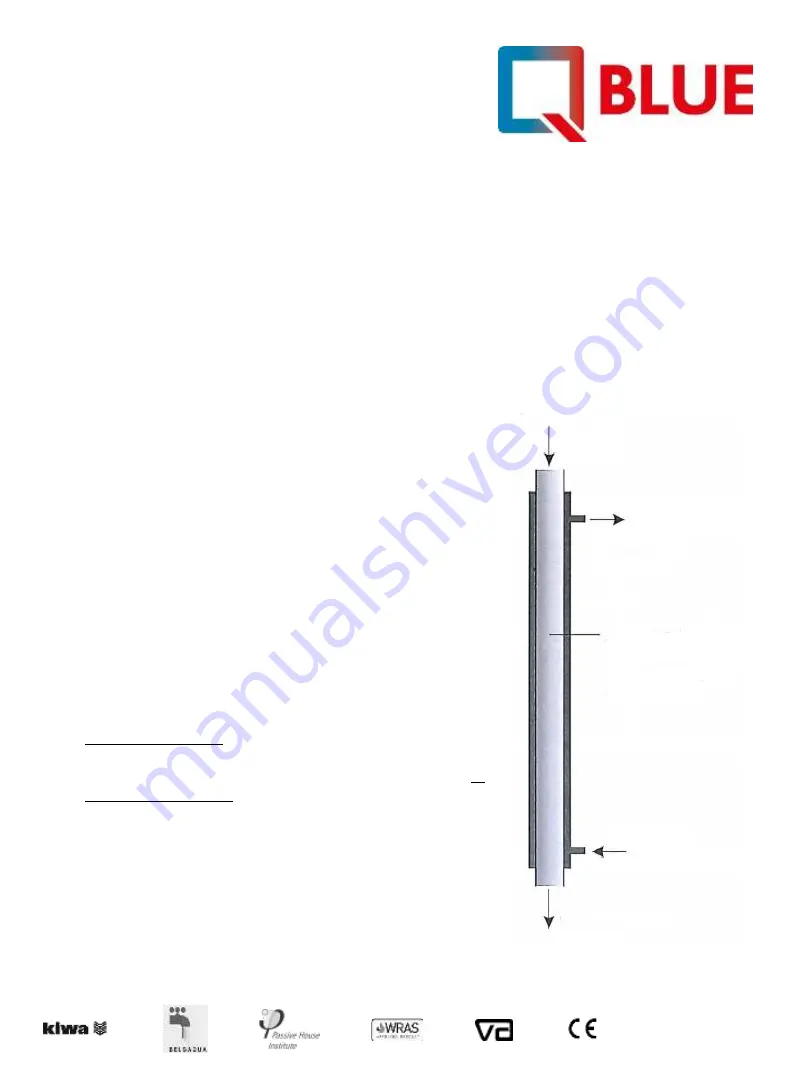
fig.2
Page 3
Waste water to
drain
Pre heated tap
water
Incoming (cold) tap
water
Shower waste
water flows in a
thin film along the
wall of the waste
water pipe
Shower waste water
Showersave®QB1-21 (heatexchanger)
QB1-16
QB1-12
1.3 Maintenance and cleaning
Generally no maintenance is required. Efficiency can decrease as a result of dirt accumulating on the inside of the
Showersave®QB1. However, the waste water from the showersave flows at a high speed (>1m/s) along the inner
pipes wall. This is comparable to the water speed in a dishwasher. The water flows through the pipe in 2 seconds
and therefore no dirt will accumulate (normally).
If, for what reason, dirt accumulates, then a soap based cleaning agent can be used to flush the pipe. Cleaning
agents based on scouring or polishing agents are not allowed, because they can stik to the wall of the pipe and
reduce efficiency.
Connecting a wash basin to the Showersave®QB1 is not recommended as shaving gel and toothpaste are very
sticky and could adhere to the wall of the inner pipe.