background image

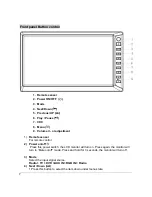
Front panel Button contro


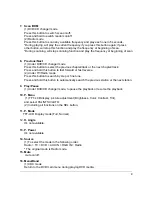
1. Remote sensor 

2.  Power ON/OFF  (

3. Mode  

4. Next/Down (

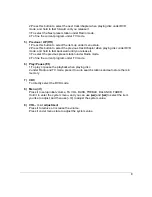
5. Previous/ UP (

6.  Play / Pause (

7. CDC 

8. Menu ( ) 

9.  /- or adjustment 


1) 

Remote sensor


For remote control. 

2) Power 

on/off   


Press this power switch, the LCD monitor will turn on. Press again; the monitor will 

turn to “Mute on/off” mode. Press and hold for 3 seconds, the monitor will turn off. 


3) Mode 


Select the input signal source.


Radio > TV > DVD >AUX IN >RGB IN > Radio 

4)  Next / Down (

1.Press this button to select the item down under menu state.  

Содержание View PL2DNTV7

Страница 1: ...2 DIN TFT LCD Monitor with TV Radio tuner PL2DNTV7 Owner s manual Please read it before using this equipment www pyleaudio com ...

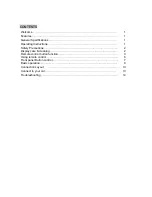
Страница 2: ...ications 1 Operating Instructions 1 Safety Precautions 2 Display care cleaning 2 Remote control button function 3 Using remote control 6 Front panel Button control 7 Basic operation 9 Connection Layout 13 Connect to your car 13 Troubleshooting 14 ...

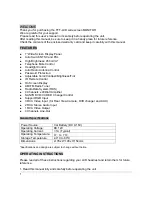
Страница 3: ...ness Tint IR Remote Control On Screen Display AM FM Radio Tuner Radio Data System RDS 4 Channels x 40Watt Amplifier SANYO DVD VCD CD Changer Control Support RGB Input 3 RCA Video Input for Rear View Camera DVD changer and AUX 2 RCA Stereo Audio Input 1 RCA Video Output 4 Channels Line Out General Specifications Power Source Car Battery DC 9 16V Operating Voltage DC 12V Operating Current 1A Typical...

Страница 4: ... the monitor is used soon after switch on the heater moisture may form on the unit Turn off the unit immediately Failure to do so may cause the internal components to short Allow the unit to rest for about one hour to allow the condensation to disappear before continue operation 7 In extremely cold temperatures the movement of the picture may be slow and the picture may be dark It is not a malfunc...

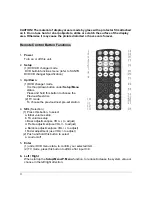
Страница 5: ...r Setup Menu status Press and hold this button to choose the Previous Next disc 2 TV mode To choose the previous next pre set station 4 SEL Selection 1 Press this button to select a Initial volume setup b TA volume setup c Bass adjustment use VOL to adjust d Treble adjustment use VOL to adjust e Balance adjustment use VOL to adjust f Fader adjustment use VOL to adjust 2 Push and hold this button t...

Страница 6: ... track Press and hold this button to fast forward or fast reverse 2 Under TV Radio mode Press this button to search by step or fine tune Press and hold this button to automatically search the previous station or the next station 9 Play Pause 1 Under DVD CD changer mode to pause the playback or resume the playback 10 P Menu 1 TFT LCD display picture adjustment Brightness Color Contrast Tint and sel...

Страница 7: ... current band M1 M6 step 5seconds 20 Stop 1 CDC mode To stop playback 21 Audio 1 CDC mode To select audio language when playing DVD disc 2 Radio mode To select stereo mono 22 Title Under CDC mode to display DVD title during playing DVD media 23 Sub Title Under CDC mode to select sub title language during playing DVD media 24 Angle It s only available when playing DVD disc which recorded some pictu...

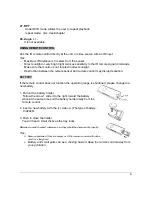
Страница 8: ...n BATTERY If the remote control does not function the operating range is shortened please change to a new battery 1 Pull out the battery holder Follow the arrow 1 slide it to the right toward the battery while at the same time pull the battery holder away from the remote control 2 Insert a new battery with the side up The type of battery Crd2025 3 Push to close the holder You will hear a small cli...

Страница 9: ... sensor For remote control 2 Power on off Press this power switch the LCD monitor will turn on Press again the monitor will turn to Mute on off mode Press and hold for 3 seconds the monitor will turn off 3 Mode Select the input signal source Radio TV DVD AUX IN RGB IN Radio 4 Next Down 1 Press this button to select the item down under menu state 7 ...

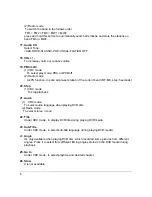
Страница 10: ...you release it 3 To select the previous preset station under Radio mode 4 To fine the current program under TV mode 6 Play Pause 1 To play or pause the playback when playing disc 2 under Radio and TV mode press it to auto search stations and auto store them in memory 7 CDC To directly select the DVD mode 8 Menu Press it to setup initial volume TA VOL BASS TREBLE BALANCE FADER Hold it to enter the ...

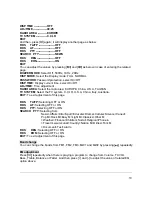
Страница 11: ...not display on the above list Select stations Press and hold or for 3 seconds to automatically search stations in the related band such as FM1 and will automatically store the stations of strongest signal in related band or press and hold for 3 seconds to search stations automatically and then will automatically store 6 stations of strongest signal in FM3 Value adjustment Press repeatedly to chang...

Страница 12: ...em C C I R U S A China Italy Australia EXIT To exit adjustment of this page RDS TA TP Selecting OFF or ON RDS AF Selecting OFF or ON RDS PTY Selecting OFF or ON SEARCH PTY Selecting from News Affairs Info Sport Educate Drama Culture Science Varied Pop M Rock M Easy M Light M Classics Other M Weather Finance Children Social Religion Phone in Travel Leisure Jazz Country Nation M Oldies Folk M Docume...

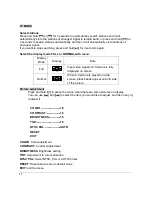
Страница 13: ...y Note Full Input video signals 16 9 picture is fully displayed on screen Normal When 4 3 picture is played on wide screen black bands appear on both side of the picture Picture adjustment Press and hold to active the menu when there are some pictures on display You can use and to select the item you would like to adjust and then use to adjust it COLOR 18 CONTRAST 18 BRIGHTNESS 18 TINT 18 NTSC PAL...

Страница 14: ...g discs it will display DISC CHANGE behind STATUS on the screen EQ adjustment Press repeatedly when there is playing a program to change from Volume TA VOL Bass Treble Balance or Fader And then press and to adjust the value of related EQ option above Change disc Press and hold to change to next disc and press and hold CDC to change to previous disc Select track You can select the desired track by ...

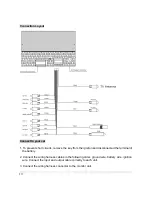
Страница 15: ... from the ignition and disconnected the terminal of the battery 2 Connect the wiring harness cables in the following order ground wire battery wire ignition wire Connect the input and output cable correctly to each unit 3 Connect the wiring harness connector to the monitor unit 13 ...

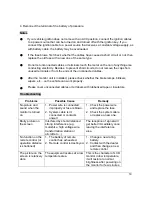
Страница 16: ... cover unconnected cables or terminals with rubberized tape or insulators Troubleshooting Problems Possible Cause Remedy No picture and sound when the monitor is turned on 1 Power wire is connected improperly or fuse is blown 2 System cable isn t connected or contacts unwell 1 Check the power wire and replace the fuse 2 Check the system cable or replace a new one Blurry picture on the screen Inter...

Отзывы: