background image

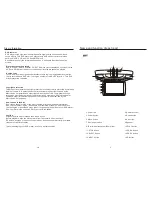
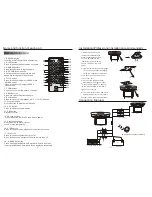
Name and function of each part

Remote Control Unit

4. REV/FWD-Scan buttons
Use these buttons to scan forward and 
backward through pictures or sound.

8. ANGLE button
Press it to switch the picture's angle.

2. EJECT button
Press this button to slide the disc out and in.

3. NUMBER buttons
Press these buttons to input numbers.

5. TITLE button
Press this button to display the DVD's title.

7. ZOOM button
Zoom in or zoom out the picture on screen.

9. SLOW button
Press this button slow playback at 1/2 ,1/4,1/6 ,1/8speed.

11. Program button
Use this button to program individually.

1. SEARCH button

Locating a title

/

chapter

/

time and playing

.

12. VOL-. button
Press this button to volume down.

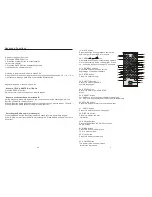
SEARCH

1

PBC

2

3

4

5

6

7

8

9

0

10+

A-B

MUTE

TITLE

ZOOM


DVD

MENU

ENTER

SUBTITLE

SETUP

REPEAT

SLOW

ANGLE

RETURN

AUDIO

DISP

PROGRAM

MENU

AV/DVD

VOL-

VOL+

POWER

EJECT

PDVD

-

+

1

2

3

4

5

6

7

8

9

10

11

12

13
14
15

16
17

18

19

20

21

22
23

24

25

26

27

28

29

30

31

32

33

V I D E O

13. PBC button
Playback control.

15. Play/Pause button
Use this button to play picture or 
sound or stop temporarily.

14.SD card  buttons
 Press this button to ON/OFF the SD card  power

16. STOP button
Press this button to stop playback of the picture or sound

17.10+ button
Press this button to select a program of 
which the sequence number on the disc is more than 10.

18 . A-B REPEAT button
Press it during playback to set Point A and Point B and then
the program between Point A and B can be played repeatedly.

6.MENU button
Press this button to display the DVD's
menu screen.

4

Connection Diagram

12

BATTERY

Video2 input( yellow)

Video 

out

put( yellow)

CAR AUDIO(DVD OR VCD)

Audio left  input (white)

Audio left  

out

put (white)

Audio right  input (red)

Audio right  

out

put (red)

Installation(Professional installation recommended)

1

.

Unpack


and


check


the


contents

.

Disassemble


the


meral


support


bracket


from


the


unit


as


shown


in


the


illustration

,

by


unscr


ewing

the


six


screws


on


the


unit

body

.

2

.

Tighten


the


metal


support


bracket


to


the


ceilling


support


beam

(

s

)

,


using


the


supplied


screws

.

Take

extra


care


to


not


penetr


ate


the

roof


of


your


car

.

3

.

Connect


the


wiring


harness

,


according


to


the


diagram


under

"

Connection


Diagram

"

on


page19

.

 to


the


wires


located


in


the


dome

light


of


your


vehicle

.

4

.

Flip


the


monitor


screen


down


 and


tighten


the


monitor


to


the


support

bracket

using


the


supplied


screws

.

17

IR


wireless


headphone

(

optional

)

Содержание PLRD143F

Страница 1: ...PLRD143F 13 3 TFT LCD MONITOR DVD PLAYER WWW PYLEAUDIO COM Instruction Manual ...

Страница 2: ...m NTSC PAL Video Input 1EA Video Output A V Input A V Output Disc Format IR Transmitter Dome Light Remote Control Dimensions mm 1EA 2EA 2EA MP3 VCD DVD CD CD R CD RW DVD R DVD RW Yes Yes Yes W 498 D 320 H 68 21 Contents Caution Check Point Name and Function of Each Part Unit Remote Control Remote Control Picture control Picture Selections Playing a Disc Play DVD Player DVD Setup How to Setup Menue...

Страница 3: ...o the front panel of your video monitor If the screen cracks due to misuse your warrantly will be void 1 WARNING The lightning flash with arrowhead symbol within an equilateral triangle is intended to alert the user to the presenceof dangerous voltage within the product s enclosure that may be of sufficient magnitude to constitute a risk of electric shock to persons CAUTION The exclamation point w...

Страница 4: ... Point Cautions on Use Handing Do not use damaged cracked or werped disc Do not scratch signal surface or let it dirty Do not attach paper or seals to discs The player may be damaged if there is any exposed glue etc x on discs using such discs Check carefully for any exposed glue before are often attached to the discs For rental disc in particular extra labels are often attached to the discs Check...

Страница 5: ...udio CD and MP3 discs Each disc plays only the information saved on it and some functions cannot be utilized Discs that cannot be played DVD RW DVD REM CD ROM CD EXTRA discs cannot be played on this unit Also a CD or a CD RW which was recorded on special software cannot be played Region code Your DVD player is designed and manufactured to region management information that is recorded on a DVD dis...

Страница 6: ...ns Press this button to ON OFF the SD card power 16 STOP button Press this button to stop playback of the picture or sound 17 10 button Press this button to select a program of which the sequence number on the disc is more than 10 18 A B REPEAT button Press it during playback to set Point A and Point B and then the program between Point A and B can be played repeatedly 6 MENU button Press this but...

Страница 7: ... 0 10 A B MUTE TITLE ZOOM DVD MENU ENTER SUBTITLE SETUP REPEAT SLOW ANGLE RETURN AUDIO DISP PROGRAM MENU AV DVD VOL VOL POWER EJECT PDVD 1 2 3 4 5 6 7 8 9 10 11 12 13 14 15 16 17 18 19 20 21 22 23 24 25 26 27 28 29 30 31 32 33 V I D E O 16 Advanced Functions Search for a speacific scene 1 Press the SEARCH button 2 Press the number button to select specific time or titlel chapter 3 Press the ENTER ...

Страница 8: ...t For some discs playback may not start from the position at which was stopped If the STOP button then the previous is pressed while the resume function is on playback starts from the beginning fo the title Pausing the disc Press the play pause button Press the button again to resume playback Scanning forward and backward During playback press the previous or next button Reverse direction Forward ...

Страница 9: ...n Playback starts For some discs a menu screen appears For video CDs playing the disc according to the instructions on the disc s menu screens I called PBC playback control playback 3 Hint For video CDs it is also possible to playa disc without displaying the menu screen For example to play from track 1 press the 1 number button while in the stop mode When play CD disc or MP3 discs you are recomme...

Страница 10: ...sition at which was stopped when turn off the power suddenly or eject the disc then play again The unit has the last play function At the following situation last play function can be realized and provided the convenience for users 1 Using the car DC adapter to supply the power in the car when get off the car take the unit to other place to play 2 The power supply is off suddenly or disconnected p...

Страница 11: ...ill pictures There are three options AUTO FIELD and FRAME DVD Setup 11 SELECT SET ENTER RETURN RETURN EXIT SERUP SETUP MENU DISPLAY LANGUAGE SETTING STATE Ö Ð Î Ä ENGLISH FRANCAIS ESPANOL DEUTSH ITALIANO SELECT SET ENTER RETURN RETURN EXIT SERUP SETUP MENU DISPLAY LANGUAGE SETTING STATE ENGLISH SELECT SET ENTER RETURN RETURN EXIT SERUP SETUP MENU AUDIO LPCM DOWNSMPL SETTING STATE OFF BITSTREAM PCM...

Страница 12: ...NGS MENUS RATINGS PASSWORD SELECT SET ENTER RETURN RETURN EXIT SERUP SETUP MENU DISC AUDIO SETTING STATE SETTING SUBTINGS MENUS RATINGS PASSWORD DVD Setup 12 Other Functions Setting JPEG TIME Setting DEFAULTS Setting Please press to select OTHER items Press ENTER to confirm setting See the diagram in the left 1 JPEG Image Time Display To setup a JPEG image time display from1 second to 180 seconds ...

Отзывы: