background image

03

PURE-PRO

R

EVERSE

O

SMOSIS

SYSTEM

12

PURE-PRO

R

EVERSE

O

SMOSIS

SYSTEM

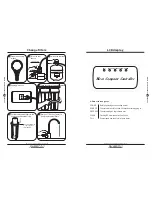
T.D.S

UVC-LIGHTING

ULTRAVIOLET WATER STERILIZER

PRO

P

URE

DRINKING WATER SYSTEM

Infra-Red Filter

PRO

P

URE

DRINKING WATER SYSTEM

Mineral Filter

RO103 Auto Flushing Membrane System

PRO

P

URE

DRINKING WATER SYSTEM

RO103 Auto Flushing Membrane System

PRO

P

URE

DRINKING WATER SYSTEM

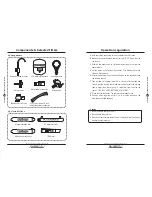
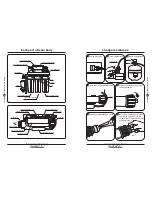
Components & Selected filters

European ceramic faucet

3.2G water storage tank

Housing wrench

Deliver-valve

Water supply connector

Drain saddle

Tank ball shut-off valve

Four color coded 1/4 inch

tubing for system connection

¨

Selected filters

¨

Components

Mineral cartridge filter

UV water sterilizer

Infra-red cartridge filter

TDS meter

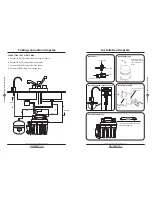
A.With everything connected, turn on the water check for leaks.

B.Make sure the storage tank shut-off valve is "OFF". Open the sink

top faucet.

C.Within a few minutes (up to 15) the water will start to run from the

faucet slowly.

D.Let the water run for at least 30 minutes. This flushes the carbon

filters on first time use.

E.After initial flushing, open the shut-off valve on the tank and close

the sink top faucet.

F.Tank will now full of water (usually 2 to 3 hours) after the tank has

filled. Open the sink top faucet and drain all water until the storage

tank is empty and there is only a small flow from the sink top

faucet.*** DO NOT USE FIRST TANK OF WATER.***

G.Close the sink top faucet. The system is now ready for use.

H.Change filters regularly every 6 to 12 months and have the

membrane checked annually.

Caution

1.Do not use hot water (over 45 C)!

2.Do not freeze the machine!

3.Switch off electricity and water source if away for more than 5 days,

and drain out pure water.

0

Operation regulation

Содержание RO103

Страница 1: ...ntroduction of RO103 02 What is reverse osmosis 03 Components 04 Cartridge filters 05 The parts of RO103 06 LCD display 07 Tubing connection diagram 09 Change filters 10 C embrane 11 Operation regulat...

Страница 2: ...understand more about it Smart to warn you if the operation is affected by any reason Smart microprocessor control system Auto flushing membrane to get the best water quality 5 Indicators LCD display...

Страница 3: ...1 The greater the water pressure the better water quantity and quality it produced Water pressure of 60 PSI is ideal 2 76 F is the ideal water temperature for R O 40 F water will cause the production...

Страница 4: ...for leaks B Make sure the storage tank shut off valve is OFF Open the sink top faucet C Within a few minutes up to 15 the water will start to run from the faucet slowly D Let the water run for at leas...

Страница 5: ...s This 5micron sediment filter is made of 100 pure polypropylene fibers High capacity filter removes dusts particles and rusts This block carbon filter is composed of high performance carbon that remo...

Страница 6: ...membrane by a pincer 7 Install the membrane by carefully pushing the spigot end into the socket at the far end of the housing until completely in To RO system 1 Unplug electricity 2 Turn off water so...

Страница 7: ...RO103 Auto Flushing Membrane System PRO PURE DRINKING WATER SYSTEM RO103 Auto Flushing Membrane System PRO PURE DRINKING WATER SYSTEM 3 Switch off water tank LCD display Function express POWER SOURCE...

Страница 8: ...ro Computer Controller POWER SOURCE PROCESS FLUSH FULL Faucet Tank Drain Input water To RO system Deliver valve To faucet To water source pipe Install European ceramic faucet Install drain saddle Asse...

Отзывы: