background image

7

Settings

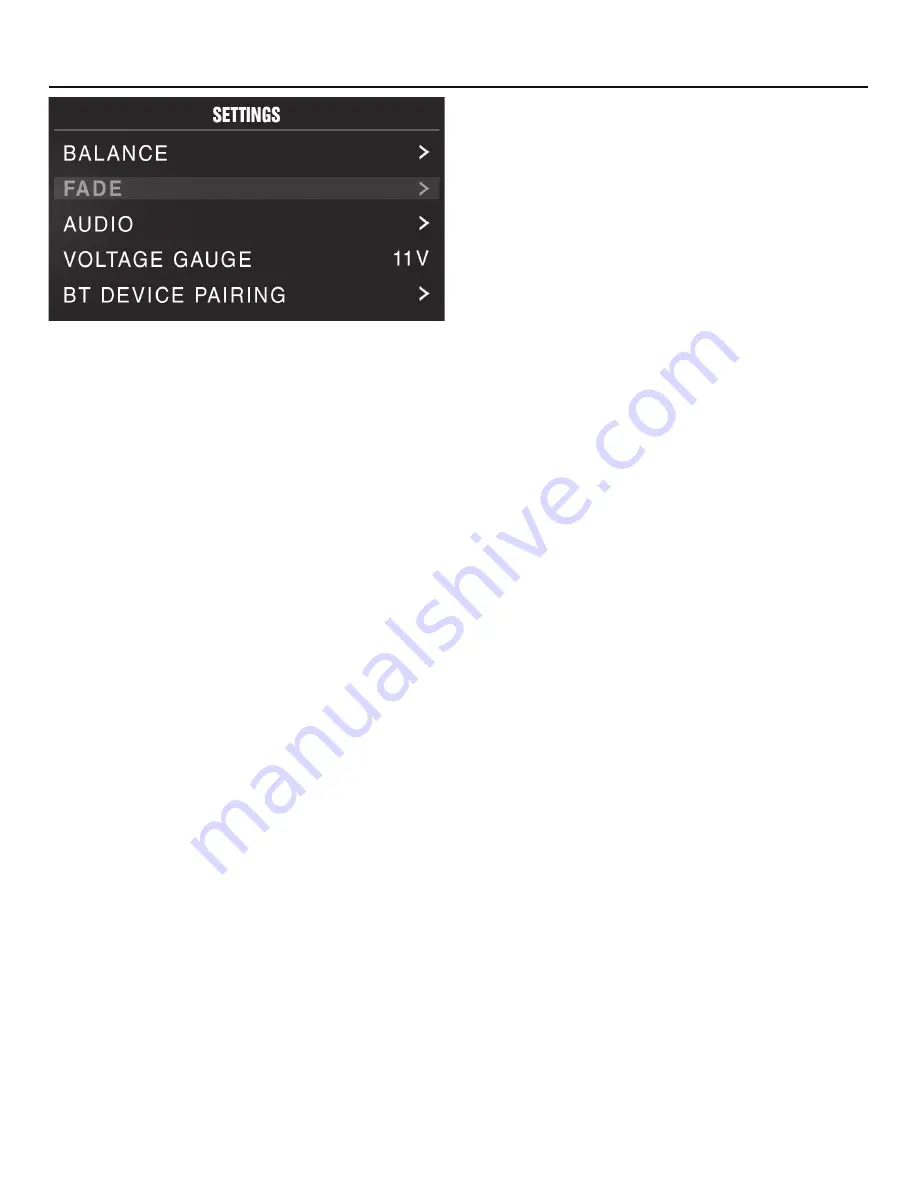
Source Unit Settings

To access the source unit’s settings, long press the MENU button until the 
options appear. Rotate the encoder to scroll through the list of settings and 
short press the encoder button to select the setting you wish to change. 
(BALANCE>FADER>AUDIO>VOLTAGE GAUGE>BT PAIRING>BEEP>TUNER 
REGION>SOFTWARE>FACTORY DEFAULT)

This source unit has a zero current draw when turned off. All of your settings and 
presets will be saved along with your boat’s battery during storage.

BALANCE

Short press the encoder button to access BALANCE adjustment settings. Rotate 
the encoder button to set output BALANCE.

FADER

Short press the encoder button to access FADER adjustment settings. Rotate the 
encoder button to set output FADER.

AUDIO

To access the AUDIO settings, short press the AUDIO option from the MENU 
screen. Rotate the encoder to scroll through the list of settings and short 
press the encoder button to select the setting you wish to change. (7 BAND 
EQ>CROSSOVER>PEQ>REAR RCA>AUX INPUT>SOURCE GAIN>INTERNAL 
AMPLIFIER)

7 BAND EQ

Short press the encoder button to access the 7 BAND EQ settings. Use the 
rotary encoder to scroll through the EQ settings. (FLAT > ROCK > CLASSIC > 
ACOUSTIC > DANCE > ELECTRONIC > HIP-HOP > CUSTOM) When setting 
up the CUSTOM EQ, short press the encoder button to set the first frequency. 
Once active, rotate the encoder to adjust the frequency settings. Short press 
encoder button again to access the next frequency. Repeat until all EQ settings are 
complete. Short press the MENU button to exit and go back up one level.

CROSSOVER

Short press to access the CROSSOVER settings. Use the rotary encoder to select 
the crossover zone options (FRONT>REAR>SUB). Short press the encoder to 
adjust the frequency of the crossover (60Hz>80Hz>120Hz>APF). Short press 
MENU to exit and go back up one level.

REAR RCA

Short press to access the REAR RCA options. Use the rotary encoder to select 
options (LINE OUT>SUBWOOFER).

PUNCH EQ

Short press to access the PUNCH EQ settings. Use the rotary encoder to adjust 
the gain output (0-12). Short press MENU to exit and go back up one level.

Punch EQ is an onboard equalizer with up to +18dB @ 45Hz and/or up to +12dB 
boost at 12.5kHz

AUX INPUT

RENAME – To rename AUX, short press the encoder button to set the first letter 
of the new name. Once active, rotate encoder to adjust letters. Short press the 
encoder button again to set the next letter. Repeat until AUX has been renamed. 
Short press MENU to exit and go back up one level.

ENABLE - Short press the encoder button to access options. Rotate the encoder 
button to select if unit is discoverable. (ENABLE > DISABLE)

SOURCE GAIN

To adjust the level of device input gain, scroll through the inputs (FM TUNER>AM 
TUNER>WB TUNER>USB>AUX>BLUETOOTH>PANDORA) to the device you want 
to adjust, short press the encoder button to access the gain settings. Rotate the 
encoder button to set the level of gain. (-3dB > -2dB > -1dB > 0dB > +1dB > +2dB 
> +3dB) 

INTERNAL AMPLIFIER

Short press to access the INTERNAL AMPLIFIER options. Use the rotary encoder 
to select options (ON>OFF). When using an amplifier to power your speakers, 
select OFF. If you are powering your speakers directly from the source unit, select 
the INTERNAL AMPLIFIER to ON.

VOLTAGE GAUGE

To display the vehicle voltage, short press the encoder button on the VOLTAGE 
GAUGE option. 

BT DEVICE PAIRING

Short press the encoder button to access options. Rotate the encoder button to 
select if unit is discoverable for pairing. (ENABLE > DISABLE) Once enabled, the 
source unit is now discoverable and ready for pairing to your device. Open the 
Bluetooth settings on your device to find the source unit labeled “Rockford PMX” 
and select.

BEEP

Short press the encoder button to access the BEEP options. Rotate the encoder 
button to turn system beep ON/ OFF.

TUNER REGION

To adjust, short press the encoder button to access. Rotate the encoder button to 
select the TUNER REGION of your preference. (EUROPE > USA > RUSSIA > LATIN 
> ASIA > JAPAN > MIDEAST > AUSTRALIA)

SOFTWARE

VERSION - Short press the encoder button to display the current firmware version 
of the unit.

UPDATE - Short press the encoder button to update the firmware. Follow the 
instructions on the screen when updating.

FACTORY DEFAULT

AUDIO – Short press the encoder button to access. Rotate the encoder button to 
select YES/NO. Selecting YES will reset your unit back to factory default settings.

SYSTEM - Short press the encoder button to access. Rotate the encoder button to 
select YES/NO. Selecting YES will reset your unit back to factory default settings.

Basic Operation

TURNING THE UNIT ON / OFF

Long press the SRC (Power) button to turn the unit ON or OFF

ADJUSTING THE VOLUME

Rotate encoder knob left or right to desired volume level (0-40). The current 
volume level will be displayed during adjustment.

Содержание PMX-2

Страница 1: ...PMX 2 DIGITAL MEDIA RECEIVER ...

Страница 2: ...ice pursuant to part 15 of the FCC Rules These limits are designed to provide more reasonable protection against harmful interference in a residential installation Operation is subjected to the following two conditions 1 This device may not cause harmful interference and 2 the device must accept any interference received including interference that may cause undesired operation This equipment gene...

Страница 3: ...ility 2 0 USB Output 1A Made for iPhone Model Names iPhone 6 Plus iPhone 6 iPhone 5S iPhone 5C iPhone 5 iPhone 4S iPhone 4 iPhone 3GS Made for iPod Model Names iPod Touch 5th generation iPod Touch 4th generation iPod Nano 7th generation iPod Nano 6th generation Android Compatibility Bluetooth Only Audio File Compatibility MP3 WMA Compatible Wired Remotes PMX 1R PMX 0R 3 Remote Limit 100 ft Total W...

Страница 4: ... long pressing Short pressing will give you access to the settings for the active source DIMMER button Pressing this button will allow you to select between the two brightness values for the display PLAY PAUSE button Press this button to play or pause your music This button also acts as a MUTE when the source is in AUX TUNER mode SRC Power Button This button allows you to switch between sources sh...

Страница 5: ...SPEAKER REAR LEFT REMOTE ACC 12V 1 RED 7 12 11 10 9 8 4 5 6 3 2 BLACK GROUND PURPLE BLACK BLUE WHITE PURPLE GREEN BLACK GREEN ORANGE GREY BLACK GREY WHITE BLACK WHITE PIN NO WIRE COLOR WIRE DEFINITION ILLUMINATION ORIENTATION SPEAKER REAR LEFT SPEAKER FRONT LEFT SPEAKER FRONT LEFT SPEAKER FRONT RIGHT SPEAKER FRONT RIGHT SPEAKER REAR RIGHT SPEAKER REAR RIGHT AWG 20 16 16 20 20 20 20 20 20 20 20 20 ...

Страница 6: ...tery terminal 10 When grounding to the chassis of the vehicle scrape all paint from the metal to ensure a good clean ground connection Grounding connections should be as short as possible and always be connected to metal that is welded to the main body or chassis of the vehicle Seatbelt bolts should never be used for connecting to ground Volt Ohm meter Wire strippers Wire crimpers Wire cutters 2 P...

Страница 7: ... the new name Once active rotate encoder to adjust letters Short press the encoder button again to set the next letter Repeat until AUX has been renamed Short press MENU to exit and go back up one level ENABLE Short press the encoder button to access options Rotate the encoder button to select if unit is discoverable ENABLE DISABLE SOURCE GAIN To adjust the level of device input gain scroll throug...

Страница 8: ...tton to access the LOCAL options Once selected use the rotary encoder to select ON or OFF The local option tunes to nearby radio stations with sufficiently strong signals for good reception In areas where reception is poor switching to distance tuning enables the unit to tune in to more distant stations Distance tuning is the default AM BAND SETTINGS To access the AM BAND SETTINGS short press the M...

Страница 9: ...tton to access the REPEAT feature options OFF ONE ALL SHUFFLE Short press the encoder button to access the SHUFFLE feature options OFF ALL This feature allows you to set your preference on shuffling tracks or songs AUX Operation After your device is plugged into the source unit this feature allows you to play music from your device Select the AUX source option on the source unit and use your plugge...

Страница 10: ... feature will sort your stations by date added or alphabetically You can also select your saved stations directly from this list BOOKMARKS To BOOKMARK an artist or track that is playing short press the encoder button to display your BOOKMARK options ARTIST TRACK Select the option you wish to use for bookmarking STATIONS MANAGE To create stations short press the encoder button to display your STATI...

Страница 11: ...n a weak signal area Make sure the tuner LOC mode is off USB Devices USB device cannot be inserted The USB device has been inserted in the wrong direction Reversing the connection direction of the USB device try reinserting The USB device connector is broken Replace with a new USB device USB device is not recognized The USB device is damaged Disconnect USB device and reconnect If the device is sti...

Страница 12: ... 1 Damage caused by accident abuse improper operations water theft shipping 2 Any cost or expense related to the removal or reinstallation of product 3 Service performed by anyone other than Rockford or an Authorized Rockford Fosgate Service Center 4 Any product which has had the serial number defaced altered or removed 5 Subsequent damage to other components 6 Any product purchased outside the U ...

Страница 13: ...ce available at www rockfordfosgate com rftech R O C K F O R D F O S G AT E C O M 600 South Rockford Drive Tempe Arizona 85281 United States Direct 480 967 3565 Toll Free 800 669 9899 Printed in China 061115 1230 59187 01 D ...

Отзывы: