www.pulsar.pl
INTRE
9
4.4 STEP 3
– The TCP/IP Network settings.
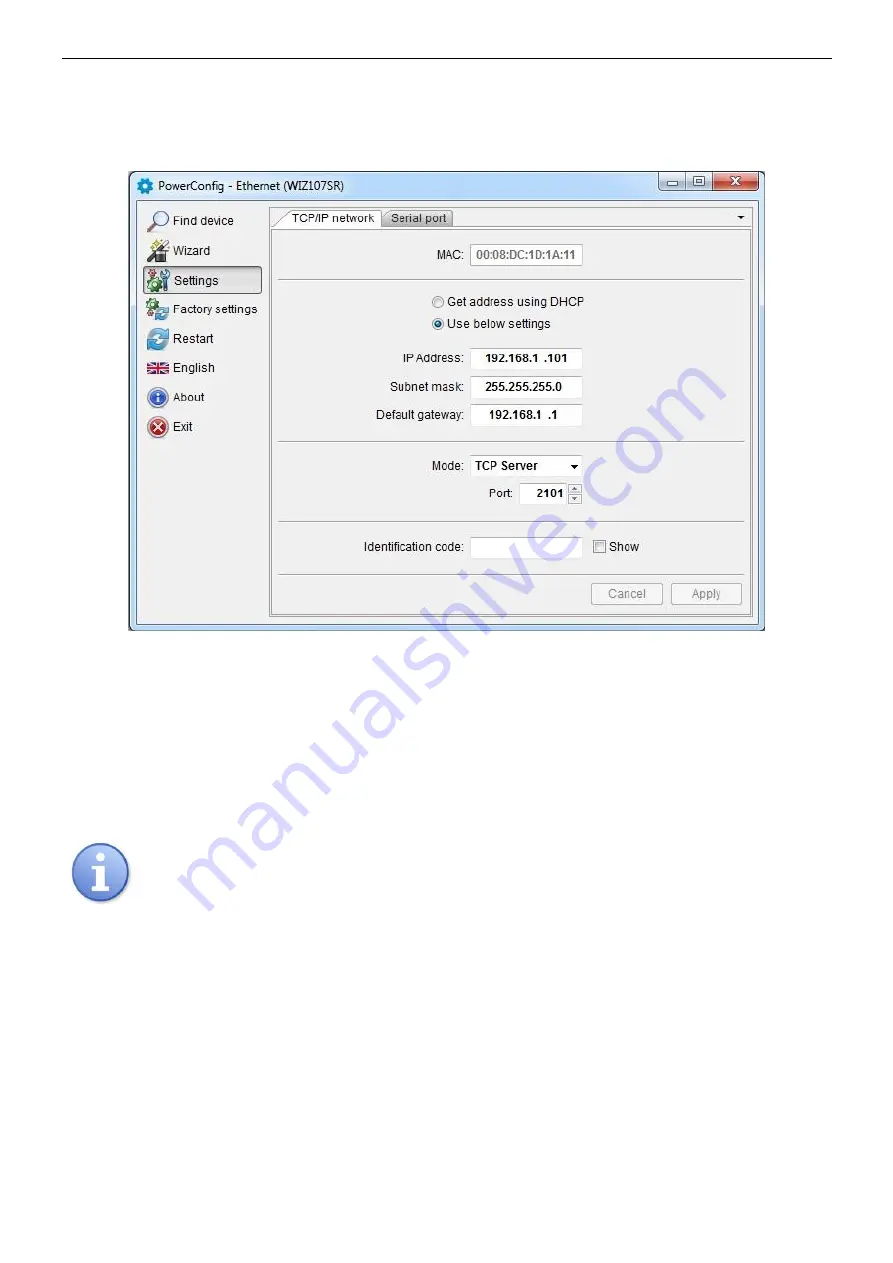
Press the ‘Settings" button from the menu on the left side of the PowerConfig program window. A window
will be displayed in the right part of the screen. Choose the "Network TCP / IP” from the top tab menu. This window
allows setting the IP address for Ethernet communication.
Fig. 7. The TCP/IP Network settings.
There are two options:
"Get an address using DHCP" - automatic IP address assignment (setting is not recommended);
After selecting this option, the IP address will be automatically assigned by a router each time the interface module
is turned on.
„Use the settings below "” – assign a static IP address (
recommended setting
);
When selecting this option, type the available network address for interface identification.
In the next fields, enter the port number and subnet mask if required.
Before setting the network IP address, make sure it is not used by any device on the network.
The next parameters to be set in the "TCP/IP Network" tab are the "TCP Server" operation mode and the
port number
– 2101 by default.
To increase security, the INTE interface module offers the possibility to assign an identification code to use
when searching for network modules. If the code is assigned, it then must be entered
in the „Code” field each time
the search is performed.
Once the settings are entered, press the
“Apply”
button”.


