background image


7


PSsystec SMARTbox IO Agent User Guide            


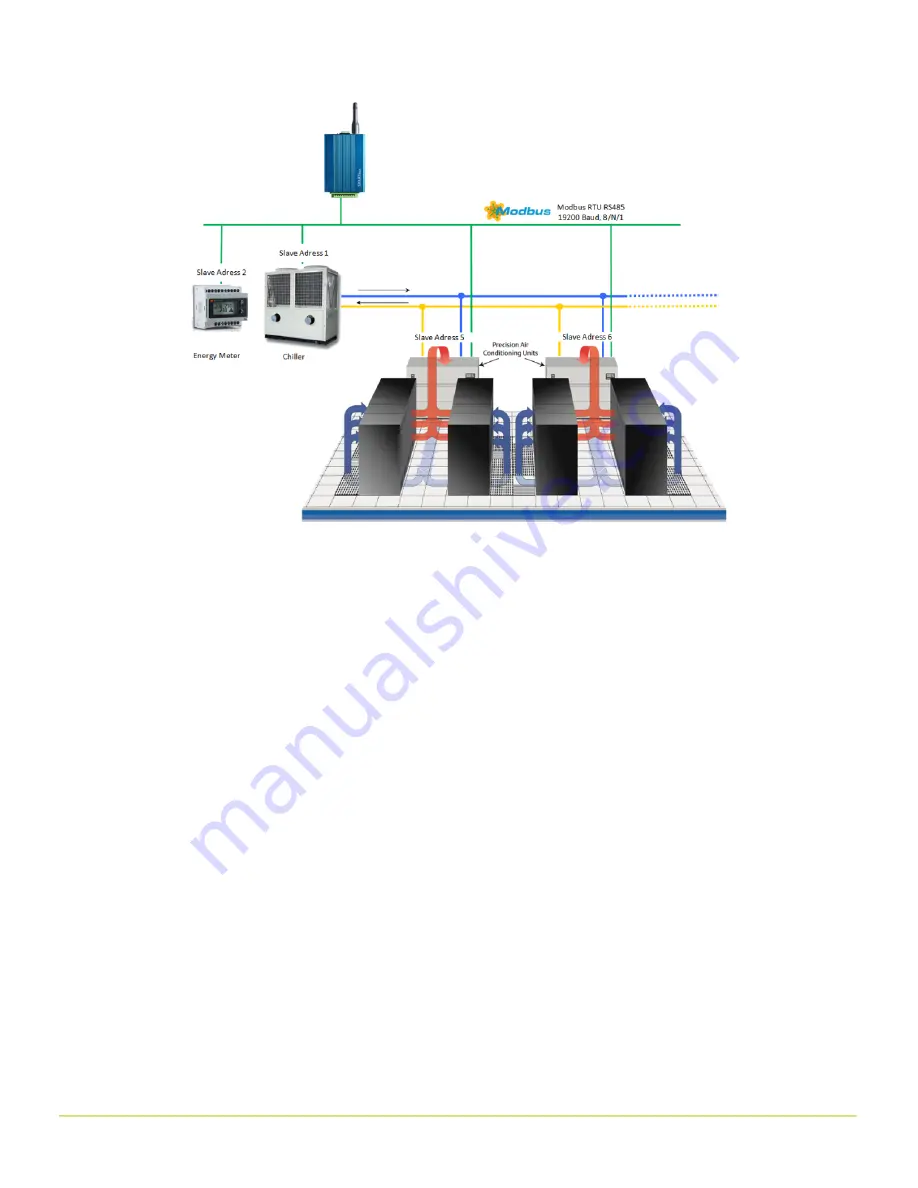
To connect 1 Modbus Device to the RTU network: 


a.


Physically wire the Modbus/RTU device through RS485 to the terminal.  

b.


Give the device a unique Modbus address according to the instructions provided 

with the Modbus device (e.g. by setting a jumper on the device).  

c.


Check the serial communication settings of the device according to the instructions 

provided with the device (i.e. baud rates and communication protocol). These have 

to match with all devices on the bus.  

d.


Navigate to the terminal in Cumulocity and click on the "Modbus" tab.  

e.


Change the communication settings shown in the section "Serial Communication" 

to match the settings on the bus, if needed.  

f.


Change the transmit rate and the polling rate according to your requirements. The 

polling rate is the frequency at which the Modbus devices are polled for changes. 

The transmit rate is the frequency where measurements are sent to CoT.  

g.


Click "Save changes" if you made changes.  

h.


To  start  communication  between  the  terminal  and  the  Modbus  device,  click  "Add 

new device".  

i.


Enter a name for the device and select the type of the device from the drop-down 

box. To add new device types, see  www.youtube.com/watch?v=99dj4PDMwQQ  

below. Set the Modbus address of the connected device.  

j.


Click "Add". CoT will now send a notification to the SMARTbox that a new device is 

ready to be managed. This may take a few seconds.  


Содержание SMARTbox Mini

Страница 1: ......

Страница 2: ...itchboard clips Montage Modbus RTU RS485 Modbus Master Frames Parity Even ODD Stoppbits 1 2 Baudrate 4800 9600 19200 115200 FunctionCodes F1 F2 F3 F4 F5 F6 Up to 20 Devices on Modbus Line Developed for Cloud Fieldbus Flexible Device database Alarming Events Measurments Value Operations SetUp Modbus MasterCommunication Remote restart GE910 2G HE910 3G Telit ChipSet 2 Options Betriebsspannung 12 24V...

Страница 3: ...port or Pssystec Kontakt pssystec gmbh de The full product overview pls download it https www pssystec de downloads Wire your Smartbox ____________ Connect your sensors and Modbus Devices to the terminal block You can use external 24VDC 200mA or the with the delivered PowerSupply Powersupply 24VDC IO Sensors DI DI O NTC AI O 0 20mA AI P Modbus RTU Master Programming Debug GSM flashing Registerd in...

Страница 4: ...conds you should be able to see it in the All Devices list after a short delay Configuration ____________ The SMARTbox supports the configuration tab to set specific properties independent of Fieldbus connectivity features You can get an actual snapshot or set a property in the Configuration window Following Configurations are supported Valid for Product Agent c8y ConfigDin 0 Enable the extra digi...

Страница 5: ...3 x c8y LocationCycle 0 Define the Location update in min If it is set to 0 then Location is derived only at startUp all 2 3 x c8y min 0 Define the Min of AIN Value conversion if AIN is set to 0 20mA by jumper Mini DP CubeIO 2 3 x c8y max 0 Define the Max of AIN Value conversion if AIN is set to 0 20mA by jumper Mini DP CubeIO 2 3 x c8y GPS 0 If GPS Hardware option is available you can enable the ...

Страница 6: ...ct 2 Read Input Status Funct 3 Read Holding Registers Funct 4 Read Input Registers Funct 5 Write Coil Funct 6 Write Holding Register Device database model Datapoints 1 10 Slaves with each 100 datapoints fix Polling Rate on Bus 500ms fix We assume that you already defined your Modbus device s which you want to connect in the device database In this exemplary SetUp you need 4 Models in the device da...

Страница 7: ...on settings shown in the section Serial Communication to match the settings on the bus if needed f Change the transmit rate and the polling rate according to your requirements The polling rate is the frequency at which the Modbus devices are polled for changes The transmit rate is the frequency where measurements are sent to CoT g Click Save changes if you made changes h To start communication bet...

Страница 8: ... You have 3 Options 1 Using the built in Cell Location The terminal identifies 3 cells in the near environment and derives the location default 2 Using the hardware Option with a built in GPS this is an extra option Set c8y GPS 1 then GPS is enabled Setting c8y GPS 0 Cell location is enabled default 3 Activate a regular identification of the location In Configuration tab you can set c8y LocationCy...

Страница 9: ...ntegration into CoT you can also configure device side geo fencing and motion detection Additionally when the feature is activated Cell ID information can be used to determine the position of the device Currently the services from Combain and Google are supported The user can see the tracks based on both data or filter out GPS based data or Cell ID based data Manage the Agent ____________ The inst...

Страница 10: ... www pssystec de downloads à supported AT commands and includes a huge amount of different AT commands Operate AT commands via device shell V2 3 x ____________ The device shell enables you to read and write configuration parameters to interactively work with remote devices You can send AT commands in the respective language of the device and view the results of the commands You can sent any At Com...

Страница 11: ... 2 3 x you have to connect to USB3 Help for Setting up the Device database ____________ All devices which are connected to the SMARTbox are needed to define in Device Database The definition includes all supported datapoints of this connected device Even more you can not only define the physical datapoint like register address you can also define if this datapoint comes in the cloud as a measureme...

Страница 12: ...12 PSsystec SMARTbox IO Agent User Guide ...

Отзывы: