background image

caps. This assures that the system stays put at any angle that you set it. Also note 
that  the  mounting  bracket  ends  have  slots  that  allow  over  an  inch  of  in/out 
adjustment. This range can be used to tilt the system slightly when on wall and also 
to adjust the space between the system and the wall. Most likely the installer will 
hang the system on the wall with the brackets loose, connect the wires and then 
push the system close to the wall and tighten the knobs.

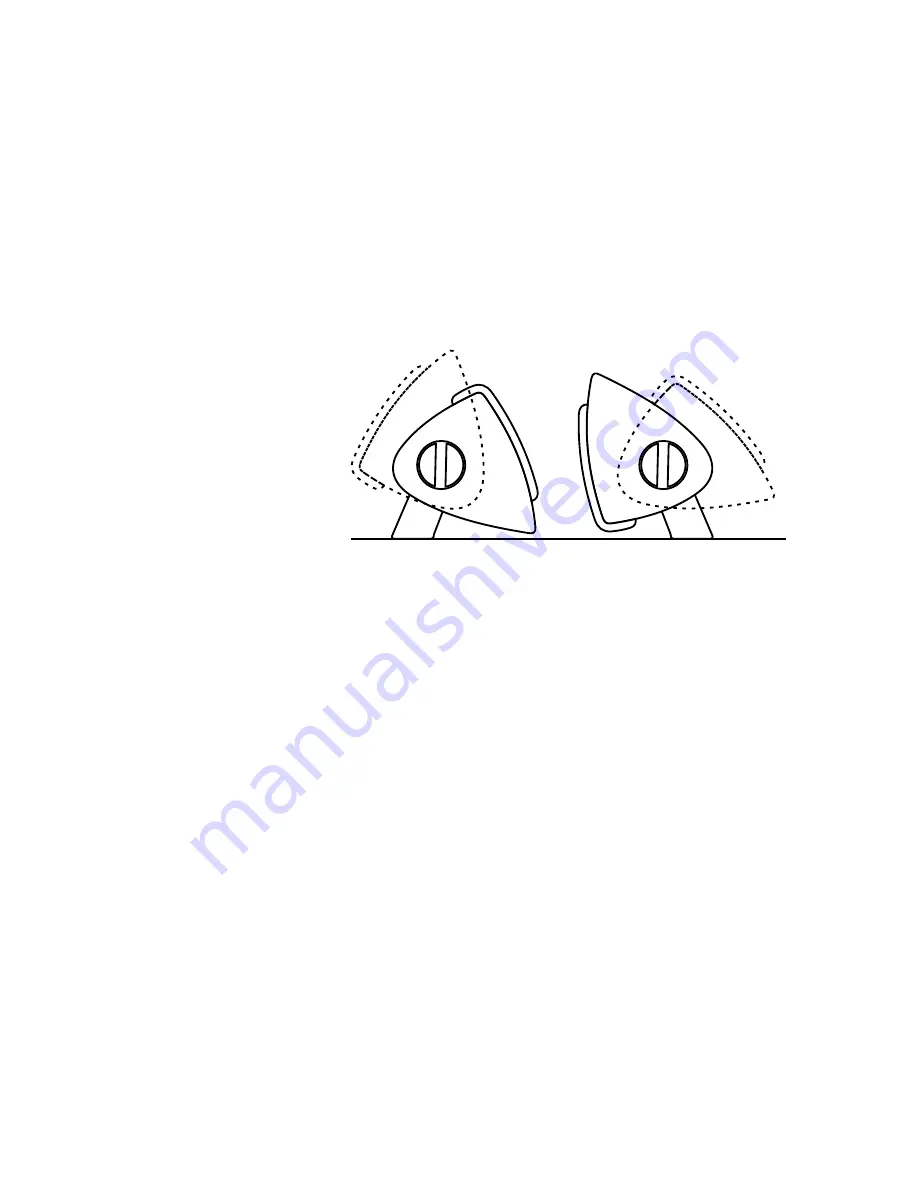
The question of orientation may arise. That is, when mounted vertically, which side 
of  the  system  should  be  inside  and  which  should  be  outside?  Acoustically  the 
response  is  quite  symmetrical  so  it  becomes  a  matter  of  visual  preference. The 
system is typically mounted with the exposed cabinet edge to the inside (towards the 
Plasma  set)  because 
when angled inward the 
system  sets  nearer  the 
wall.

When the VS300 is wall 
mounted you may prefer 
to  tilt  the  speakers 
towards  ear  level  by 
l o o s e n i n g   t h e  
a t t a c h m e n t   s c r e w s  
slightly  and  pulling  one 
end or the other forward.  
This shouldn't be required for acoustical reasons but can help align the system with 
a  TV  that  angles  slightly  downward,  for  cosmetic  reasons.    A  slot  in  the  wall 
attachment bracket is long enough for useful angle adjustment.

Table top mounting with the optional VisionSound Base Kit

You  may  be  using  the  VS300’s  next  to  a  table  top  mounted TV.  If  so  it  may  be 
preferable to stand them upright on the table rather than to wall mount them. We 
have provided for this with the optional VisionSound Base Kit. (One pair of bases per 
kit)  Each  kit  includes  two  cast  aluminum  bases,  a  left  and  right  spacer  and 
replacement (sans knobs) top caps. The bases are nicely weighted and have rubber 
feet to keep from marring furniture. 

To attach them you should first remove the two knobs and the wall bracket. Then 
both end caps need to come off. Although the end caps are snugly attached a firm 
grasp and steady pull (wiggle side to side) will remove them. Resist the temptation to 
pry them off with a screwdriver which would certainly mar the cabinet. Use a Philips 
screwdriver to remove the 4 screws from one end of either system. Note that you are 
turning “centers” into “lefts” and “rights” and so you need to remove the screws from 
one  end  of  one  system  and  the  opposite  end  of  the  other. Add  the  appropriate 
adaptor plate (the plastic piece approximately ¾” thick) and reattach and snug the 
screws. The flat side of the spacer will attach to the VS300. The curved side is a mate 
to the aluminum base. The cast base then attaches via 3 hex key type (key included) 
screws. Finally, attach the new end caps. Note that you won’t be re-using the knobs 
so the new end caps delete the knob hole and also the unused bracket slot around 
back for a clean appearance.

9

Содержание VisionSound VS300

Страница 1: ...PSB VisionSound Owner s Manual Manuel d informations du propriétaire Manual del propietario VS300 VS400 ...

Страница 2: ......

Страница 3: ... 14 X Specifications 15 3 Notes on environmental protection At the end of its useful life this product must not be disposed of with regular household waste but must be returned to a collection point for the recycling of electrical and electronic equipment The symbol on the product user smanualandpackaging pointthisout The materials can be reused in accordance with their markings Through re use rec...

Страница 4: ... proximity to these surfaces the listeners proximity as well will have a strong impact on the balance of the system We will deal with these in turn Angular position 5 1 movie soundtracks and to a lesser degree stereo soundtracks are mixed with the intention of creating or transporting you to a specific sonic environment This includes both placing sound elements at specific locations around the lis...

Страница 5: ...ssible The left and right speakers can be mounted at the same wall height as the television Ideally for comfortable viewing the television will be seated head height or perhaps between an appropriate seated height and a standing height Most importantly a center channel speaker should be located centered on the TV screen to keep center channel sound coming from the center of the screen In the case ...

Страница 6: ...d ceiling will produce more bass than placement near a single surface The greatest proportion of bass is delivered by placement near three intersecting surfaces in a room corner near the floor or ceiling where the convergence of the two walls and the floor ceiling produces an amplifying effect that is a bit like that of a megaphone And the least bass comes from placing a speaker away from all boun...

Страница 7: ...n within the walls of your house then your best bet is to hire an experienced custom installer Look for a local CEDIA certified installer in your area If your wires are to remain external to the walls then you can wall mount the system as long as you are handy with a few basic tools and feel confident in the process One simple approach to hiding the wires is to put them into the walls and let them...

Страница 8: ...el use this angle orientation allows the feet to be attached Note that one orientation gives more swing in one direction while removing and flipping the bracket gives greater swing in the opposite direction Between these two orientations the system can be wall mounted at any angle required it can even be mounted on a side wall and fired at 90 degrees down the wall as might be required in surround ...

Страница 9: ...g with the optional VisionSound Base Kit You may be using the VS300 s next to a table top mounted TV If so it may be preferable to stand them upright on the table rather than to wall mount them We have provided for this with the optional VisionSound Base Kit One pair of bases per kit Each kit includes two cast aluminum bases a left and right spacer and replacement sans knobs top caps The bases are...

Страница 10: ... to hide the speaker wires in the walls The wall mounting bracket includes a larger central hole near the input terminal cup that allows the wires to enter the wall without being visible from the front From the wall bracket the wires can run back to a central equipment location or simply run down to a junction box near the floor Unless you are experienced in house wiring we recommend you engage th...

Страница 11: ...peaker color coding to be sure you are connecting the same wire of a given pair to a like coded terminal at both ends of your connection Assure all wiring terminals are tightened firmly but be careful not to over tighten and damage the connectors VI GRILLES Installing and Removing Grilles for the VS models are magnetically attached Bring the grille up to the approximate position and it should snap...

Страница 12: ... with a switch to compensate for this phenomenon When the VS300 is wall mounted the switch should be set to the on wall position per the graphic on the rear label DO NOT set the switch to on wall for any other mounting conditions such as stand mounting or table top mounting with the optional bases Even if such mounting puts the system somewhat near to a wall it will degrade the response for any mo...

Страница 13: ...y well damage them Some loudness compensation Loudness controls which boost both bass and treble can also be troublesome at high volume They are intended only for low volume listening C Finally you should be aware that when amplifiers and receivers are pushed to their limits to produce excessive volume levels they are driven into clipping and can do severe damage especially to tweeters Often the d...

Страница 14: ...t in the speaker but in the electronics C Another component or very often a cable or connection problem between components may be at fault If the problem stays in the same speaker irrespective of the channel to which it s connected and after changing the connecting wire the speaker itself probably needs service D See your dealer if you require service PSB dealers are equipped to handle almost all ...

Страница 15: ...e 1 25mm Aluminum Dome Woofer Nominal 2 x 4 5 114mm 4 x 4 5 114mm Treated paper cone Treated paper cone butyl rubber surround butyl rubber surround Crossover 2500Hz 2500Hz EQ Adjustment On wall correction Contour correction Finish Construction Finish Frame Titanium or Black Titanium or Black Grille Matching grille cloth Matching grille cloth magnetic catches magnetic catches Dimensions W x H x D 6...

Страница 16: ...16 ...

Страница 17: ...n cas de problèmes 29 X Caractéristiques techniques 30 17 Un mot sur la protection de l environnement Au terme de sa durée de vie ce produit ne doit pas être jeté avec les ordures ménagères ordinaires mais retourné à un pointdecollecte pourrecyclage descomposants électriques et électroniques Le symbole sur le produit sur le manuel d installationetsurl emballageattirel attentionsurcepoint Les matér...

Страница 18: ...e la sensation cinématographique et musicale Ces effets d emplacement se répartissent dans deux grandes catégories La première est constituée par l emplacement des haut parleurs autour de l auditeur et comment cela définit l impression spatiale du champ acoustique ainsi créé Deuxièmement les surfaces de la pièce et la proximité du système de ces surfaces ainsi que la proximité des auditeurs auront...

Страница 19: ... le côté ou juste un peu à l arrière des auditeurs bien qu il y ait un peu plus de marge de liberté pour placer les haut parleurs d ambiance que pour placer les haut parleurs avant Autres conseils Idéalement les auditeurs seront placés à égale distance des haut parleurs de voies droite et gauche et centrale et des haut parleurs des voies d ambiance arrière ou latérales droite et gauche pour une re...

Страница 20: ...fets provenant d un point particulier Vous pouvez préférer plus ou moins ces effets localisés par rapport à la profondeur et à la diffusion sonore globale Si vous écoutez de la musique multivoies issue d un DVD Audio ou d un SACD vous pouvez souhaiter localiser au maximum les instruments En revanche pour des applications de cinéma à domicile un champ sonore diffus peut être préférable Vous pouvez ...

Страница 21: ...s pouvez choisir de vous asseoir à une distance plus grande ou au contraire d avoir un champ sonore plus proche Gardez à l esprit que la bonne inclinaison la bonne hauteur et une distance raisonnablement symétrique des haut parleurs contribuent toutes à restituer la meilleure définition des fréquences hautes et la meilleure image sonore Le changement de votre propre position par rapport aux limite...

Страница 22: ...urs pour autant que vous sachiez vous servir de quelques outils de base et que vous soyez sûr de pouvoir le faire Un moyen simple pour cacher les fils est de les encastrer dans les murs et de les laisser retomber au niveau du sol là où ils peuvent sortir du mur à l aide d une simple plaque murale Cela peut être obtenu avec un minimum de fils qui pendent et permettra de ressortir les fils propremen...

Страница 23: ...rse dans une direction alors qu en retirant et en retournant la bride on obtient une course plus grande dans la direction opposée Entre ces deux orientations le système peut être fixé au mur avec tout angle requis Il peut même être fixé sur un mur latéral et pointé à 90 degrés par rapport au mur comme cela serait le cas pour un haut parleur d ambiance ou s il était fixé au plafond Pour retourner l...

Страница 24: ...u téléviseur Si c est le cas il peut être préférable de les installer verticalement sur la tablette plutôt que de les installer au mur Nous avons prévu pour cela le kit de socles VisionSound en option Une paire de socles par kit Chaque kit contient deux socles en fonderie d aluminium une entretoise droite et gauche et des embouts de remplacement sans bouton Les socles ont un poids soigneusement ét...

Страница 25: ...uhaiter cacher les fils du haut parleur dans les murs La bride d installation murale comporte un large trou central près de l intrusion des bornes d entrée qui permet aux fils d entrer dans le mur sans être visibles depuis l avant Depuis la bride murale les fils peuvent courir jusqu à l endroit d un équipement central ou simplement jusqu à un boîtier de raccordement près du sol Sauf si vous avez d...

Страница 26: ...onnée sur toute sa périphérie VII RÉGLAGE Commutateurs de réglage de réponse PSB a déployé de gros efforts pour rendre la réponse en fréquence de votre système mural aussi plate et neutre que possible Cela procure une restitution précise et agréable de tous les genres de signaux d entrée musique voix ou bande Branchement de fil nu Branchement de fiches bananes Branchement de cosses à fourche Desse...

Страница 27: ... arrière NE placez PAS le commutateur sur la position on wall pour toutes autres conditions d installation telles qu une installation autonome ou sur une table à l aide des socles en option Même si une telle installation place le système non loin d un mur cette position dégradera la réponse pour toutes conditions d installation autres que sur un mur Le VS400 comporte son propre réglage de réponse ...

Страница 28: ...devez respecter leurs limites Des niveaux de volume excessifs peuvent endommager les haut parleurs les plus percutants en particulier sur des périodes de temps étendues B Lorsque vous écoutez de la musique ou regardez des films à très fort volume vous ne devez pas tourner les commandes de graves et d aigus à fond ou près de cette position Cela envoie une puissance formidablement augmentée et dispr...

Страница 29: ...s comme on l a expliqué à la section Protection de votre investissement B Tentez de déterminer si le problème est dû au matériel électronique ou aux haut parleurs et dans ce dernier cas à quel haut parleur Permutez les branchements des fils de haut parleurs sur votre amplificateur ou votre récepteur entre les voies de sorte que le haut parleur de gauche soit branché à la voie de droite et vice ver...

Страница 30: ... 1 po Haut parleur de graves 2 x 114 mm 4 5 po 4 x 114 mm 4 5 po nominal Cône en papier traité Cône en papier traité Suspension de Suspension de caoutchouc butyle caoutchouc butyle Recouvrement 2500 Hz 2500 Hz Réglage de correction Correction pour Réglage de contour installation murale Finition Construction Cadre de finition Titane ou noir Titane ou noir Grille Tissu de grille coordonné Tissu de g...

Страница 31: ...31 ...

Страница 32: ...32 ...

Страница 33: ...pecificaciones 33 Notas sobre la protección ambiental Al final de su vida útil no se debe eliminar este producto junto conlosresiduosnormalesdelhogar sinoquedebeserdevuelto en un punto de recolección para el reciclado de equipos eléctricos y electrónicos Así lo señalan los símbolos sobre el producto enelManualdelusuarioyenelembalaje Los materiales puede ser reutilizados de acuerdo a estos símbolos...

Страница 34: ... segundo lugar las superficies de la sala y su proximidad a los altavoces también la proximidad del oyente tienen una fuerte influencia sobre el equilibrio del sistema También trataremos estos puntos Posición angular Las bandas sonoras cinematográficas 5 1 y en menor medida las bandas sonoras estereofónicas se producen con la intención de crear un ambiente sonoro específico y llevarle a él Para ha...

Страница 35: ...ormarse Con el VS300 aunque es ideal poner el centro del sistema a la misma altura de los oídos la respuesta del sistema es amplia y puede permitirse cierta variación en la altura Los altavoces derecho e izquierdo puede montarse a la misma altura de la pared que el televisor Para ver cómodamente el televisor debería ubicarse a la altura de la cabeza de una persona sentada o a una altura intermedia...

Страница 36: ...paredes Cuanto más cerca ponga usted los altavoces de las paredes del salón atrás o a los lados mayor será la proporción de graves en su sonido Esto se debe al efecto concentrador que producen las superficies cercanas en las frecuencias de mayor longitud de onda los bajos Ubicar los altavoces cerca de la intersección de dos superficies pared y pared pared y suelo o pared y techo producirá más grav...

Страница 37: ...en usarlo como canal central horizontal sobre el televisor o sobre una mesa frente al televisor Para montar los pies suelte las manijas laterales y extienda la montura para que quede espacio entre la montura y el VS300 Encaje los pies en la montura y ajústelos con los dos pequeños tornillos Philips de cabeza en cruz provistos Ajuste el ángulo según sea necesario y apriete las dos ruedas de ajuste ...

Страница 38: ... No use los tacos plásticos rectos comunes Estos están diseñados para u s a r s e e n ladrillo y NO SOPORTARÁN el peso de un VS300 Verá que la montura para pared tiene un ángulo entre la superficie de montaje y las dos barras de soporte Dado que la montura es reversible el sistema tiene más libertad de giro en el montaje a la vez que se reduce la ranura de los extremos El producto viene con la ori...

Страница 39: ...acia la altura de los oídos aflojando ligeramente los tornillos de montaje y tirando hacia adelante de uno u otro extremo Esto no sería necesario por razones acústicas pero puede servir para alinear el sistema con un TV inclinado ligeramente hacia abajo por razones estéticas La ranura en la montura para pared tiene el largo suficiente para ajustar este ángulo Montura sobre mesa con el VisionSound ...

Страница 40: ...tar los altavoces Selección del cable Recomendamos un calibre mínimo de 16 para el cable del altavoz para longitudes normales y hasta calibre 12 para tendidos largos más de 30 Quizás le convenga escuchar y comparar el rendimiento de algunos de los cables especializados para altavoces disponibles en tiendas de audio Montaje en pared Al montar en pared el VS300 sería deseable ocultar los cables en l...

Страница 41: ...s para poderlos distinguir entre sí El aislamiento o cubierta de un conductor puede estar marcado con signos o uno de los conductores puede tener un color diferente al otro Use esta señal del cable conjuntamente con las señales de positivo y negativo del amplificador receptor y de los altavoces para conectar siempre positivo con positivo y negativo con negativo en ambos extremos del cable Ajuste f...

Страница 42: ...dos Este sonido de llegada directa es similar a la respuesta en una cámara anecoica y uno de los criterios de diseño del VS300 fue que fuera plana El sonido también viaja hacia atrás Ese componente rebota en la pared de montaje y llega a su oídos aproximadamente 1 milisegundo después del sonido directo El efecto principal de esta llegada retrasada es causar un agujero significativo en 500 Hz justo...

Страница 43: ...ar problemas a alto volumen Están destinados sólo a la escucha a bajo volumen C Finalmente debe saber que cuando se lleva los amplificadores y receptores al límite para producir niveles de volumen excesivos entran en recorte lo que puede causar un grave daño particularmente a los altavoces de agudos Frecuentemente el daño lo provocan amplificadores de baja potencia que alcanzan muy pronto su límit...

Страница 44: ...omponente o muy frecuentemente en un cable o un problema de conexión entre componentes Si el problema permanece en el mismo altavoz independientemente del canal al que se lo conecta después de cambiar el cable del altavoz probablemente sea el altavoz mismo el que necesita servicio D Consulte a su distribuidor si requiere servicio Los distribuidores de PSB están equipados para manejar casi todos lo...

Страница 45: ...l Cúpula de aluminio de 1 Cúpula de aluminio de 1 Woofer nominal 2 x 4 5 4 x 4 5 Cono de papel tratada Cono de papel tratada Contorno de caucho butílico Contorno de caucho butílico Frecuencia de cruce 2500 Hz 2500 Hz Ajuste de EQ Corrección montaje en pared Corrección de contorno Terminación Construcción Terminación del marco Titanio o negro Titanio o negro Rejilla Rejilla combinada Rejilla combin...

Страница 46: ...46 ...

Страница 47: ...47 ...

Страница 48: ...PSB Speakers 633 Granite Court Pickering Ontario L1W 3K1 CANADA www psbspeakers com 888 772 0000 North America 905 831 6555 International Fax 905 837 6357 OM VS Rev D 05 06 ...

Отзывы: