background image

- 9 -

Cleaning and Care 

Your disk sander was developed for minimal maintenance,

however regular cleaning is required to ensure a long

trouble-free service life.

Caution!

Always disconnect the mains plug prior to cleaning and

maintenance operations.

1. Regularly inspect the mains cable for damage.

2. Ensure the abrasive disk is securely seated and in

perfect condition, if necessary replace the abrasive disk.

3. Thoroughly clean the disk sander after use.

Warning!

To avoid fire or toxic reaction, never use gasoline, naphtha,

acetone, lacquer thinner, or similar highly volatile solvents

to clean the disk sander.

Do not allow brake fluids, gasoline, or penetrating oils to

come in contact with the plastic parts. They contain

chemicals that can damage or destroy plastics.

Turn switch OFF and always remove plug from power

source before making any adjustments or repairs.

All electrical or mechanical repairs should be done only by

qualified service technicians.

When servicing use only PROXXON replacement parts.

Use of any other parts may create a hazard or cause

product damage.

Any attempt to repair or replace electrical parts on this disk

sander may create a hazard unless repair is done by a

qualified service technician. Repair service is available at

your PROXXON service center (You find the address at

address at the back of this manual)

Содержание TG 250 E

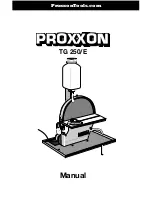
Страница 1: ...ProxxonTools com Manual TG 250 E 2 Fig Fig 16 15 14 13 12 11 10 9 8...

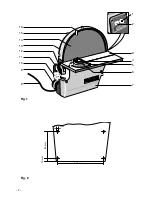
Страница 2: ...2 Fig 1 Fig 2 4 5 6 3 1 2 10 mm 80 mm 135 mm 4 5 mm 16 15 14 13 12 11 10 9 8 1 2 3 4 5 6 7...

Страница 3: ...his instru safety r operatio spare p Please re Using this make i help pr increas Keep this Only oper and follow PROXXON functionin 1 if it per 2 if it fied 3 if th 4 War rect cien In the inte safety r...

Страница 4: ...Repairs e g replacement of the power supply lead may only 6 be performed by a qualified electrician 7 Never work without the safety equipment fitted 8 Do not use electrical power tools in the rain in...

Страница 5: ...cing when changing accessories such as blades bits cutters and the like 16 REDUCE THE RISK OF UNINTENTIONAL STARTING Make sure switch is in off position before plugging in 17 USE RECOMMENDED ACCESSORI...

Страница 6: ...14 12 Not Recommended Legend fig 1 1 Speed controller 2 On off switch 3 Working table 4 Angular limit stop clamping bolt 5 Angular limit stop 6 Angular limit stop scale 7 Housing 8 Mains cable 9 Spigo...

Страница 7: ...ssary correct the zero setting of the indicator 12 fig 1 after releasing the clamping bolts Note Perform a grinding test before performing precision work 3 Grind a piece of wood and check the angle if...

Страница 8: ...meter low speed outer diameter high speed 4 The abrasive disk turns in an anti clockwise direction For this reason only grind on the left half of the working table Important Only use abrasive disks wh...

Страница 9: ...e solvents to clean the disk sander Do not allow brake fluids gasoline or penetrating oils to come in contact with the plastic parts They contain chemicals that can damage or destroy plastics Turn swi...

Отзывы: