background image

– 5 –

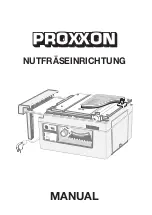
PROXXON – Rabbet milling 
attachment 28736

The rabbet milling attachment for the
PROXXON FKS/E fine circular saw can be
used for the easy milling of all kinds of
grooves and rabbets in model building and
cabinet making. With the enclosed hard-
metal milling blade, rabbets can be cut with
a width of 2 mm and a maximum depth of
8mm. Please read these instructions care-
fully before using the attachment and take
special note of the safety instructions. 

For your safety:
• you must also observe the safety instruc-

tions for your FKS/E,

• you should keep the machine manuals

ready to hand while working.

FITTING THE
RABBET MILLING ATTACHMENT

Note! For the following steps, you will need
the manual of your FKS/E ready to hand.

1. Dismantle the saw blade cover of your

FKS/E (see also fig. 1).

2. Remove the saw blade and replace it

with the enclosed milling blade.

3. To screw on the protective cover as

shown in fig. 2, remove the plastic stop-
per and insert the threaded bolt through
the opening. Fix from below with the
knurled nut.

4. Check that the protective cover moves

freely and the clearance from the saw
table as shown in fig. 4.

Remark:
For machines with no hole in the work table,
you can make one yourself, as in fig. 3.

WORKING WITH THE RABBET MILLING
ATTACHMENT.

Danger!

The fine circular saw must always be se-
curely fastened and stable.
Never work without the protective cover.
Always pull the mains plug before perform-
ing care and maintenance work.
Never leave the machine unattended.
Always change a defective or worn milling
disc. 

The milling disc supplied has a diameter of
50 mm. Note that if larger diameter milling
discs are used, the protective cover will be
damaged. 

1. Setting up the milling blade. For the de-

sired setting, note also the explanations
in the manual of the circular saw.

2. Set the fence position. Note: the fence

must be fitted in its guide before the pro-
tective cover is mounted; mounting in
the reverse order is not possible.

3. After switching on the machine, move

the work-piece slowly, as shown in fig.
5. Make sure that the protective cover
follows the movement correctly. You
should also take care that the work-
piece is placed securely on the table.

Tip:
The milling blade is 2 mm wide. If you wish
to cut wider rabbets, simply shift the fence
by the appropriate amount and repeat the
milling pass.

Enjoy your work!

GB

Содержание 28736

Страница 1: ...MANUAL NUTFR SEINRICHTUNG...

Страница 2: ...er leggere le istruzioni per l uso aprire le pagine ripiegate contenenti le figure Espa ol Al consultar el manual de instrucciones abrir la hoja plegable Nederlands Bij het lezen van de gebruiksaanwij...

Страница 3: ...0 10 10 20 20 30 30 40 40 50 50 60 60 70 70 80 80 90 100 110 120 130 90 10 15 20 25 30 35 40 45 0 5 100 Weichholz Hartholz Kunststoff NE Metalle Platinen Glasfaser Tischkreiss ge FKS E HM S geblatt D...

Страница 4: ...S getisch gem ss Fig 4 Anmerkung F r Ger te ohne Bohrung in der Arbeits platte k nne Sie diese selbst gem ss Fig 3 anfertigen ARBEITEN MIT DER NUTENFR SEINRICHTUNG Achtung Gefahr Die Feinkreiss ge mu...

Страница 5: ...and the clearance from the saw table as shown in fig 4 Remark For machines with no hole in the work table you can make one yourself as in fig 3 WORKING WITH THE RABBET MILLING ATTACHMENT Danger The f...

Страница 6: ...arque Pour les appareils sans per age dans le plan de travail vous pouvez en faire vous m me conform ment la fig 3 TRAVAILLER AVEC LE DISPOSITIF DE RAINURAGE Attention danger La scie circulaire fine d...

Страница 7: ...secondo fig 4 Nota Per apparecchi senza foro nel banco lavo ro lo si pu eseguire seguendo le indicazio ni su fig 3 LAVORARE CON IL DISPOSITIVO PER LA FRESATURA Attenzione pericolo La sega va sempre f...

Страница 8: ...seg n fig 4 Observaci n Para aparatos sin taladro en la encimera de trabajo usted mismo puede confeccionar lo como se indica en la fig 3 TRABAJAR CON EL DISPOSITIVO FRESADOR PARA RANURAS Atenci n peli...

Страница 9: ...en opzichte van de zaagtafel volgens afb 4 Opmerking Voor toestellen zonder boring in de werk plaat kunt u deze zelf volgens afb 3 ver vaardigen WERKEN MET DE GROEVENFREES VOORZIENING Attentie gevaar...

Страница 10: ...kor rekt i henhold til fig 4 Anm rkning Ved maskiner uden hul i arbejdspladen kan man selv fremstille den i henhold til fig 3 ARBEJDE MED NOTFR SEREN OBS fare Finrundsaven skal altid v re fastgjort si...

Страница 11: ...sa Er om att skyddsk pan g r fri och kontrollera avst ndet till s gbordet i enlighet med bild 4 Anm rkning Om maskinen r f rsedd med ett arbets bord utan h l kan Ni sj lv f rf rdiga ett s dant i enlig...

Страница 12: ...oje bez otvoru v pracovn desce m ete tento vytvo it sami podle fig 3 PR CE S FR ZOVAC M ZAR ZEN M DR EK Pozor nebezpe Jemn kotou ov pila mus b t poka d bezpe n a stabiln upevn n Nepracujte nikdy bez o...

Страница 13: ...trol ediniz Not al ma plakas nda delik olmayan cihazlar i in delikleri resim 3 uyar nca kendiniz a a bilirsiniz YIVLI FREZE ILE AL MAK Dikkat Tehlike Hassas yuvarlak testere daima emniyetli ve sa lam...

Страница 14: ...24 Wartberg Aist Wir reagieren prompt und zuverl ssig ber diese Adresse k nnen Sie auch alle erforderlichen Ersatzteile bestellen Wichtig Eine kurze Fehlerbeschreibung hilft uns noch schneller zu reag...

Отзывы: