background image

U

s

in

g

 t

h

e

 F

e

a

tu

re

s

Using the Features

23

USING THE FEATURES

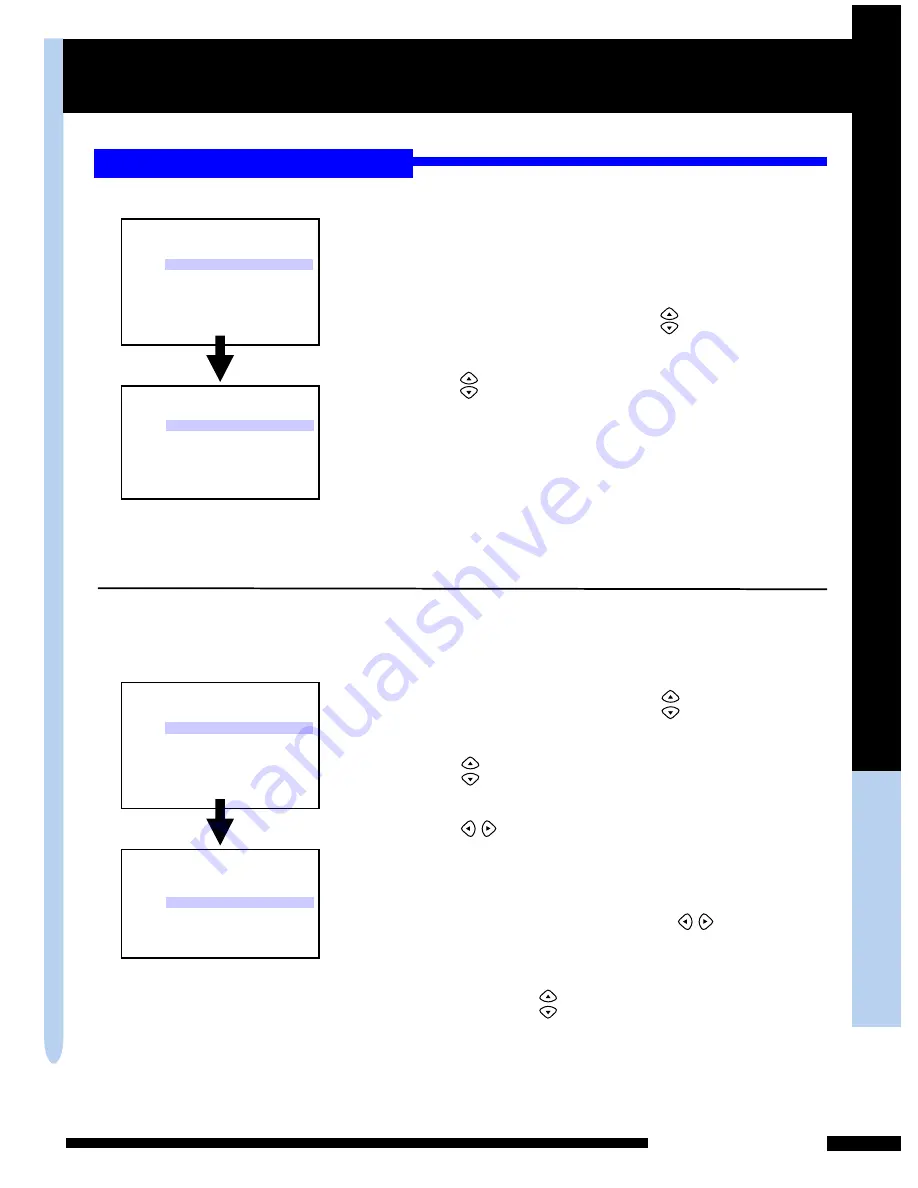
1

Press      to move the highlight bar to the 

CH SEARCH

,

then press the 

OK

 button.

2

3

1

2

Press       to select the 

CH MEMORY

, then press 

the 

OK

 button.

3

4

Press          to select the 

NO

 option to remove a 

channel. Repeat steps 1~4 to remove 
other channels.

5

Editing channels

Allow you to customize the 
channel list that appears when you 
use the - buttons.

SOURCE             CABLE STD
CH SEARCH
CH MEMORY     NO
RETURN

TV SETTING

Press the 

MENU

 button on the remote control

to display the TV Menu, and use       to select 
the 

TV SETTING

, then press the 

OK

 button.

VIDEO ADJUSTMENT
PC DISPLAY
TV SETTING
C.C/V-CHIP
AUDIO SETUP
SETUP MENU
RESET
EXIT

MENU

The 

CH SEARCH 

automatically creates a list of 

receivable channels
Press the 

EXIT

 button at any time to interrupt 

the memorization process. (the list cannot be created
if interrupted) .. 

Press the 

MENU

 button on the remote control

to display the TV Menu, and use       to select 

the 

TV SETTING

, then press the 

OK

 button.

To add a channel , use  

you wish to add and 

Press          to select 

the 

YES

 option


the 

0-9 

 buttons to choose the 

channel 

, then repeat steps 2~3 to add 

the channel.

Press the 

-

  button on the remote control 

to select the channel you wish to delete.

You can also use     to select the 

RESET 

option, then 

press the 

OK 

button to restore a default TV channel 

table.

Setting up the Channel List

After you have finished connecting a TV cable or 
antenna to your LCD TV, press the 

TV

 button 

on the remote control.

SOURCE             CABLE STD
CH SEARCH
CH MEMORY     NO
RETURN

TV SETTING

VIDEO ADJUSTMENT
PC DISPLAY
TV SETTING
C.C/V-CHIP
AUDIO SETUP
SETUP MENU
RESET
EXIT

MENU

Содержание HV-147

Страница 1: ...USER GUIDE LCD TV Component Video Inputs Multiple I O Support Digital Noise Reduction Progressive Scan Display Excellent Audio Performance with BBE HV 147...

Страница 2: ......

Страница 3: ...that interference will not occur in a particular installation If this equipment does cause harmful interference to radio or television reception which can be determined by turning the equipment off an...

Страница 4: ...vice personnel This symbol is intended to alert the user to the presence of important operating and maintenance instructions in the literature accompanying the appliance WARNING CAUTION TO REDUCE THE...

Страница 5: ...power cord Do not pull the AC power cord Do not handle the AC power cord with a wet hand Do not touch the power cord and antenna cable during lightning When the equipment has not been used for a long...

Страница 6: ...ookcase built in cabinet or any other similar places that may cause poor ventilation Do not block any ventilating openings leave an open space around the equipment Always remove the cord from the outl...

Страница 7: ...irements for the grounding electrode An outdoor antenna should not be located anywhere that can be in contact of overhead power lines or any other electric light or power circuits When installing an o...

Страница 8: ...note the RF switch is required to provide two inputs A and B not included A position on the RF switch not included you can view all unscrambled channels by using the TV channel keys B position on the...

Страница 9: ...n outdoor antenna A Use a VHF UHF combination outdoor antenna B Use a separate VHF and or UHF outdoor antenna A 300 ohm system is a flat twin lead cable that can be attached to a 75 ohm terminal throu...

Страница 10: ...P MENU 33 23 USING THE FEATURES 36 SPECIFICATIONS 35 TROUBLESHOOTING PREPARATION 9 Features 9 Package Contents 10 Your LCD TV 11 Front View 11 Rea View 1 12 Rear View 2 13 Remote Control 14 Using your...

Страница 11: ...ious Audio Video terminals for external equipment connection BBE High Definition Sound restores clarity and presence for better speech intelligibility and musical realism Excellent Audio performance w...

Страница 12: ...ction If you want to set up a complex system you may need to buy extra cable connector etc Remote control AAA batteries Power Cord A V Cable User Guide COMPONENT Cable S Video Cable D SUB Cable Audio...

Страница 13: ...volume up and down Changes values for menu items when in the OSD The LED light indicates when the LCD TV is activated green light indicates on and amber indicates off ITEM DESCRIPTION CHANNEL POWER S...

Страница 14: ...D Sub connector AUDIO IN Connects the audio input jack of the satellite receiver or other AV equipment with D Sub connector AUDIO IN LINE OUT DC IN LINE IN Connects the ear phone output jack of the AV...

Страница 15: ...t and right audio output jacks of the Video or S Vide or Component Y Cb Cr S VIDEO Connects to the S VIDEO output jacks and Audio output jacks on your video equipment VIDEO Connects to the composite A...

Страница 16: ...6 7 1 2 3 4 5 6 7 8 OK RESET Restores the factory settings Allows you to move select and set up the OSD options TV AV S VIDEO VGA YUV 2 9 For Europe TV system only TEXT 10 Turns the TELETEXT on and of...

Страница 17: ...and ends indicated in the battery compartment Slide the cover back into place 2 3 Slide the back cover to open the battery compartment of the remote control 1 Your remote control can be activated fro...

Страница 18: ...V off when the LCD TV is not in use for a long period of time The Power button is only used for switching the LCD TV on and off it does not disconnect the device from the main voltage To completely di...

Страница 19: ...rnal equipment do not connect any AC power cords to wall outlets until you have completed all connections Connecting a TV Cable or an Antenna Use a supplied antenna cable to connect the VHF UHF to you...

Страница 20: ...1 Use an AV cable to connect the VCR s composite output jacks to your LCD TV 1 2 3 4 To watch VCR press the AV button on the remote Method 2 Press the POWER button on the remote to turn on your LCD TV...

Страница 21: ...to your LCD TV Use an S Video cable to connect your LCD TV and DVD player Press the POWER button on the remote to turn on your LCD TV To watch DVD press the YUV button on the remote Method 3 Use an A...

Страница 22: ...watch programs by satellite receiver press the YUV button on the remote Use a D SUB cable to connect the TV Cable Box D SUB VGA connector to your LCD TV Use an audio cable to connect the LCD TV and T...

Страница 23: ...ress the AV button on the remote Method 2 Press the POWER button on the remote to turn on your LCD TV Press the POWER button on the remote to turn on your LCD TV Connecting a Video Camera Note Not all...

Страница 24: ...output jack to the Ear phone 1 2 3 Press the POWER button on the remote to turn on your LCD TV Audio Cable Connecting an Ear Phone LINE OUT Connect the AC power cable to the DC adapter and connect th...

Страница 25: ...s a list of receivable channels Press the EXIT button at any time to interrupt the memorization process the list cannot be created if interrupted Press the MENU button on the remote control to display...

Страница 26: ...button Press the JUMP button to alternate back and forth between two channels If your LCD TV does not display a picture check to make sure all connections are secure and correct Press the EXIT button...

Страница 27: ...on the screen 1 1 3 2 2 Use to highlight your main menu option then press the OK button to enter your selected option Use to highlight an option of the sub menu Use to change the value of the item Pr...

Страница 28: ...effects Allows you to adjust the RGB color 6 5 SETUP MENU AUDIO SETUP Allows you to set up the following features OSD timeout OSD language This function will enable if the signal source is VGA This fu...

Страница 29: ...ust the brightness of the picture CONTRAST Allows you to adjust the contrast of the picture SHARPNESS COLOR Allows you to adjust the color intensity of the picture HUE Allows you to adjust the color t...

Страница 30: ...RETURN 50 50 0 50 3 PC DISPLAY 50 CONTRAST Allows you to adjust the contrast of the picture BRIGHTNESS Allows you to adjust the brightness of the picture CLOCK Allows you to adjust the vertical size...

Страница 31: ...to the previous menu SOURCE CH SEARCH CH MEMORY RETURN CABLE STD NO TV SETTING SOURCE Allows you to choose the antenna or cable signal AIR If you are receiving TV channels with an antenna CABLE STD HR...

Страница 32: ...s the OK button the V CHIP SETUP displays V CHIP function 1 Press to move the highlight bar to the MODE then press the OK button 2 Press the MENU button on the remote control to display the TV Menu an...

Страница 33: ...G 13 R NC 17 X General Audiences Movie is appropriate for all ages Parental guidance suggested May Contain material not suited for younger viewers Contains content that may not be appropriate for view...

Страница 34: ...Option Description 2 BASS Allows you to adjust the lower pitched sounds TREBLE Allows you to adjust the higher pitched sounds BALANCE Allows you to adjust the balance of the speakers BBE Allows you t...

Страница 35: ...menu 5 60 seconds and off RETURN Allows you to return to the previous menu If the signal source is TV C VIDEO YCbCr S VIDEO VGA the OSD displays LANGUAGE SLEEP TIMER H POSITION V POSITION OSD TIMEOUT...

Страница 36: ...Using the Features Using the Features 34...

Страница 37: ...le TV Press the Power button on the remote Press the TV button on the remote or press other input source button to select the connected video sources Poor picture sound OK Check the interface cable be...

Страница 38: ...Out 14 Inch LCD TV NTSC PAL D K 75 unbalanced 3W x 2 640 pixels horizontal x 480 pixels vertical Power Source Power Consumption MAX AC 100 240V 60 50 HZ 60W Dimension Physical 10 79 lbs 18 58 inch W...

Страница 39: ...s and water damage Repair or replacement of warranted parts by other than Proview authorized service centers Units purchased or serviced outside of the coverage area Product where the original factory...

Страница 40: ......

Отзывы: