6
7
1. Make sure the drone is turned off.
2. Open the battery cover and remove the battery.
3. Connect the USB charging cable to the battery.
4. Plug the charger into a USB port. The USB light will turn off while
charging and will turn on once fully charged.
Charging time: 50 minutes --- Flying time: approximately 5 minutes
NOTE
1. If the Paparazzi AP and the remote do not sync after following the
checklist, reverse steps 1 and 2 of the process. Turn the remote and
the drone off. Then, turn on the remote first and then the drone.
2. Turn on the controller; if, after 30 seconds, it has not recognized the
drone, turn off the controller to retry synchronization.
3. If the Paparazzi AP is unsteady in flight, it may not have been able
to calibrate horizontally. Power down both drone and remote and
restart pre-flight procedure.
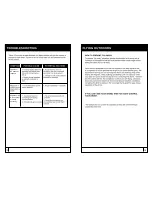
1. Turn on the drone by connecting the battery wire to the drone and place it
on an even surface.
2. Turn on the remote control.
3. Both indicators on the drone and the remote will flash while they are
syncing.
4. Push the throttle up and then down to sync. You will hear two beeps
and the lights will go steady.
Tip: When syncing your drone keep it in a horizontal position for stable flight.
Содержание PAPARAZZI AP DRONE with camera
Страница 1: ...INSTRUCTION MANUAL PAPARAZZI AP DRONE with camera TM ...
Страница 3: ...1 ...
Страница 4: ...2 3 ...
Страница 5: ...Battery cover ...
Страница 7: ...OPERATION FLYING THE DRONE 8 9 ...
Страница 8: ...10 11 ...
Страница 10: ...Paparazzi AP does not respond Paparazzi AP will not hover or strafe correctly 14 15 ...
Страница 12: ......


