Prosonic DFT-2615 Скачать руководство пользователя страница 8


- 8 -


Basic Operation 

All the functions can be conducted by pressing the keys on the remote control. For some functions you can also press 

the buttons on the control panel of the TV set. Please check the table on Page 6 for details. 

Power On/Off 

1.Turn on the POWER button on the back cover, the TV is at STANDBY status, press <POWER> on the remote 

control or <        > on the control panel to turn on the TV. The power indicator is red at STANDBY status, it is green when 

the TV is ON and has signal. 

2.Press <POWER> on the remote control to switch between ON and STANDBY.


3.You can turn off the TV directly by pressing POWER button on the TV set. 

To receive TV program 

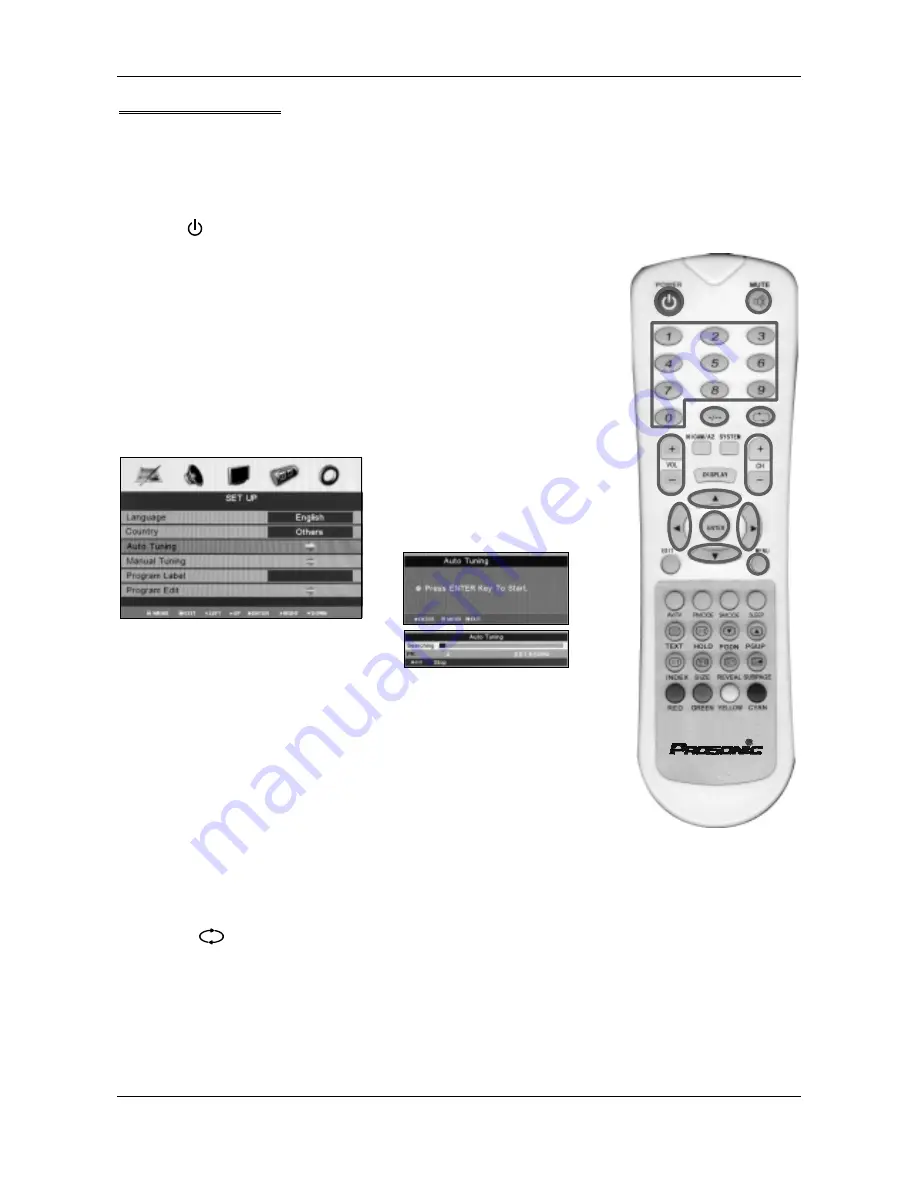
1.Press <MENU> to display the OSD main menu. 

2.Press <

 / 

> to select “SET UP”, press <ENTER>. 

3.Press <

 / 

> to select “Country”, press <

 / 

>to select a country where you 

are. 

4.Press <

 / 

> to select “Auto Tuning”, press <ENTER>. 


5.Press <ENTER> to start auto tuning. 

A brand of tuning progress will be display 
on the bottom side of the screen. 


6.During searching, you can press the 

<EXIT> to stop searching at any moment, and 
return to the previous menu. 

The TV set begins to store the TV program from channel 0 automatically.


After auto 

tune, you can watch the TV programs one by one by pressing <CH->/<CH+>, or press 
<-/--> and numeric keys to select the channel you want to watch. 

To adjust volume 

Press <VOL->/<VOL+> to decrease or increase the volume. 

Mute 

Press <MUTE>, the mute mark appears on the bottom left corner of the screen, it indicates the MUTE function is on, 

the sound disappears; press <MUTE> again, the mark disappears, it indicates the MUTE function is off, the sound 
recovers. 

Return 

Press <            > to return to the last program. 

Receiving the TV program by using numeric keys 

When you select the program number which is less than 10, press “-/--“ until the screen appears “ -“, then press the 

numeric keys. 

When you select the program number which is more than 10 (including 10), press “-/--“ until the screen appears “ --“, 

then press the numeric keys. 

When you select the program number which is more than 100 (including 100), press “-/--“ until the screen appears 

“ ---“, then press the numeric keys (Max 199).

DFT-3215 

Содержание DFT-2615

Страница 1: ...User s Manual To enjoy your set to the full from the very beginning read this manual carefully and keep it handy for future reference LCD Color TV DFT 2615...

Страница 2: ...To receive TV program 8 To adjust volume 8 Mute 8 Return 8 Receiving the TV program by using numeric keys8 Using Menus 9 PICTURE 9 How to enter PICTURE 9 How to use PICTURE 9 SOUND 10 How to enter SO...

Страница 3: ...ely unplug the power cord from the outlet and call the shop for repairing Do not remove the back cover by yourselves to avoid electrical shock Let qualified technicians check and adjust your TV When a...

Страница 4: ...the power is turned off completely when it is loaded and transported do not touch especially do not press the panel when it is loaded and transported Do not turn on and turn off the set continuously...

Страница 5: ...ed by this set AC 220V 240V 50Hz When away for a long time turn off the power then unplug the power plug Do not connect the set to DC power Remote control s batteries installation This remote control...

Страница 6: ...s on control panel Press this button the TV switches between ON and STANDBY TV AV Press this button the signal switches among TV SCART 1 SCART 2 AV S Video YPbPr VGA and HDMI To exit the main menu MEN...

Страница 7: ...change signal source TV SCART 1 SCART 2 AV S Video YPbPr VGA and HDMI 14 NICAM A2 When the TV is broadcasting the program with Nicam press this key to select sound channel 15 SYSTEM Switch among D K...

Страница 8: ...tom side of the screen 6 During searching you can press the EXIT to stop searching at any moment and return to the previous menu The TV set begins to store the TV program from channel 0 automatically...

Страница 9: ...h best corresponds to your viewing requirements by selecting Picture Mode in PICTURE menu The following picture effects are available Dynamic Standard Mild and User You may select the picture mode dir...

Страница 10: ...t the item 3 When you satisfied with your adjustment press MENU to return to the previous menu or press EXIT to exit the main menu Volume Adjust the sound level Sound Mode Select the type of sound whi...

Страница 11: ...n allows you to tuning the stations that can be received automatically fig 3 fig4 Note It is recommended to select a corresponding country where you are before start Auto Tuning Manual Tuning This opt...

Страница 12: ...directly or press to select the letters 5 Press to move the cursor 6 After completed press MENU to return to the previous menu or press EXIT to exit the main menu Program Edit This function allows you...

Страница 13: ...the item 3 When you satisfied with your adjustment press MENU to return to the previous menu or press EXIT to exit the main menu Sleep Timer Select the sleep time automatically to standby Sleep time...

Страница 14: ...ustment press MENU to return to the previous menu or press EXIT to exit the main menu Video Size This option allows you to select the screen display mode which best corresponds to your viewing require...

Страница 15: ...This option allows you to adjust the position in VGA mode Auto sync Adjust screen settings automatically for optimized picture position Phase Remove any horizontal interference Clock Remove any vertic...

Страница 16: ...ymbol will appear on the page heading Press HOLD again to allow the page changing the HOLD symbol will disappear REVEAL Some TELETEXT pages contain quiz or game questions with hidden answers Press REV...

Страница 17: ...er connecting line attached to the Accessories See the picture Note Different TV has different position of speaker connecting clip please see the material object TV back cover terminals HDMI Connectin...

Страница 18: ...e YUV component cable VGA cable PC audio cable Connecting your PC Note YUV Y Pb Pr Y Cb Cr Earphone Connecting the Earphone Connecting DVD VCR with CVBS or S Video Cable Connecting to an antenna Conne...

Страница 19: ...rection 6 May be jamming from nearby equipment 7 Adjust brightness 8 Adjust contrast 9 Check if the TV station is broadcasting color program 10 Adjust color control 11 Direct remote control to TV s in...

Страница 20: ...50Hz 5 Power consumption 120W 6 Sound power consumption admitted distortion rate 10 Left and right sound channel 3W 3W 7 VGA interface input 640x480 60Hz 800x600 60Hz 1024x768 60Hz 8 Dimensions See t...

Страница 21: ...trical and electronic appliances The symbol on the product the instructions for use or the packing will inform about the methods for disposal The materials are recyclable as mentioned in this marking...

Страница 22: ...Reference Purchase date Model No Dealer S N...

Отзывы: