

The MVI56E-GSC Generic ASCII Serial Communication module is configured in RSLogix™
5000 software using the sample ladder or Add-On Instruction (AOI). The module provides
all the documentation from its built-in web server. The product CD-ROM in the box
contains two installation programs for ProSoft Discovery Service (PDS) and ProSoft
Configuration Builder (PCB).
• PDS is the software utility used to allow your PC to connect to the module’s built-in web
server and set a temporary Ethernet IP address. Then you can connect to the module’s
web page to retrieve module documentation or change the module’s firmware though
an Ethernet link.
• PCB is the software used to provide access to the module’s diagnostic menus and serial
communication data analyzer features.
MVI56E products are
backward compatible
with existing MVI56 products, ladder logic,
and module configuration files already in use. Easily swap and upgrade products while
benefiting from an array of new features designed to improve interoperability and enhance
ease of use.
•
Web Server:
The built-in web server and web page allow access to manuals and other
tools previously provided only on a product CD-ROM or from the ProSoft Technology®
web site.
•
ProSoft Configuration Builder (PCB):
New Windows software for diagnostics,
connecting via the module’s Ethernet port or CIPconnect®, to upload/download module
configuration information and access troubleshooting features and functions.
•
ProSoft Discovery Service (PDS):
Utility software to find and display a list of MVI56E
modules on the network and to temporarily change an IP address to connect with a
module’s web page.
•
CIPconnect-enabled:
Allows PC-to-module configuration and diagnostics from the
Ethernet network through a ControlLogix 1756-ENBT EtherNet/IP™ module.
•
Personality Card:
An industrial compact flash memory card storing the module’s
Ethernet settings, allowing quick and easy replacement.
•
LED Scrolling Diagnostic Display:
4-character, alphanumeric display, providing English
messages for status and alarm data, and for processor and network communication
status.
Start Here
Note:
This procedure is for accessing module documents from the built-in
web server only. Module configuration is done through ladder logic or Add-
On Instruction; so, this procedure is optional for MVI56E-GSC users. Module
documentation is also available on the product CD-ROM or from the ProSoft
Technology® web site.
Note:
If you cannot connect through an Ethernet hub or switch, try a direct
connection between your PC and the module’s E1 port. You can use the same
provided cable. The module’s E1 port is auto-sensing and will automatically correct
for the cable type used (with or without crossover).
Continued on back.
What’s Different
What’s New
Quick Start
Replacing or Upgrading an existing MVI56:
If you are replacing an MVI56-GSC module,
simply remove it and insert the MVI56E-GSC module into the same slot. Your existing
ladder logic will automatically configure the MVI56E-GSC module. Follow the procedures
below to learn how to use the new Ethernet port. The MVI56E-GSC no longer utilizes a
serial port for diagnostics or data analyzer access.
First-Time Users:
Follow the procedure below to access the module’s web page and copy
the Setup Guide to your PC.
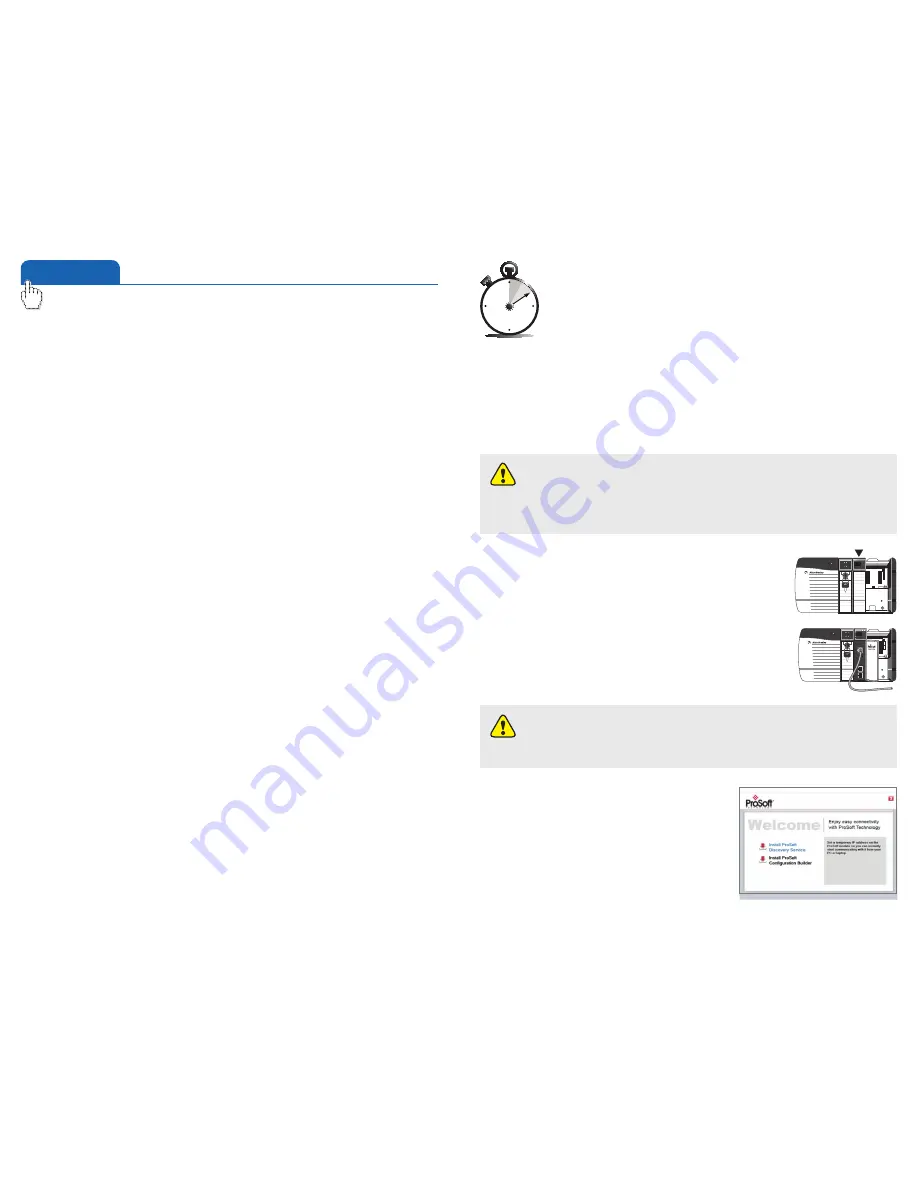
1.
Install the Module in the Rack
Insert the MVI56E-GSC into the ControlLogix chassis. Use the
same technique recommended by Rockwell Automation® to
remove and install ControlLogix modules.
2.
Connect your PC to the Module
With the module securely mounted, connect one end of the
provided Ethernet cable to the module’s Ethernet port (E1) and the
other end to an Ethernet hub or switch accessible from the same
network as you PC.
POWER
MVI56E Module
Logix5500
POWER
Logix5500
3.
Install ProSoft Discovery Service
If you want to retrieve documentation from the module
rather than from the CD-ROM, you will need to install
the ProSoft Discovery Service (PDS) software.
a. Insert the MVI56E Product Support Software CD-
ROM into the CD drive of your PC.
Wait for the Startup screen to appear.
b. Click the Install ProSoft Discovery Service icon
to begin installing the software.


