


Promise Array Manager
66
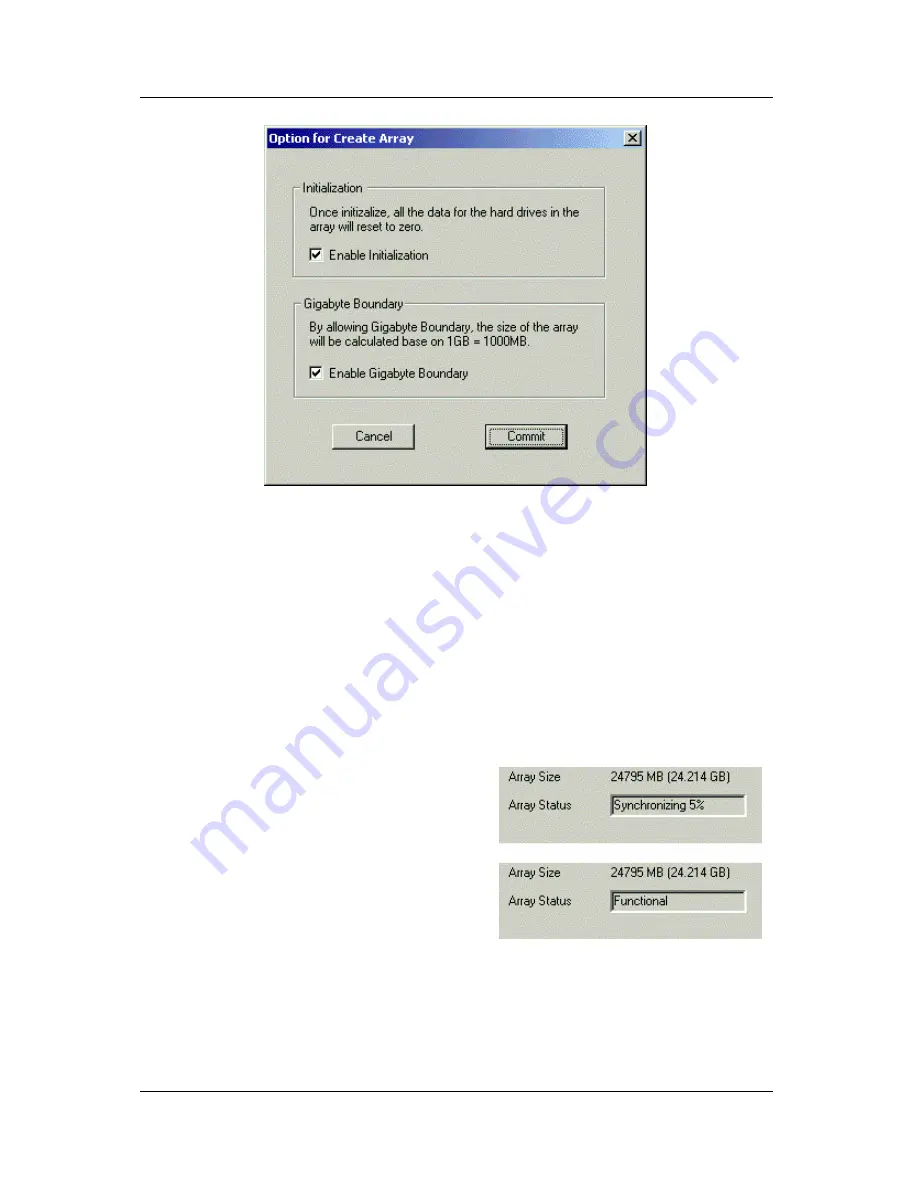
Figure 5-17. Options dialog box.
7. Click the Commit button in the Information View. The Options dialog
box appears. Check the box to enable:
Initialization
? Data on all drives is set to zero, erasing the disks.
Gigabyte Boundary
? On the array, a GB will be based on 1000 MB
used with networking, rather than the 1024 MB normally used with
computers.
8. When you have made your selection, click the Commit button on the
Options dialog box.
For several minutes, depending on
the number and size of disks in
your array, the Array Status field in
the Information View will show that
the array is synchronizing (right).
9. When the Array Status field shows
Functional (right), reboot your
computer.
Note: You cannot read or write to a newly created array until it is done
synchronizing and you have rebooted your computer.
Содержание PAM
Страница 1: ...PROMISE ARRAY MANAGEMENT PAM USER MANUAL ...
Страница 6: ......
Страница 12: ...Promise Array Management 6 ...
Страница 52: ...Promise Array Manager 46 ...
Страница 64: ...Promise Array Manager 58 Figure 5 11 A Controller in the Device Object View top and Information View bottom ...
Страница 79: ...Monitoring and Maintenance 73 ...
Страница 84: ...78 ...


