14
9.0
Operating Controls
Refer to Figure 9‐1:
N ........................................... Spindle power ON/OFF
O .......................................... Spindle forward/reverse
P ...................................... Variable speed select knob
Q ...................................................... Emergency Stop
R ................................................ Spindle speed display
Figure 9‐1: Operating Controls
10.0
Machine Operation
10.1
Cutting execution
Before starting the machine check the proper chucking.
Close the chuck guard and pulley cover before you start the
machine.
Select running direction, forward or reverse (O, Fig 9‐1).
You can start the machine with the green ON‐button (N).
The red OFF‐button stops the machine.
The speed can be adjusted with the variable speed select knob
(P).
The spindle speed will be shown on the display (R).
The emergency stop button (Q) stops all machine functions.
Turn emergency stop button clockwise to reset.
Unplug the machine if not in use !
10.2
Chucking
Do not exceed the max speed of the work holding device.
Jaw teeth and scroll must always be fully engaged. Otherwise
chuck jaws may break and fly off in rotation (Fig 10‐1).
Figure 10‐1: Poor jaw engagements
Avoid long workpiece extensions. Parts may bend (Fig 10‐2) or
fly off (Fig 10‐3). Use tailstock or rest to support.
Figure 10‐2: Workpiece too long
Figure 10‐3: Workpiece too long
Avoid short clamping contact (A, Fig 10‐4) or clamping on a
minor diameter (B). Face locate workpiece for added support
Figure 10‐4: Poor clamping
Содержание PBD-1830V
Страница 18: ...18 15 0 Replacement Parts PBD 1830V Assembly Breakdown 1...
Страница 20: ...20 PBD 1830V Assembly Breakdown 2...
Страница 22: ...22 PBD 1830V Assembly Breakdown 3...
Страница 24: ...24 PBD 1830V Assembly Breakdown 4...
Страница 26: ...26 PBD 1830V Assembly Breakdown 5...
Страница 28: ...28...
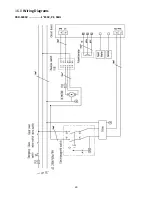
Страница 29: ...29 16 0 Wiring Diagrams PBD 1830V 1 230V PE 50Hz...


