background image


5—9 

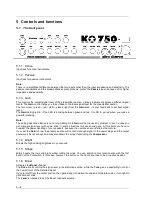
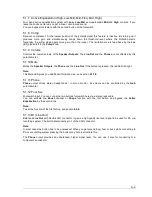
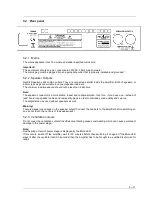
5.1.7  Active Equalization (High, Low-Mid, Mid-Freq, Mid, High) 

Four  band  active  equalization  system  with  Low,  Low-Mid,  semi-parametric  Mid  and  High  controls.  If  you 
leave the knobs centered, you get a linear, uncoloured sound. 
You can bypass this feature with the second button of the footswitch. 

5.1.8  Comp 

Dynamic  compressor.  At  the  lowest  position  of  the  potentiometer  this  feature  is  inactive.  By  turning  up  it 
produces  more  gain  and  simultaneously  brings  down  the  threshold  level,  where  the  limitation  starts. 
Generally,  the  softer  playing  gets  more  gain,  than  the  louder.  The  limitation  area  is  feed  back  by  the  blue 
LED placed left to the Comp knob. 

5.1.9  Volume 

Controls the overall volume of the Speaker Outputs. The Line-Out and the Phone are not affected by this 
potentiometer. 

5.1.10 Mute 

Mutes the Speaker Outputs, the Phone and the Line-Out. If the button is pressed, the red LED is bright. 
 
Note: 
This Mute LED gives you additional information too, see section 5.1.16

5.1.11 Phone 

Phone  output  drives  stereo  headphones  /  in  mono  mode  /.  Its  volume  can  be  controlled  by  the  Gain 
potentiometer. 

5.1.12 Foot Sw. 

Footswitch input. You can connect a two-buttons footswitch here via a stereo jack cable. 
You  can  activate  the  Boost  channel  or  Shape  function  with  the  first  button  and  bypass  the  Active 
Equalization
 by the second one. 
 
Note: 
To set the function of the first button, see section 5.4.8. 

5.1.13 DI (Line Out) 

Balanced Line Out with Neutrik XLR connector. It gives a high quality line level signal to be used for PA or a 
recording system. The button disconnects pin 1 of the XLR connector. 
 
Note: 
In most cases the button has to be unpressed! When you get ground loop, hum or buzz while connecting to 
PA or a recording system pressing the button may help to eliminate this. 
 
The  Phone  output  provides  an  unbalanced,  higher  signal  level.  You  can  use  it  also  for  connecting  to  a 
computer’s soundcard. 

Содержание KO750

Страница 1: ...PROLUDE AMPLIFICATION KO750 KO750 KO750 KO750 Bass amplifier User s manual ...

Страница 2: ...1 2 ...

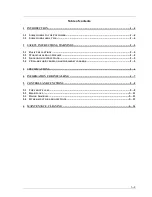
Страница 3: ...IC PRECAUTIONS 2 5 2 2 WARNINGS USED ON THE AMP 2 5 2 3 GROUNDING INSTRUCTIONS 2 5 2 4 CE MARK FOR EUROPEAN HARMONISED STANDARDS 2 5 3 SPECIFICATIONS 3 6 4 INFORMATION FOR INSTALLING 4 7 5 CONTROLS AND FUNCTIONS 5 8 5 1 THE FRONT PANEL 5 8 5 2 REAR PANEL 5 11 5 3 BLOCK DIAGRAM 5 12 5 4 OTHER FUNCTIONS PROTECTIONS 5 12 6 MAINTENANCE CLEANING 6 14 ...

Страница 4: ...ape and role within the music have all contributed to my enthusiasm To start with my studies and my sphere of interest have both moved me to the direction of electronics As a result PROLUDE AMPLIFICATION was born at the beginning of the new millennium My goal is to provide bass players with the best possible sound quality Being an electrical engineer I m doing it mainly with a technical mindset Ho...

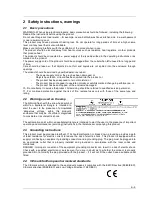
Страница 5: ...l servicing should be referred to qualified service personnel 11 For continued protection against the risk of fire replace fuses only with those of the same type and rating 2 2 Warnings used on the amp The lightning flash with the arrow head symbol within an equilateral triangle is intended to alert the user to the presence of uninsulated dangerous voltage within this product s enclosure that may ...

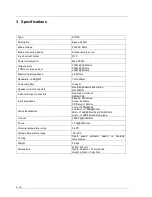
Страница 6: ...aker output connectors Neutrik Speakon Jack combo NLJ2MD H Instrument input connectors Neutrik 6 3mm Jack NMJ4HFD2 Input impedance Passive 500kohms Active 43kohms FX Return 15kohm Active Equalization Low 12dB 40Hz Low Mid 12dB 500Hz Mid 12dB Mid freq 800 3200Hz High 12dB 6kHz shelving type Line out 500mVp 600Ohms Phone 1 5Vp 50Ohms Working temperature range 0 40 C Storage temperature range 25 60 C...

Страница 7: ...aker cabinets Use high quality Neutrik SPEAKON SPEAKON speaker cable with at least 2x1 5mm2 or more cross section They are reliable robust and have less influence on the sound Use a speaker cable in good condition and connect the speaker cabinet to the amplifier before you switch on the amplifier Try to minimize the number of power strips used to connect the amplifier to the mains Use high quality...

Страница 8: ... will not cause any problem In such a case you get a larger signal level with some drive In some situations this can sound good At this point you have to consider the power handling of your speakers because the overdriven sound strains them more If you set the Gain too low the preamp section will not send enough signal to the power stage and the output power may be not enough and may also detain t...

Страница 9: ...Out If the button is pressed the red LED is bright Note This Mute LED gives you additional information too see section 5 1 16 5 1 11 Phone Phone output drives stereo headphones in mono mode Its volume can be controlled by the Gain potentiometer 5 1 12 Foot Sw Footswitch input You can connect a two buttons footswitch here via a stereo jack cable You can activate the Boost channel or Shape function ...

Страница 10: ... speakers connected It is normal Important Please avoid switching on and off the amplifier too often especially after playing at high volume level After playing at high volume level give the ventilator a few minutes to cool down the amplifier before switching it off 5 1 15 Mute LED Multifunctional feedback LED Bright when the Mute button is pressed Or if unpressed after switching on during the ven...

Страница 11: ...if you have one instead of jack Avoid long speaker cables and low quality plugs in order to maintain sound quality and volume The amplifier can be used without speakers as well Warning There is dangerous voltage on the speaker output Connect the cabinets to the amplifier before switching on and do not touch the hot pole of the speaker jack 5 2 3 Ventilation cutouts Do not cover the ventilation cut...

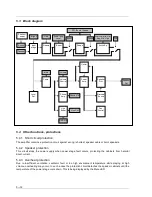
Страница 12: ...ventilator fault or too high environment temperature while playing at high volume overheating may occur In such a case the protection circuit detaches the speaker cabinets until the temperature of the power stage cools down This is being displayed by the Mute LED Input stage Preamp Boost Shape Comp Speaker Prot Volume Control Power Amp Level Det Line Buffer Phone Amp Fan Control Active Passive Act...

Страница 13: ...he DIP switch located on the bottom of the amplifier The settings are described in section 5 4 7 if your electronic does not support phantom power you have to disconnect the battery and make a short circuit on the battery clip in the bass Note The phantom power can supply 14 5V and max 6mA You get more headroom compared to the use of one 9V battery before Make sure that your electronic circuit can...

Страница 14: ...he amplifier has no need for particular maintenance Occasionally check the starting of the ventilator when you switch on the amplifier Use only soft and dry or dampened cloth for cleaning Avoid aggressive caustic cleaning materials ...

Страница 15: ...6 15 Budapest 2014 03 27 ...

Отзывы: