


PC-BHT3014_IM
20.11.17
74
•
When the comb attachment for the beard trimmer (30 mm) is attached to the
beard trimmer, you can select different length settings. The length settings are
printed on the side.
Precision trimmer
Use the precision trimmer if you want to cut precise contours. It is especially suitable
for use on the upper lip, the eyebrows, and along the jaw.
Shaver attachment
The shaver attachment has been specifically designed for close shaving on the
beard, moustache and sideburns.
Nose hair / ear hair trimmer
With this attachment, you can easily and safely remove unwanted hairs in the nose
and ear regions.
Using the Appliance
Switching On and Off
Thanks to the lock (11), the appliance cannot be turned on accidentally.
•
Press the lock and slide up the switch at the same time to turn on the appliance.
You will see “ON” on the switch.
•
Slide the switch down to turn off the appliance. You will see “OFF“ on the switch.
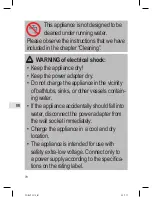
Putting on and Taking Off the Attachments
WARNING:
Always switch the appliance off before you fit attachments or accessories!
•
Always connect the attachments to the appliance by putting in the catch lock first.
•
When using the
nose hair / ear hair trimmer
, please note that the white drive
shaft must be on top of the brass-colored motor driver.
•
Press the attachment onto the base unit until you hear a click sound.
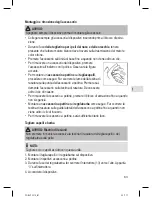
•
To remove an attachment from the appliance, press the
attachment backwards with your thumb. Take a look at the
adjacent illustration.
•
To attach a
comb attachment
to the
hair cutter
, do the fol
-
lowing: Slide the blades of the shaving head into the spikes
of the comb attachment. Press the attachment onto the
shaving head tightly. It must audibly clicks into place.
Содержание PC-BHT 3014
Страница 105: ...PC BHT3014_IM 20 11 17 105 3 106 107 110 111 111 112 115 116 116...
Страница 106: ...PC BHT3014_IM 20 11 17 106...
Страница 107: ...PC BHT3014_IM 20 11 17 107...
Страница 108: ...PC BHT3014_IM 20 11 17 108...
Страница 109: ...PC BHT3014_IM 20 11 17 109 8...
Страница 110: ...PC BHT3014_IM 20 11 17 110 1 30 2 2 5 4 3 4 3 6 9 12 5 6 39 7 8 9 10 11 12 ON OFF 13...
Страница 111: ...PC BHT3014_IM 20 11 17 111 OFF 12 12 12 12 0 40 C 39 30...
Страница 112: ...PC BHT3014_IM 20 11 17 112 39 30 11 ON OFF...
Страница 113: ...PC BHT3014_IM 20 11 17 113 1 2 3 13 3 4 5 6...
Страница 114: ...PC BHT3014_IM 20 11 17 114 13 1 10 2 3 45 13 1 2 3 13...
Страница 115: ...PC BHT3014_IM 20 11 17 115 1 2 1 6 9 10...
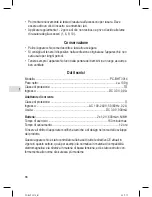
Страница 116: ...PC BHT3014_IM 20 11 17 116 PC BHT 3014 139 DC 3 0 0 9 AC 100 240 50 60 0 2 DC 3 0 900 2x1 2 600 NiMH 150 12...
Страница 117: ...PC BHT3014_IM 20 11 17 117 10 9 6 1 PC BHT 3014 139 III 0 9 3 0 II 0 2 60 50 240 100 900 3 0 600 1 2 2 150 12 CE...
Страница 118: ...PC BHT3014_IM 20 11 17 118 1 1 2 2 3 3 13...
Страница 119: ...PC BHT3014_IM 20 11 17 119 1 1 2 2 3 3 3 13 4 4 5 5 6 6 13 1 1 10 2 2 3 3 45 13...
Страница 120: ...PC BHT3014_IM 20 11 17 120 11 ON OFF...
Страница 121: ...PC BHT3014_IM 20 11 17 121 OFF 12 12 12 12 40 0 30 39 39 30...
Страница 122: ...PC BHT3014_IM 20 11 17 122 8 30 1 4 5 2 2 3 12 9 6 3 4 5 39 6 7 8 9 10 11 ON OFF 12 13...
Страница 123: ...PC BHT3014_IM 20 11 17 123...
Страница 124: ...PC BHT3014_IM 20 11 17 124...
Страница 125: ...PC BHT3014_IM 20 11 17 125 3 125 124 122 121 121 120 118 117 117...
Страница 126: ...PC BHT3014_IM 20 11 17 PC BHT 3014 Internet www proficare germany de Made in P R C Stand 10 2017...


