background image

27

THE SETTINGS MODE

The console features an information mode that keeps 
track of treadmill information and allows you to person-
alize console settings.

1.  Select the information mode.


 To select the settings mode, press the Settings 
button. When the settings mode is selected, the 
display will show the total number of hours that 
the treadmill has been used and the total number 
of miles (or kilometers) that the walking belt has 
moved. 

2.  Select the optional screens.


 While the information mode is selected, the matrix 
will display several optional screens. Press the 
increase button next to the Enter button to select 
each of the following screens:


INCLINE CALIBRATION

—To calibrate the incline 

system of the treadmill, press the Incline increase 
or decrease buttons. The treadmill will automati-
cally rise to the maximum incline level and then 
return to the minimum level.


 CONTRAST LVL

—Press the Incline increase and 

decrease buttons to adjust the contrast level of the 
display.


 Press the decrease button next to the Enter button 
to return to the previous screen.

3.  Exit the settings mode.


 To exit the settings mode, remove the key from the 
console.

HOW TO USE THE SOUND SYSTEM

To play music or audio books through the console 
sound system while you exercise, plug a 3.5 mm male 
to 3.5 mm male audio cable (not included) into the 
jack on the console and into a jack on your personal 
audio player; 

make sure that the audio cable is fully 

plugged in. Note: To purchase an audio cable, see 
your local electronics store.


Next, press the play button on 
your personal audio player. 
Adjust the volume level using 
the volume increase and 
decrease buttons on the con-
sole or the volume control on 
your personal audio player. 

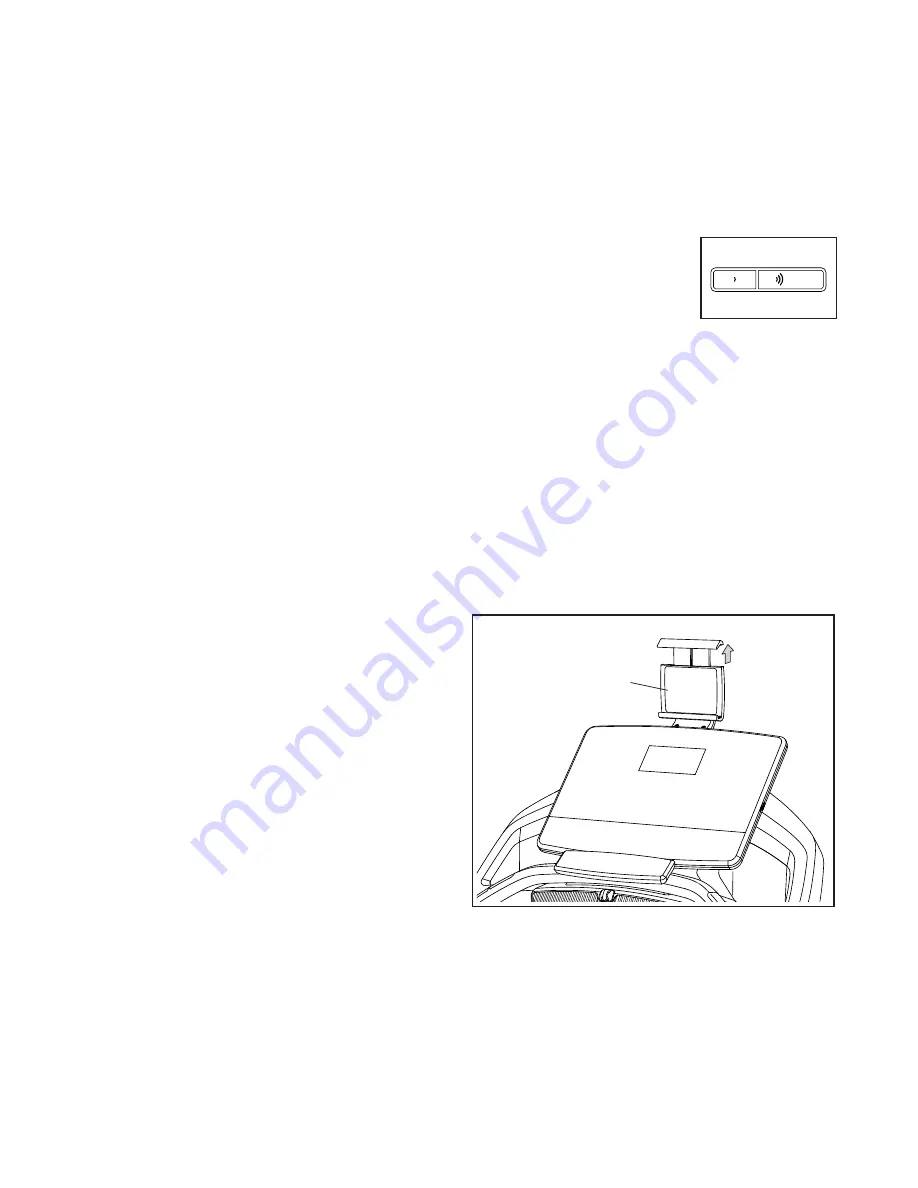
HOW TO USE THE TABLET HOLDER

IMPORTANT: The tablet holder is designed for use 
with most full-size tablets. Do not place any other 
electronic device or object in the tablet holder.

To insert a tablet into the tablet holder, set the bottom 
edge of the tablet in the tray. Then, pull the clip over 
the top edge of the tablet. 

Make sure that the tablet 

is firmly secured in the tablet holder. 

Reverse these 

actions to remove the tablet from the tablet holder.

Tablet Holder

Содержание PFTL13116.1

Страница 1: ...manual before using this equipment Save this manual for future reference proform com USER S MANUAL ACTIVATE YOUR WARRANTY To register your product and activate your warranty today go to my proform co...

Страница 2: ...ows the locations of the warning decals If a decal is missing or illegible call the telephone number on the front cover of this manual and request a free replacement decal Apply the decal in the locat...

Страница 3: ...com mended for both men and women Always wear athletic shoes Never use the treadmill with bare feet wearing only stockings or in sandals 13 Plug the power cord into a surge suppressor not included and...

Страница 4: ...properly assembled See ASSEMBLY on page 8 and HOW TO FOLD AND MOVE THE TREADMILL on page 29 You must be able to safely lift 45 lbs 20 kg to move the treadmill 26 When folding or moving the treadmill m...

Страница 5: ...5 all STANDARD SERVICE PLANS...

Страница 6: ...ons after reading this manual please see the front cover of this manual To help us assist you please note the product model number and serial number before contacting us The model number and the locat...

Страница 7: ...ey number is the quantity used for assembly Note If a part is not in the hardware kit check to see whether it is preattached Extra parts may be included 5 16 x 1 1 4 Screw 29 6 1 4 x 5 8 Screw 99 2 3...

Страница 8: ...with a soft cloth and a mild non abrasive cleaner Left parts are marked L or Left and right parts are marked R or Right To identify small parts see page 7 Assembly requires the following tools the inc...

Страница 9: ...rew 13 93 84 13 86 C B D 3 84 A 2 83 2 Make sure that the power cord is unplugged Remove the tie securing the Upright Wire 83 to the front of the Base 93 Next identify the Right Upright 84 Have a sec...

Страница 10: ...in the same way Note There are no wires on the left side 25 25 25 83 5 Identify the Left and Right Upright Covers 89 90 Slide the Left Upright Cover 89 onto the Left Upright 91 and slide the Right Up...

Страница 11: ...to pinch the Upright Wire 83 on the right side Then remove and discard the two indicated screws F F F 91 84 83 74 74 8 2 8 2 7 With the help of a second person set the con sole assembly G onto the Han...

Страница 12: ...around the wires H and cut off the end of the Wire Tie 9 83 H 8 83 H 8 See the inset drawing Connect the Upright Wire 83 to the console wire H The connec tors should slide together easily and snap in...

Страница 13: ...ws and then tighten them Then tighten the four 5 16 x 1 1 4 Screws 29 11 11 Set the Left Handrail Top Cover 73 on the left Handrail 74 Start two 8 x 3 4 Truss Head Screws 24 and one 8 x 3 4 Screw 5 in...

Страница 14: ...ot to over tighten the Truss Head Screws Attach the Right Handrail Bottom Cover 82 to the right Handrail 74 as described above 13 24 24 94 13 Identify the Left and Right Trays 94 32 Attach the Trays t...

Страница 15: ...84 91 Attach the Upright Crossbar with four 5 16 x 3 4 Screws 1 start all four Screws and then tighten them 14 91 1 76 84 1 15 Attach the Tray 97 to the Upright Crossbar 76 with four 8 x 3 4 Truss Hea...

Страница 16: ...the Latch Crossbar 78 to the brackets K on the Frame 52 with the two 5 16 x 1 1 4 Screws 29 and two 5 16 Star Washers 8 K 29 8 29 9 93 17 Remove the 5 16 Nut 9 and the 5 16 x 1 3 4 Bolt 7 from the bra...

Страница 17: ...h a spacer M out of the Storage Latch discard the spacer Next tighten the 5 16 Nut 9 onto the 5 16 x 2 1 4 Bolt 4 Do not overtighten the Nut the Storage Latch 56 must be able to pivot Then lower the F...

Страница 18: ...roperly tightened before you use the treadmill If there are sheets of plastic on the treadmill decals remove the plastic To protect the floor or carpet place a mat under the treadmill To avoid damage...

Страница 19: ...that may trap moisture Do not expose the heart rate monitor to direct sun light for extended periods of time and do not expose it to temperatures above 122 F 50 C or below 14 F 10 C Do not excessivel...

Страница 20: ...surge suppressor into an appropriate outlet that is properly installed and grounded in accordance with all local codes and ordinances The outlet must be on a nominal 120 volt circuit capable of carry...

Страница 21: ...en to your favorite workout music or audio books with the console s sound system while you exercise To turn on the power see page 22 To use the man ual mode see page 22 To use an onboard workout see p...

Страница 22: ...ng the treadmill is ready for use HOW TO USE THE MANUAL MODE 1 Insert the key into the console See HOW TO TURN ON THE POWER at the left 2 Select the manual mode If the manual mode is not selected pres...

Страница 23: ...the incline set tings of the workout A new segment will appear at the end of each minute The Speed tab will show a profile of the speed settings of the workout The My Trail tab will show a track that...

Страница 24: ...nto the foot rails press the Stop button then press the End Summary button Next adjust the incline of the treadmill to zero The incline must be at zero or you may damage the treadmill when you fold it...

Страница 25: ...kout The actual number of calories that you burn will depend on various factors such as your weight In addition if you manu ally change the speed or incline of the treadmill during the workout the num...

Страница 26: ...ole will turn solid blue 4 Record and track your workout information Follow the instructions in the iFit Bluetooth Tablet app to record and track your workout information 5 Disconnect your tablet from...

Страница 27: ...decrease button next to the Enter button to return to the previous screen 3 Exit the settings mode To exit the settings mode remove the key from the console HOW TO USE THE SOUND SYSTEM To play music o...

Страница 28: ...correct the interference by one or more of the following measures Reorient or relocate the receiving antenna Increase the separation between the equipment and the receiver Connect the equipment into a...

Страница 29: ...TO MOVE THE TREADMILL Before moving the treadmill fold it as described at the left CAUTION Make sure that the storage latch is locked in the storage position Moving the treadmill may require two peop...

Страница 30: ...ge suppressor and that the surge suppressor is plugged into a properly grounded outlet see page 20 Use only a surge suppressor that meets all of the specifications described on page 20 IMPORTANT If th...

Страница 31: ...atures a walking belt coated with high performance lubricant IMPORTANT Never apply silicone spray or other substances to the walking belt or the walking platform unless instructed to do so by an autho...

Страница 32: ...t 2 to 3 in 5 to 7 cm off the walking platform Be careful to keep the walking belt centered Then plug in the power cord insert the key and walk on the treadmill for a few minutes Repeat until the walk...

Страница 33: ...c Exercise If your goal is to strengthen your cardiovascular system you must perform aerobic exercise which is activity that requires large amounts of oxygen for prolonged periods of time For aerobic...

Страница 34: ...lles Stretch With one leg in front of the other reach forward and place your hands against a wall Keep your back leg straight and your back foot flat on the floor Bend your front leg lean forward and...

Страница 35: ...Frame 53 4 Tie 54 1 Drive Motor 55 1 Motor Belt 56 1 Storage Latch 57 1 Right Frame Cover 58 9 8 x 1 2 Screw 59 1 Idler Roller 60 1 Left Rear Cap 61 1 Right Rear Cap 62 1 Motor Hood 63 2 Incline Frame...

Страница 36: ...4 9 7 7 26 43 57 43 9 31 27 26 10 10 10 10 10 10 9 31 27 61 42 41 40 39 59 60 12 12 7 38 44 10 10 10 10 10 10 51 52 17 17 50 48 5 5 5 5 18 18 5 49 19 5 5 7 7 9 31 27 58 58 58 98 21 12 29 78 8 29 8 104...

Страница 37: ...37 62 36 5 5 5 36 36 36 36 5 5 66 35 14 15 35 5 5 5 5 5 5 72 71 70 69 68 68 5 5 5 5 67 65 34 63 34 63 64 28 64 28 47 87 47 87 45 45 58 EXPLODED DRAWING B Model No PFTL13116 1 R0417A...

Страница 38: ...01 10 101 86 10 101 85 35 45 46 92 20 20 20 20 23 23 23 25 25 25 25 25 25 25 85 85 90 89 93 1 24 76 1 83 8 82 74 75 24 24 74 81 5 5 5 5 24 24 24 24 29 80 73 5 105 58 6 8 2 8 24 29 2 8 6 1 24 99 99 77...

Страница 39: ...39 88 95 32 30 94 95 107 108 5 102 33 100 96 103 24 24 24 24 24 3 24 5 5 58 5 5 5 5 5 5 5 5 5 5 5 5 5 5 5 106 79 5 5 5 5 108 EXPLODED DRAWING D Model No PFTL13116 1 R0417A...

Страница 40: ...nditions 1 if the product is used as a store display model 2 if the product is purchased or transported outside the USA 3 if all instructions and warnings in this manual are not followed 4 if the prod...

Отзывы: